Airtable configuration
Prerequisite
Before adding your SSO metadata (sign-in URL and x509 certificate) via the admin panel, you need to first retrieve it from your SSO identity provider, Follow the steps below:
We create in the Ironchip management panel a SAML type application, in the following link you can get full information on how to do it: Create SAML type application.
Once created, we add the users that are going to be included in this group for authentication.
How to Configure SAML 2.0 for Airtable
Configuration Steps
- Sign in to Airtable.
- Click your user icon, then select Admin:
- Go to Settings > Security & Authentication, then click Add SSO identity provider.
- Enter the following:
- Email domain: Select your domain. (ironchip.com)
- Sign-in URL: this information will be obtained from the document downloaded from the Ironchip dashboard generated at the time of creating the application.
- x.509 certificate: this information will be obtained from the document downloaded from the Ironchip dashboard generated at the time of creating the application.
- Select the Airtable metadata version v2.
- Click Save.
- Done!
After retrieving your organization’s third-party SSO metadata, navigate to the Admin Panel and click on the Settings page in the navigation sidebar on the left. Next, click the SSO & Authentication tab.
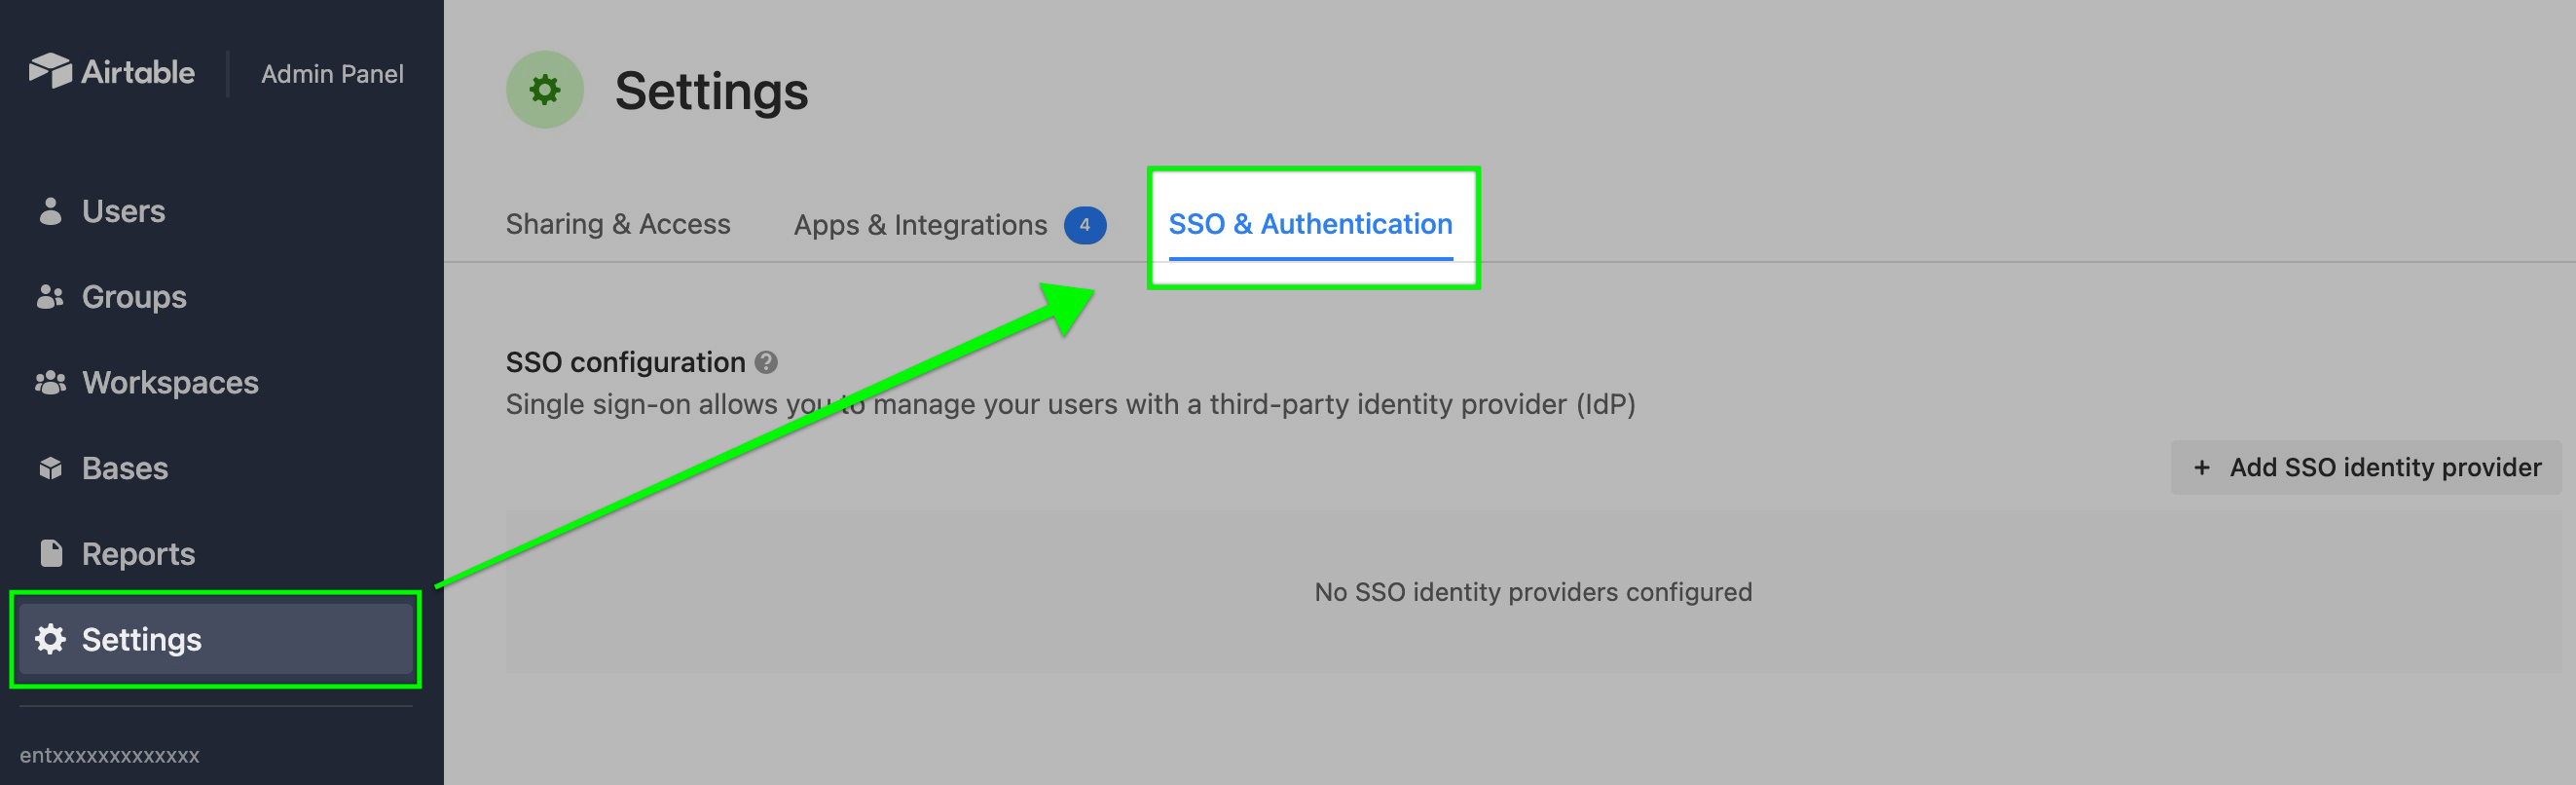
Under the SSO configuration section, you will see an option to Add SSO identity provider. Clicking this will open up a configuration window.
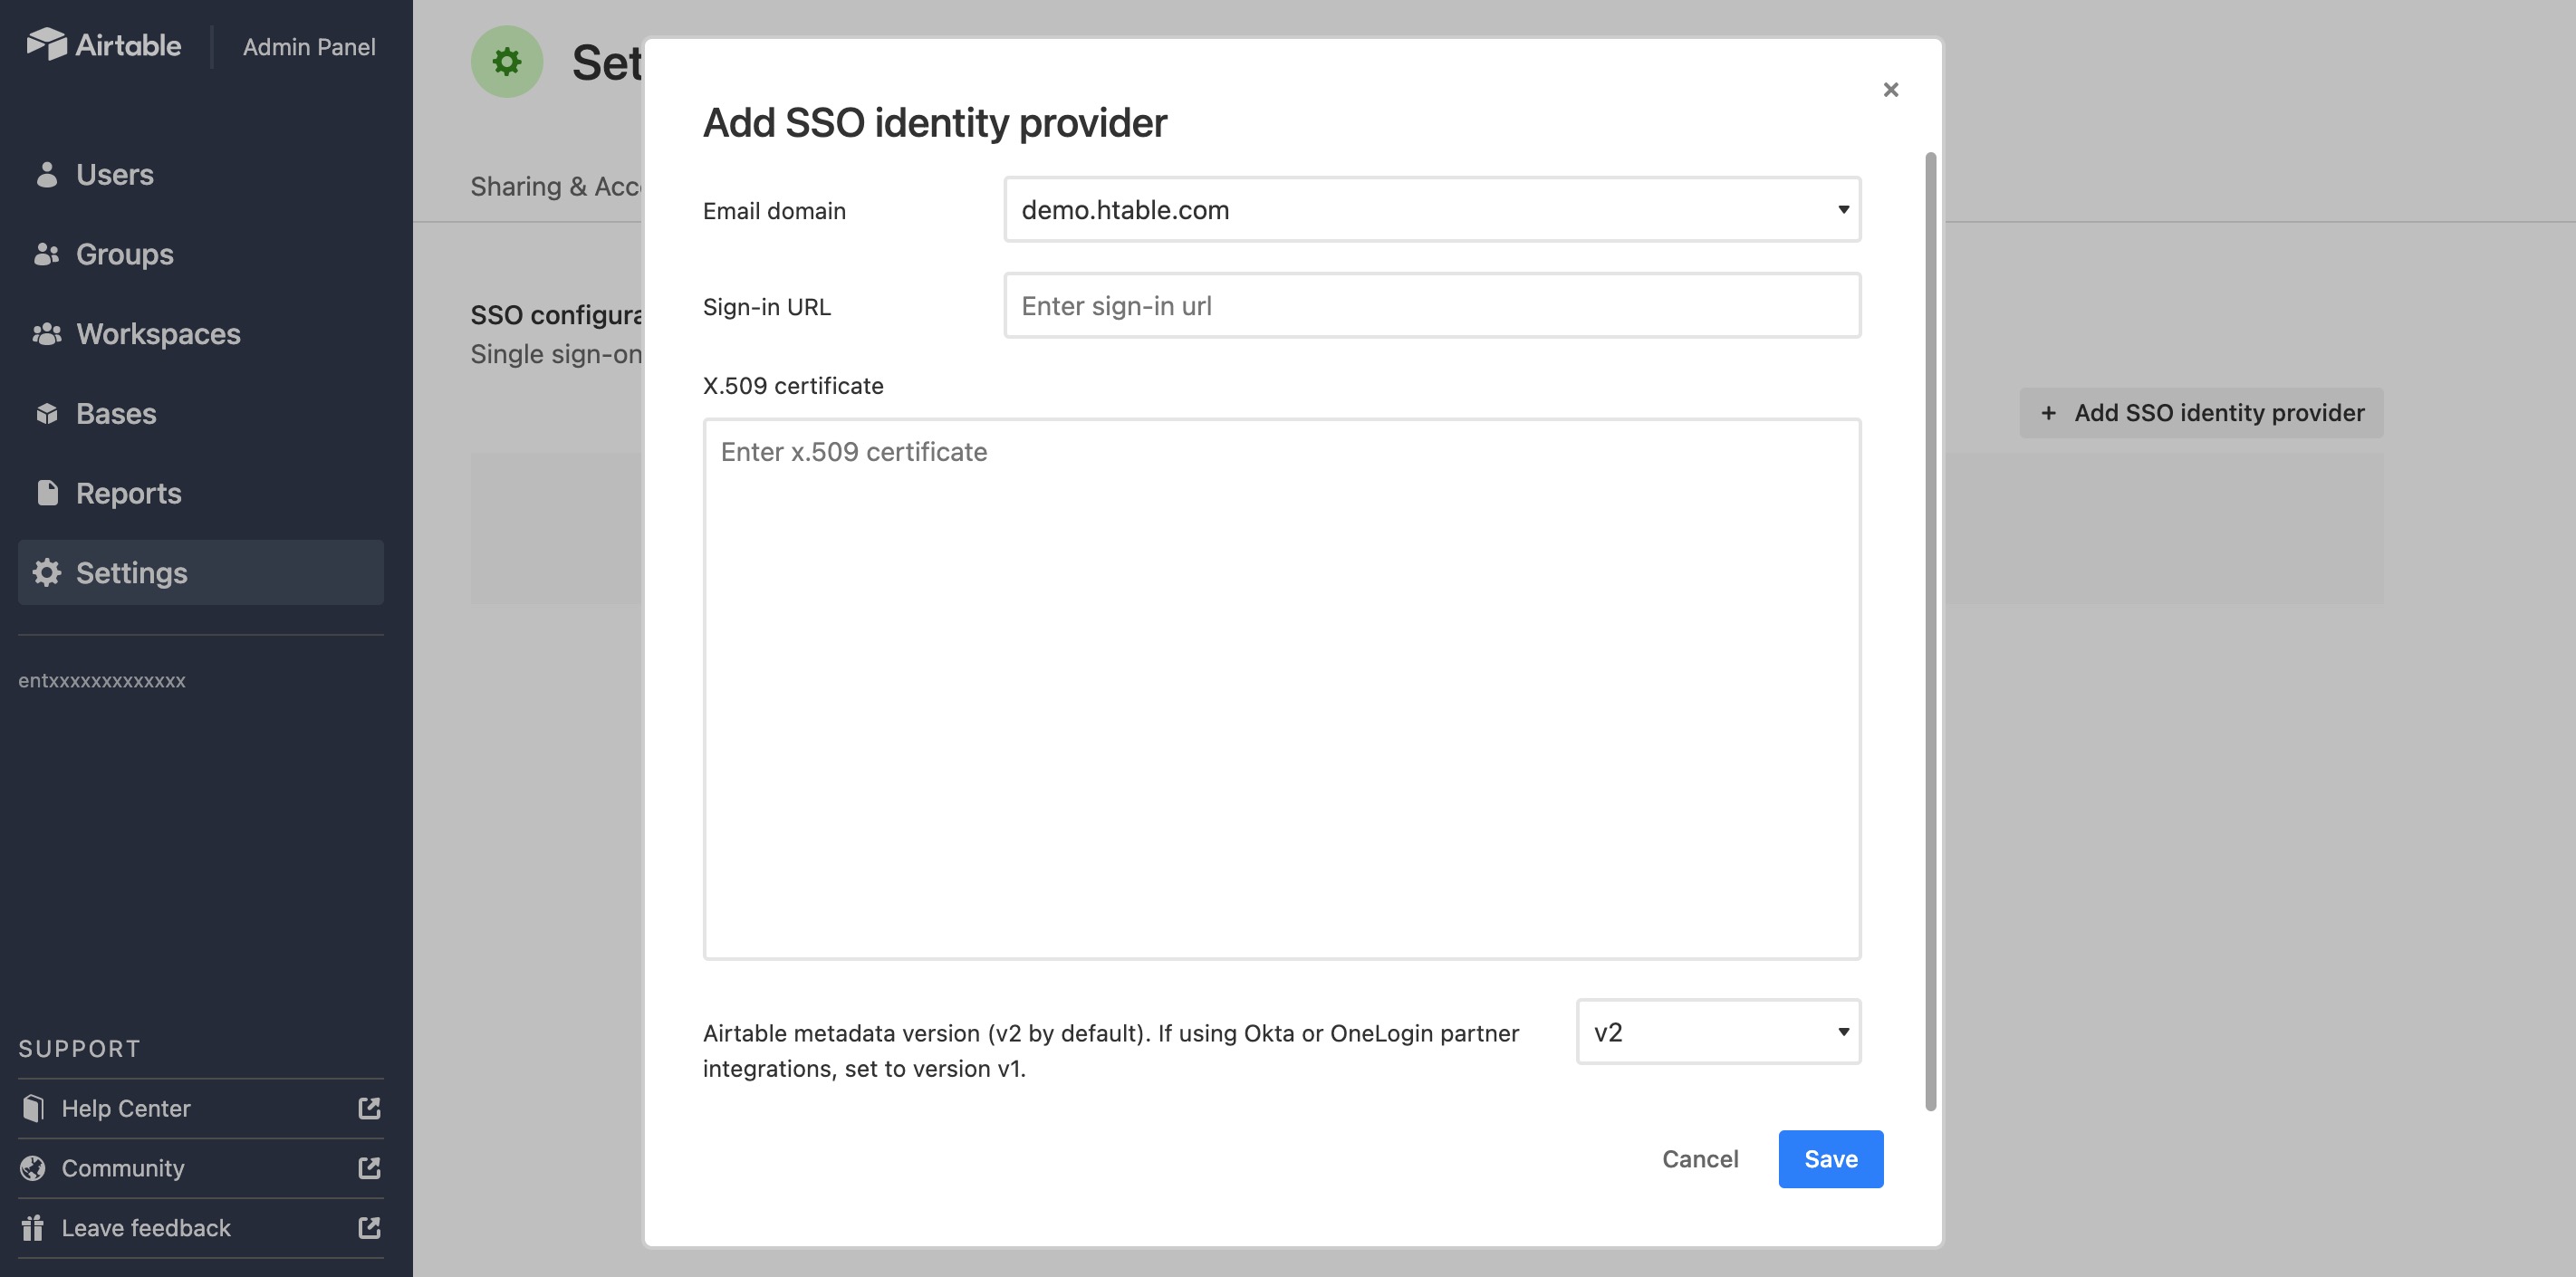
First, choose which domain this SSO configuration will map to. Clicking the down carrot will show all of the domains associated with your Enterprise account.
Note: If you are expecting to see other domains listed, then you will need to reach out to your Airtable accounts representative to make any necessary changes.
Remember the prerequisite step at the beginning? The next two steps will use that SSO metadata. First, you’ll enter the sign-in URL of the third-party IdP. Second, you’ll need to paste in the x509 certificate:
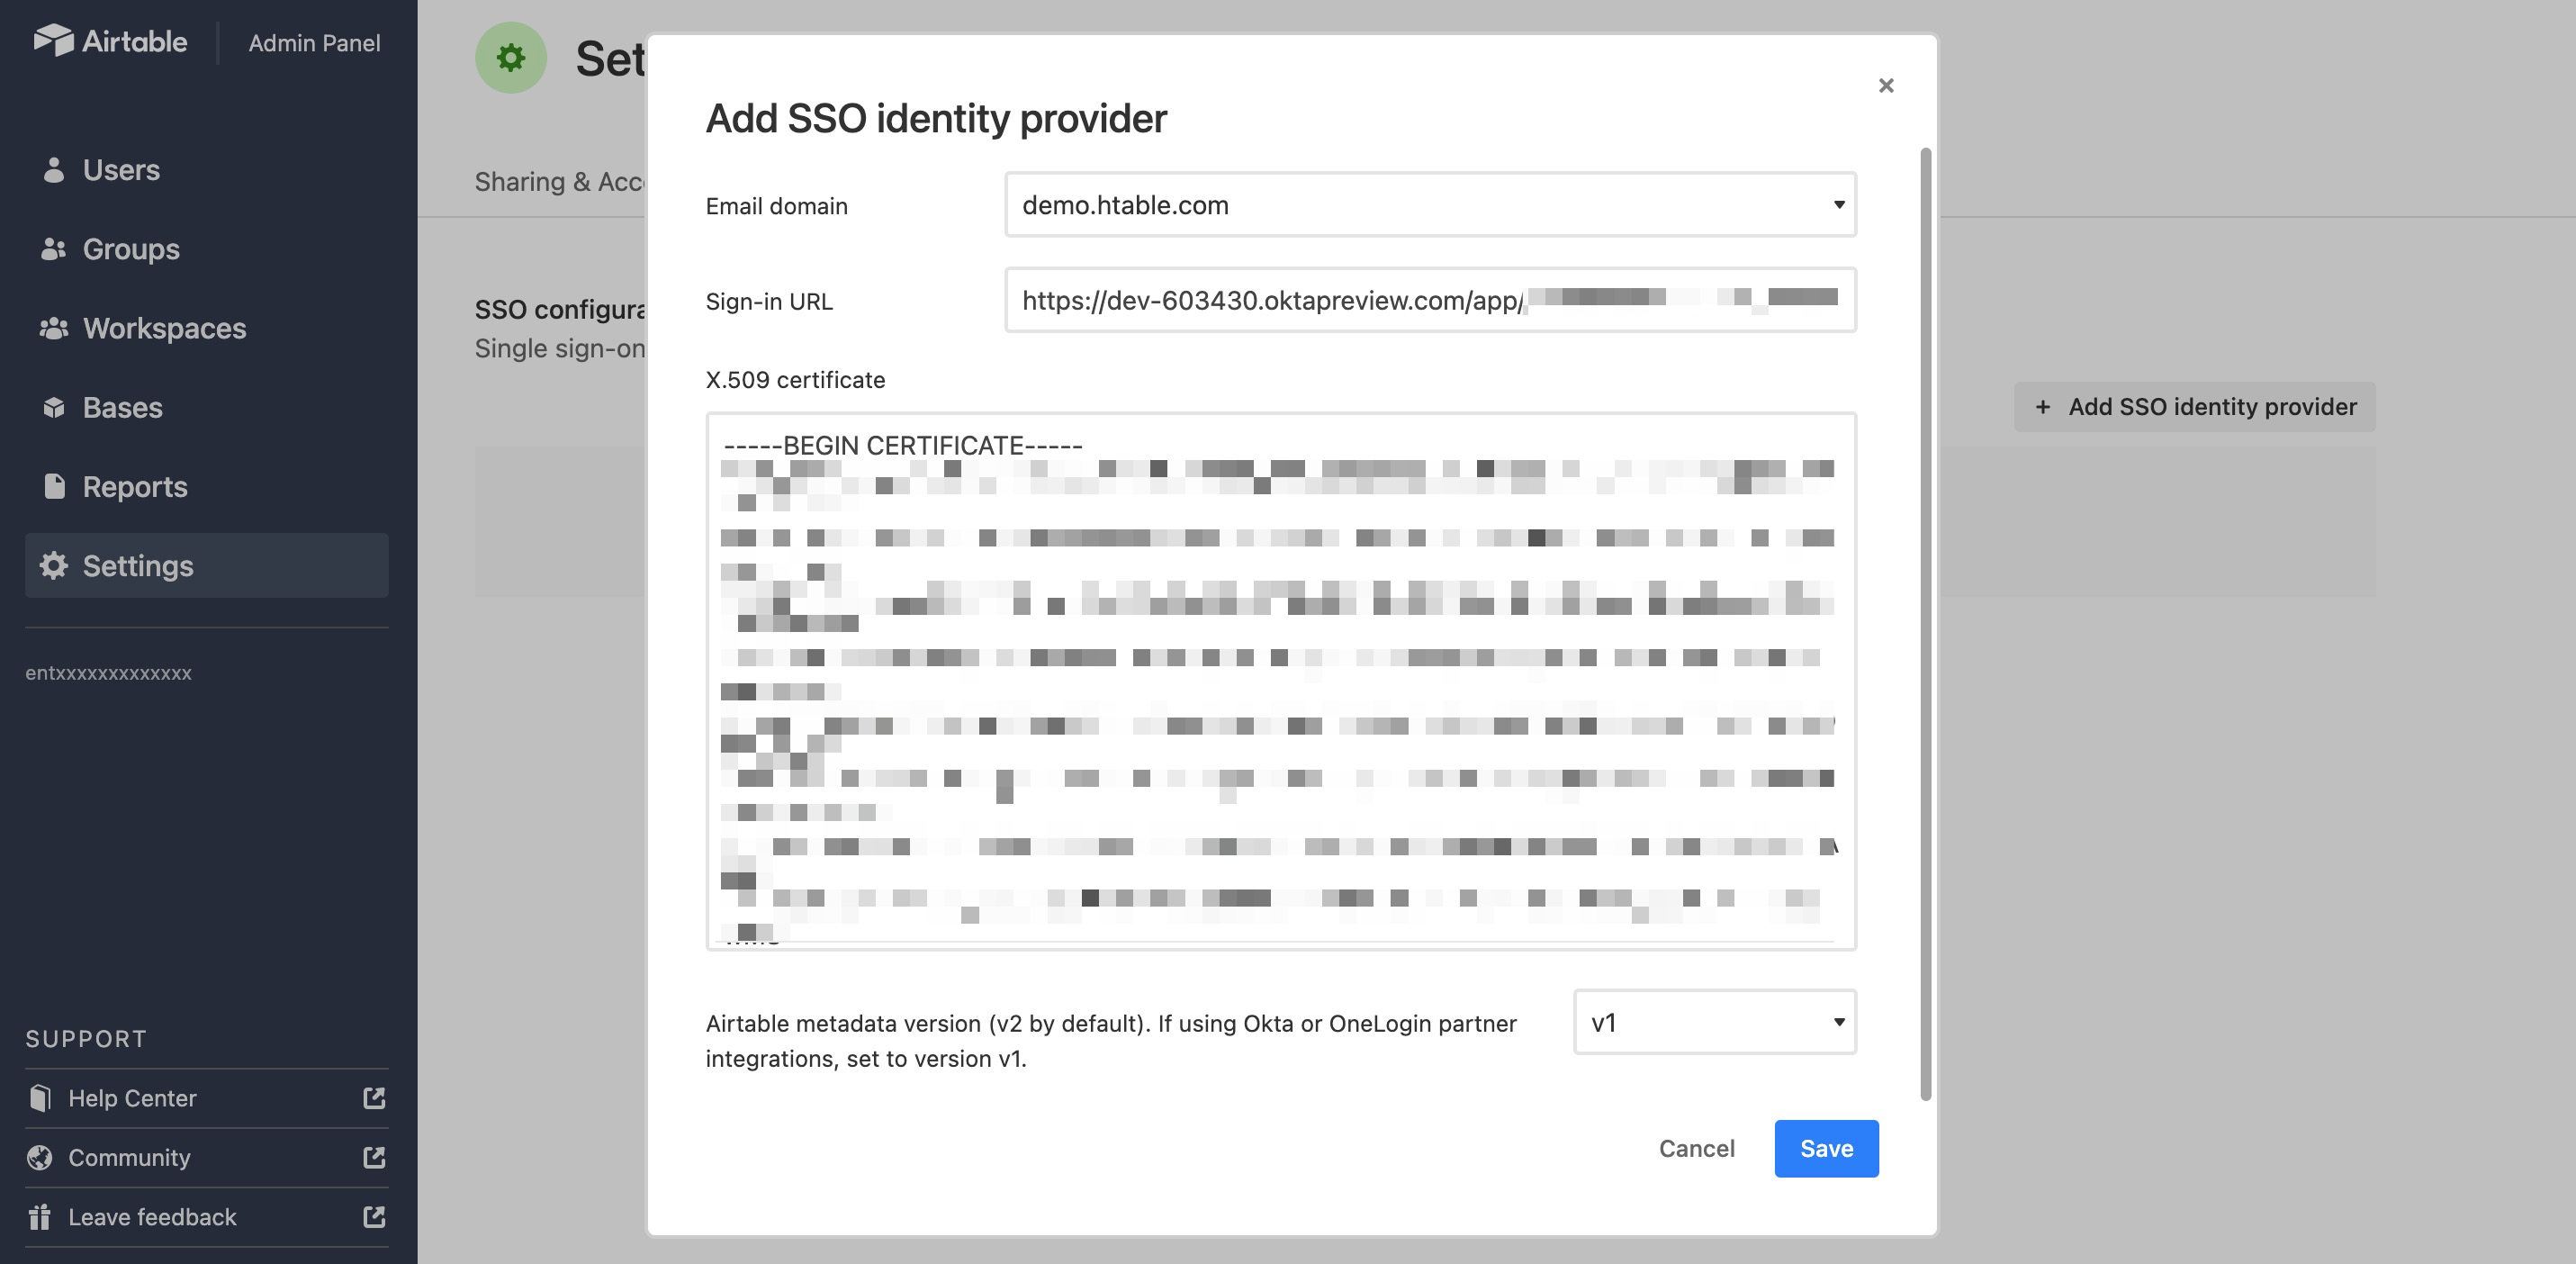
The last box’s configuration is determined by which IdP provider you are integrating with Airtable. The partner integrations will use the default V2 option.
All that’s left to do now is click Save. This will open a pop-up asking you if you are sure about the changes. Click Save again to allow the SSO login configuration to occur. Changes may take a few minutes to show up.
After clicking save, the Settings page will reload. To log out all users associated with the configured domain and enforce SSO, please navigate back to the SSO & Authentication tab and toggle the switch under SSO optional/required. Before requiring SSO for your own email domain, you must first log out and back in with SSO to verify that the metadata you’ve provided is correct.
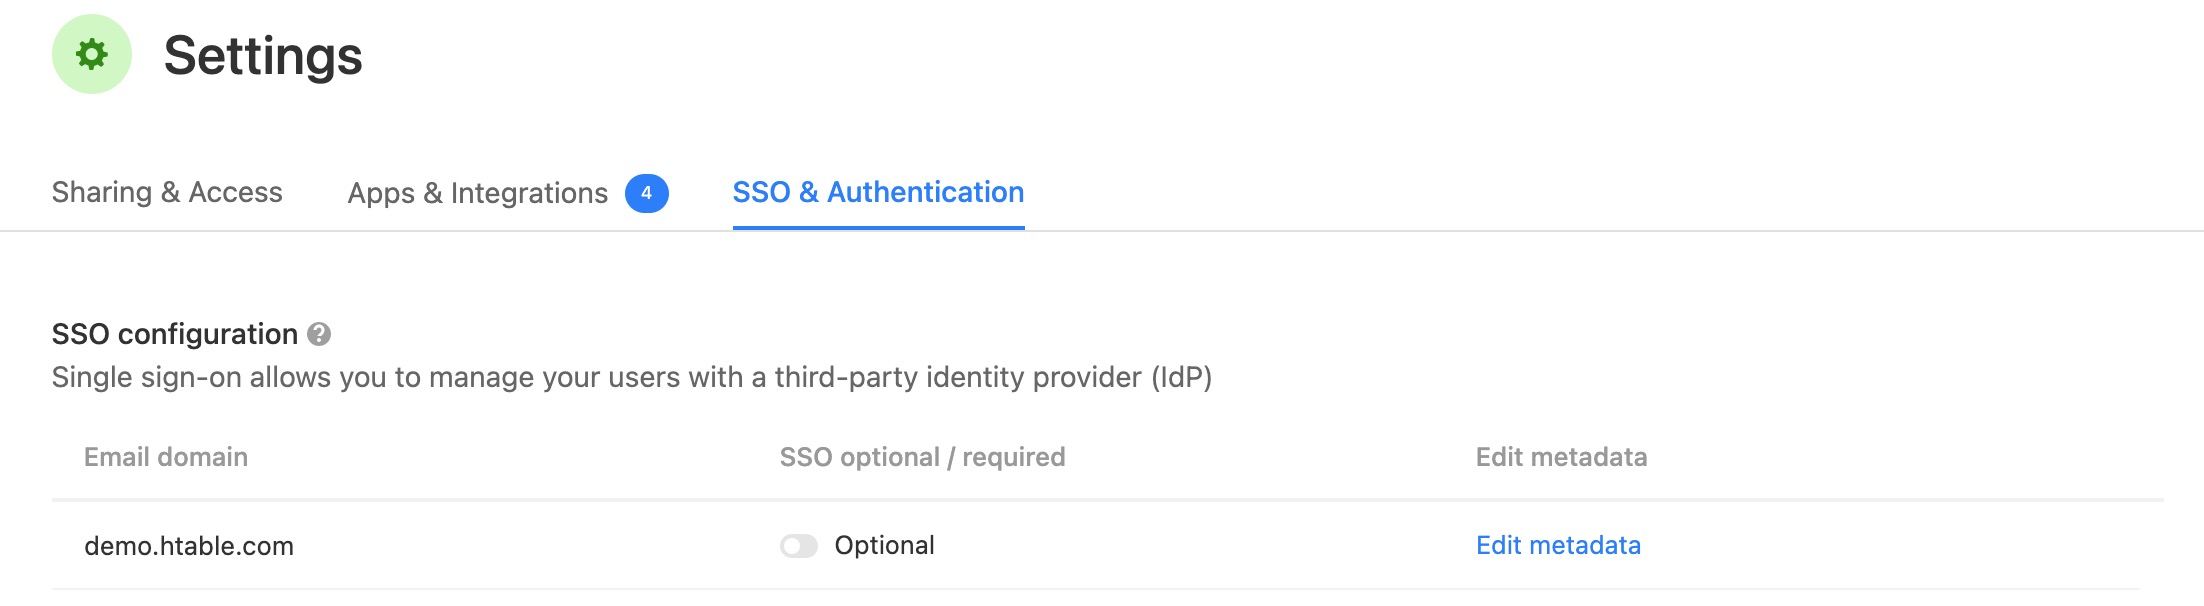
From here you can also click Edit metadata if future changes are necessary or if you want to delete the configuration altogether.