Synchronization
In this section we will find two different sections:
- Synchronization of users with CVS: This will allow you to synchronize any number of users with a CSV file.
- Synchronization with LDAP (Automatic Synchronization): This will automatically synchronize the users from the Active Directory.
Synchronization of users with CVS:
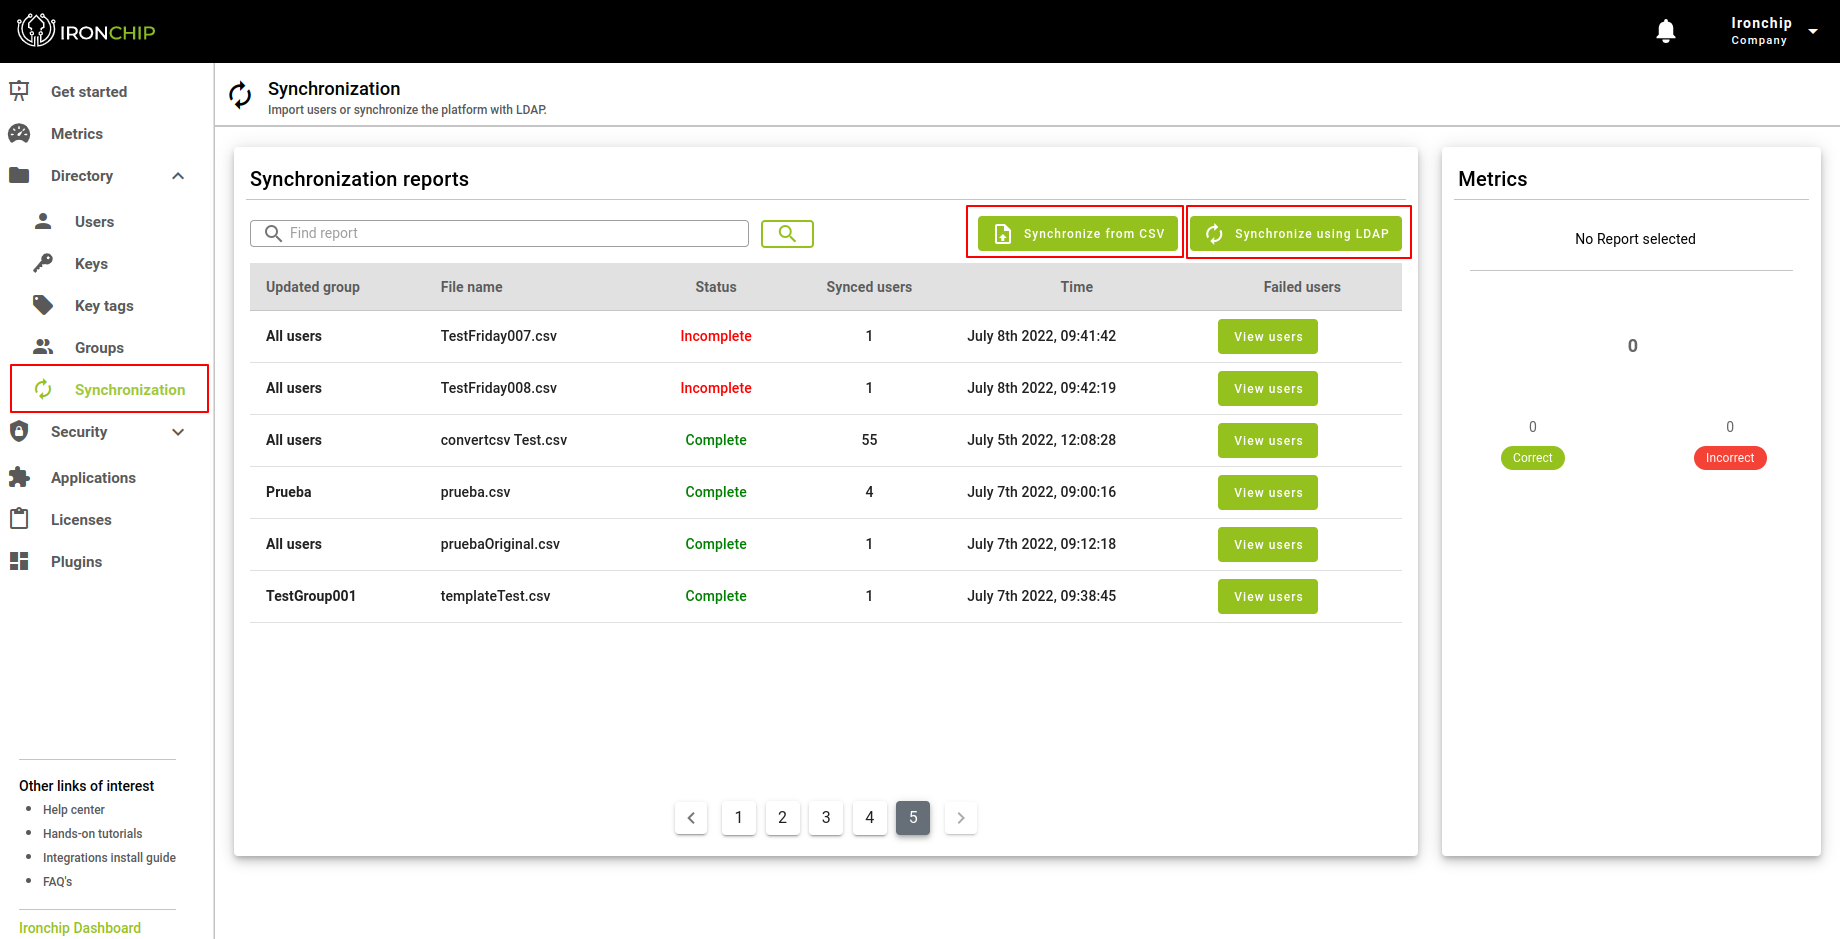
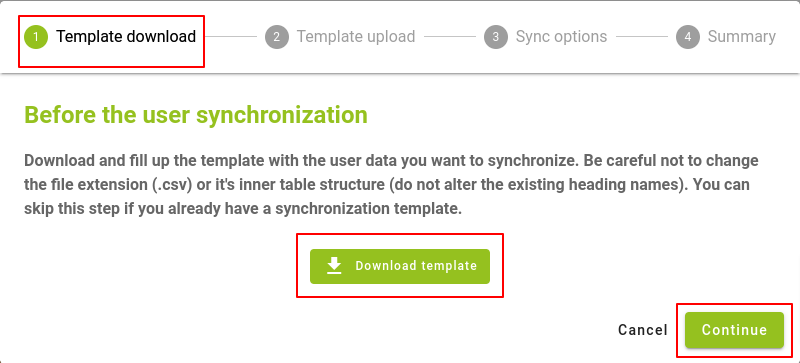
To do this, click on Synchronize Users on the right hand side of the current window. A window will open where we will make the first step (Step 1) of the user synchronization process, which will be to download the template where we must load the information of the users we want to synchronize. It is important to read carefully the information provided in this tab, as it gives us detailed information about the correct filling of the template and other important data such as the correct extension that the template must keep for its correct synchronization.
Click the button, download the template and then click Next.
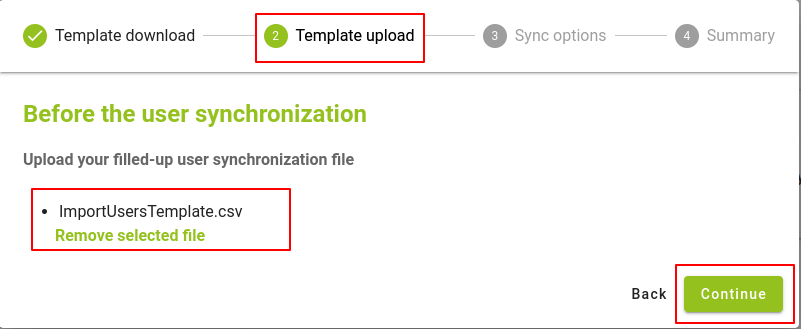
Once the necessary information has been loaded in the template, on the next screen we will find the second step (Step 2) of the synchronization process, which will be to load the template that we have downloaded and filled in the previous step. To do this we must either drag it to the area indicated, or load it by clicking on the area, which will open a list of files from which we must select it.
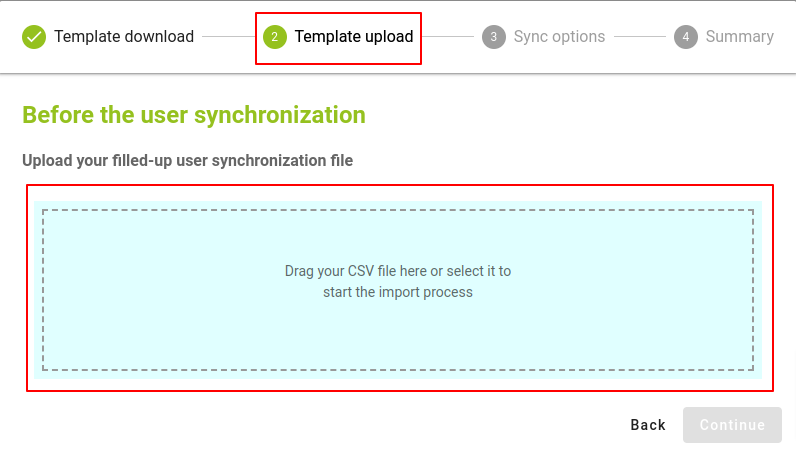
Once the template has been correctly loaded with the information, click on the Next button.
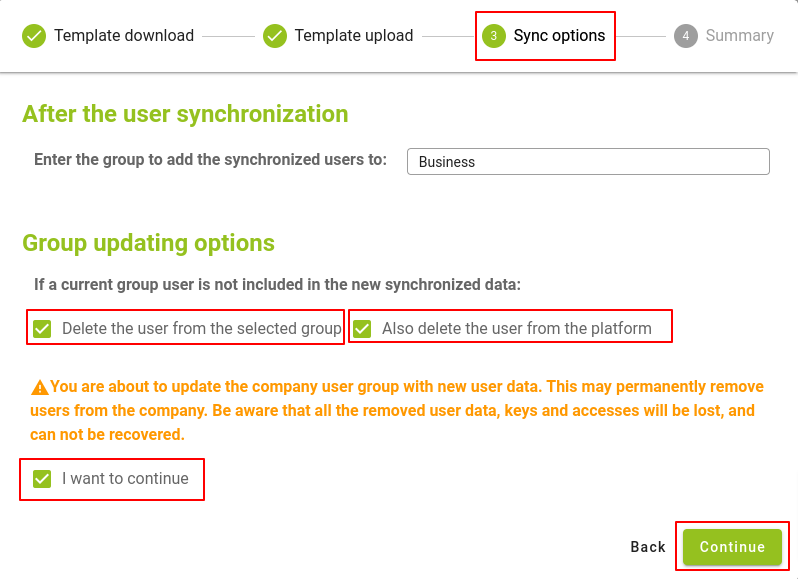
In the next screen, we find the third step (Step 3), in this part, we will have different options among which are:
Add users to a group that already exists on the platform: If a user in the current group is not included in the new synchronized data
If a user of the current group is not included in the new synchronized data:
Remove the user from the selected group Remove the user from the platform as well
It is necessary to read the information provided in the messages, to avoid performing actions that we do not want.
Then we must select the checkbox I want to continue, and press the Next button.
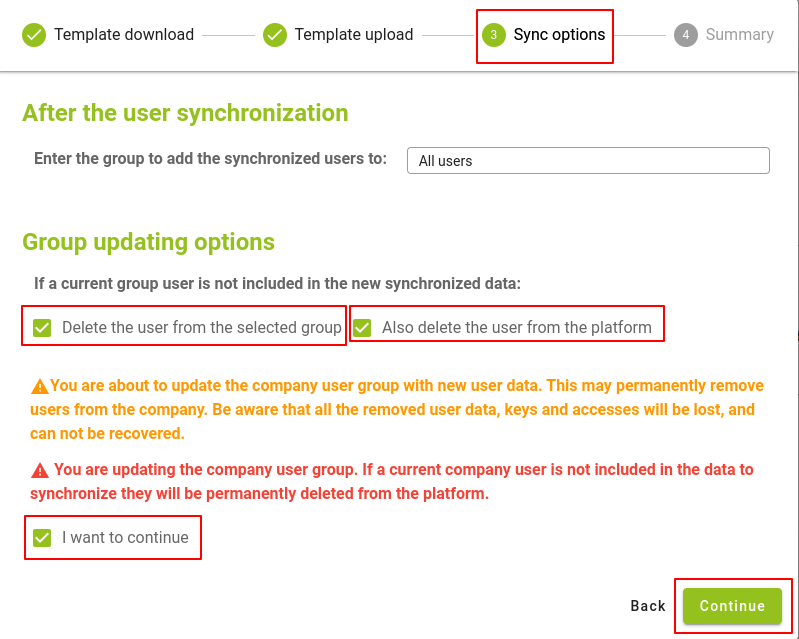
Add users to a default group on the platform (All-Users, Personal-Group).
A message will pop up with the following information:
You are about to update the company user group with new user data. This may permanently remove users from the company. Please note that all data, passwords, and logins of the deleted users will be lost and cannot be recovered.
It is important to read the messages, as they will prevent us from performing actions that are not what we really want to perform.
Then we must select the I want to continue and press the Next button.
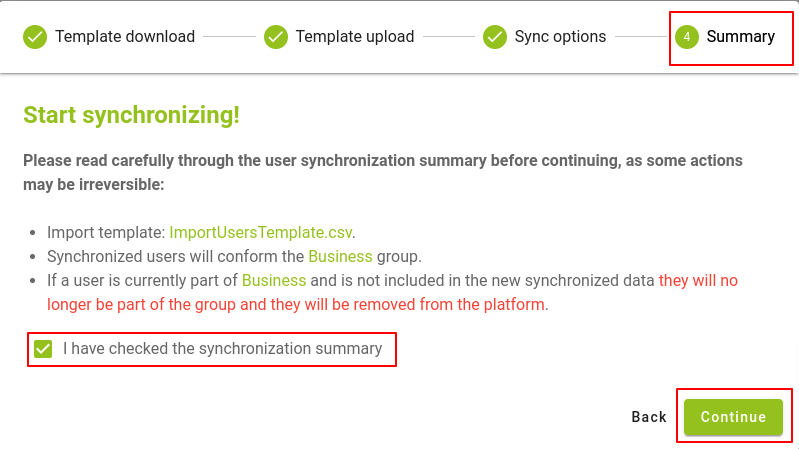
In the last step (Step 4) we have a summary with the final synchronization information, please read the user synchronization summary carefully before continuing, as some actions may be irreversible:
- Imported template: {filename}.csv
- Synchronized users will be part of the group: {SelectedGroup}.
- If a user is currently part of the {SelectedGroup} and is not included in the new synchronized data, they will no longer be part of the group and will be deleted.
Then we need to check the box where it says: I have checked the synchronization summary.
Click on the Start button, in case of any doubt, you can go back to the previous windows, with the Previous button.
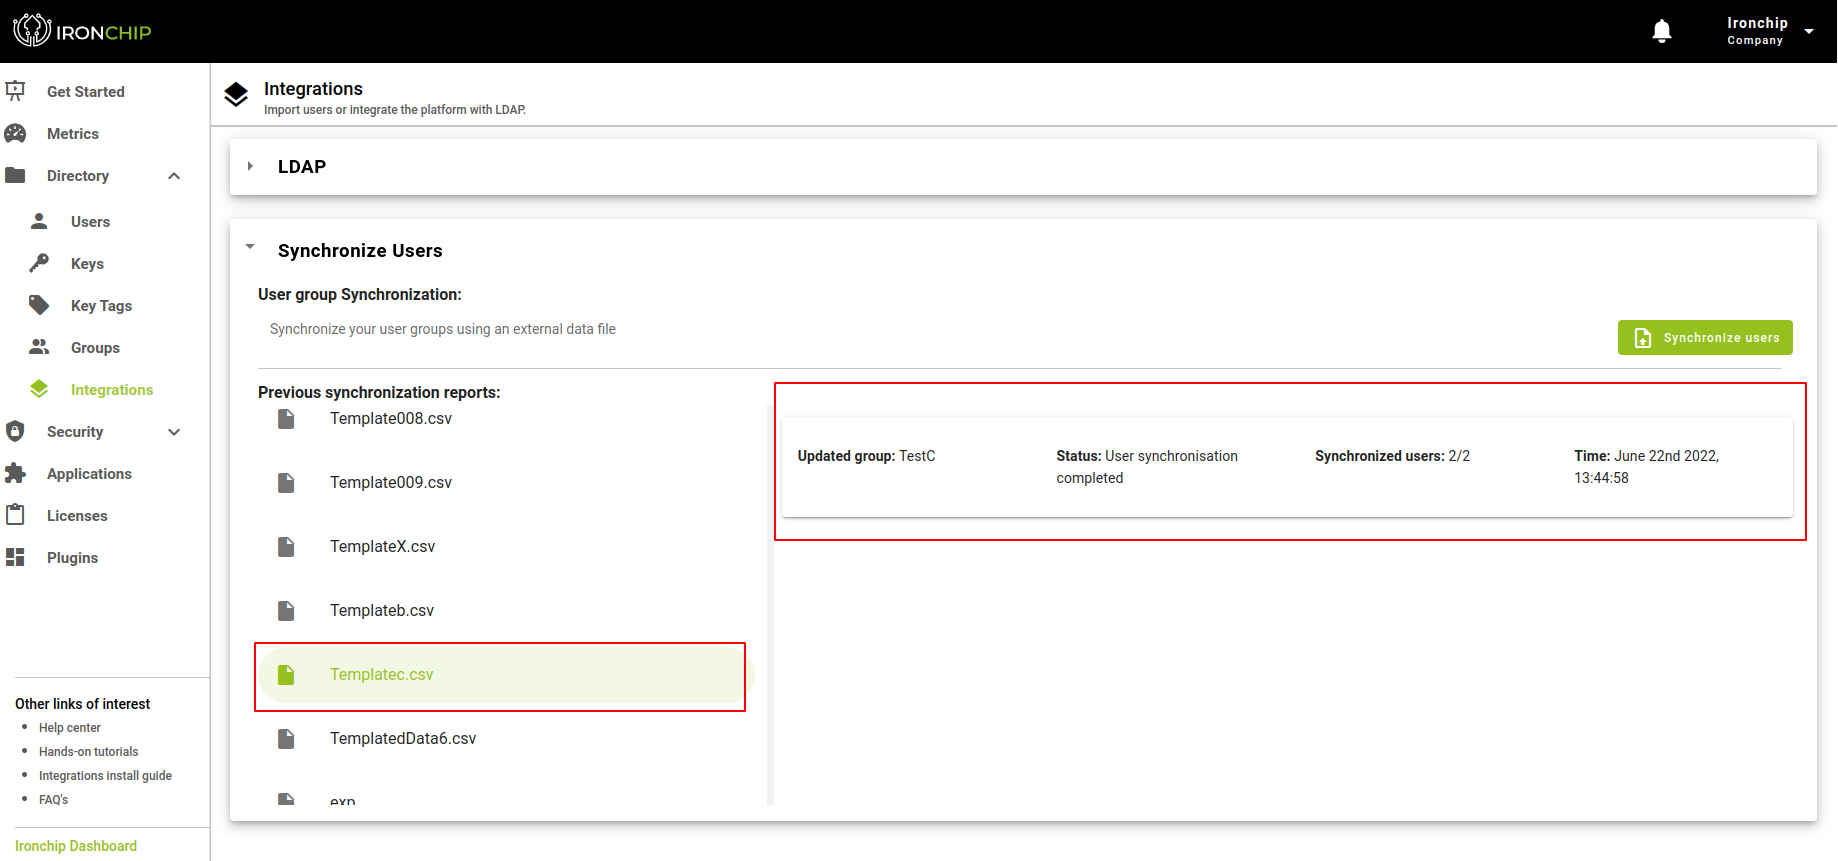
Finally, on the main screen we will have a summary with the information of the synchronization carried out and if there is any failure during the process, it will be reported.
User synchronization with LDAP (Automatic Synchronization)
Within the Synchronizations section we have the option to synchronize with LDAP the users that are in a group of the Active Directory, which we call an Automatic synchronization. When you click on the button, a window will appear where you can enter the name of the group to which you are going to add the users that you are going to synchronize from the Active Directory.
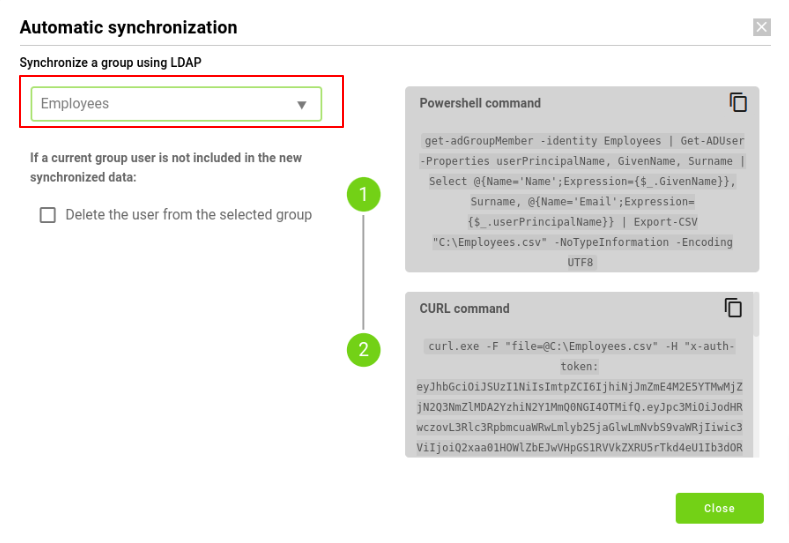
This group may or may not exist in the dashboard, in either case:
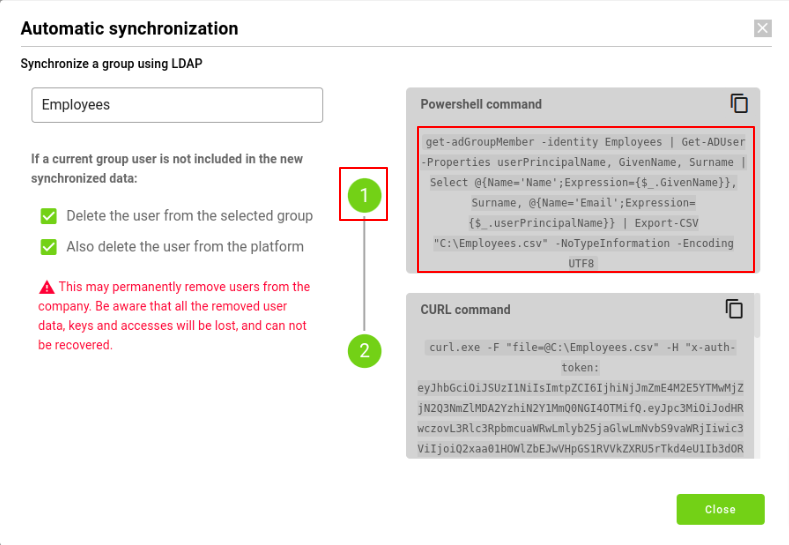
Once the group has been selected, if a user from the current group is not included in the new synchronized data we will have two options:
- Delete the user from the selected group.
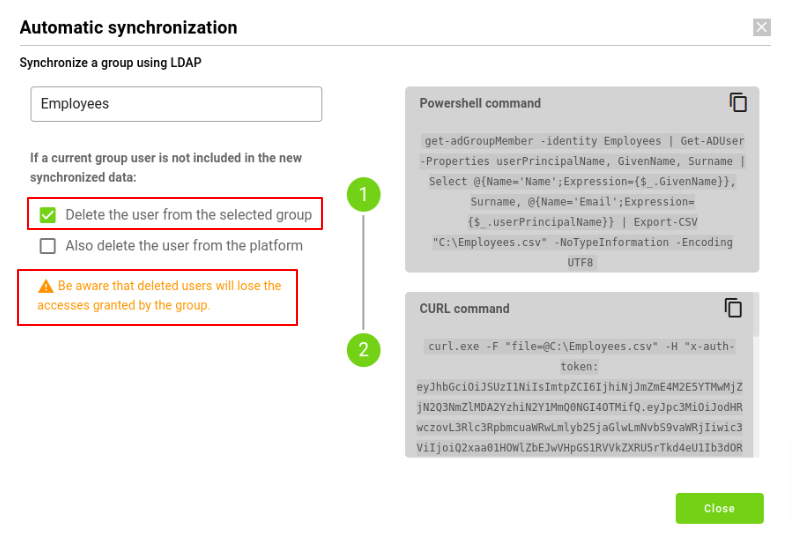
- Delete the user from the platform
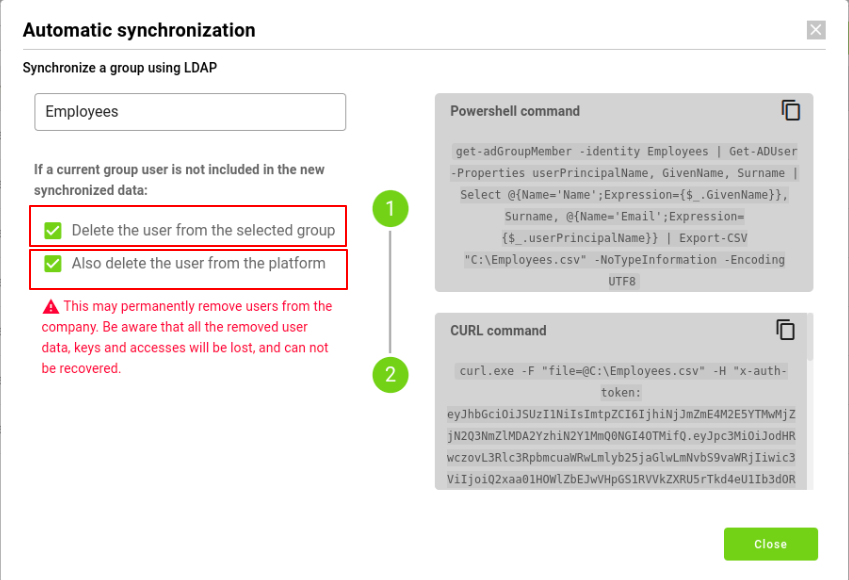
Note: It is important read carefully the messages that are presented when you select these two options, as there are actions that may be irreversible.
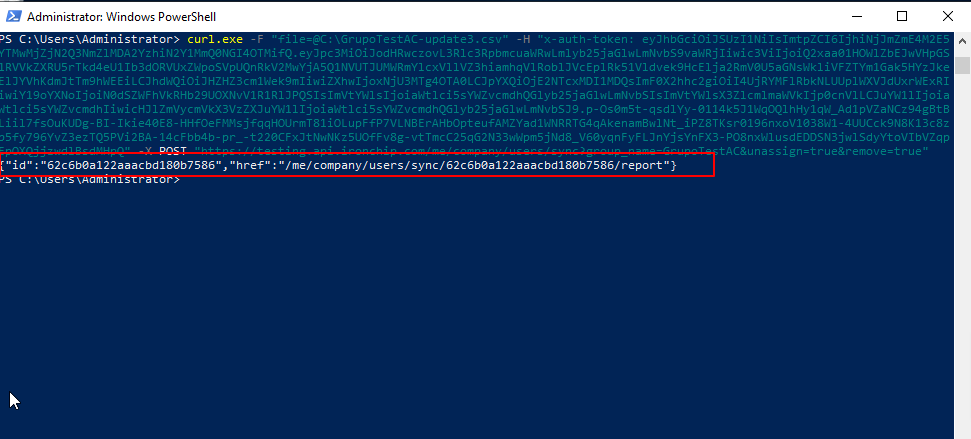
Now we must copy in the established order the commands that have been generated and execute them in the Windows PowerShell command console.
- PowerShell command
- CURL command
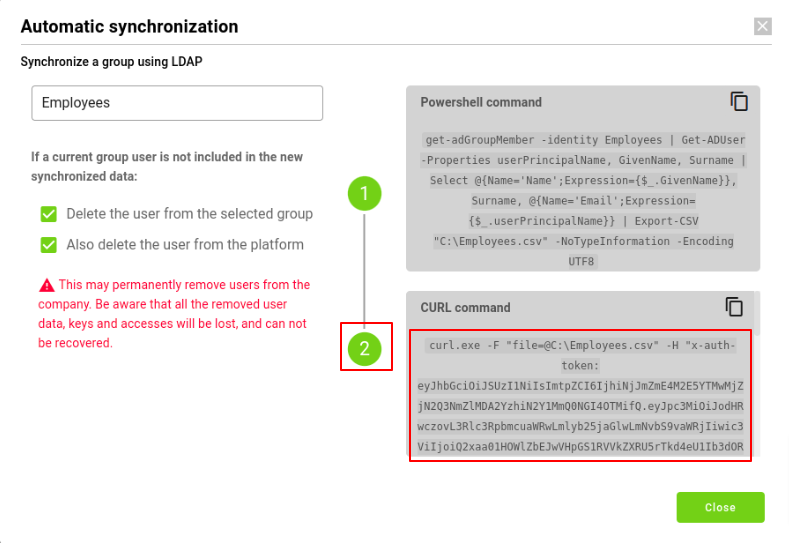
If everything went correctly, you will see a return message like the one in the image, otherwise it will send an error message.