Pulse Secure
Pulse Secure Configuration
Create Authentication Server
-
Log in as an administrator to Pulse Secure.
-
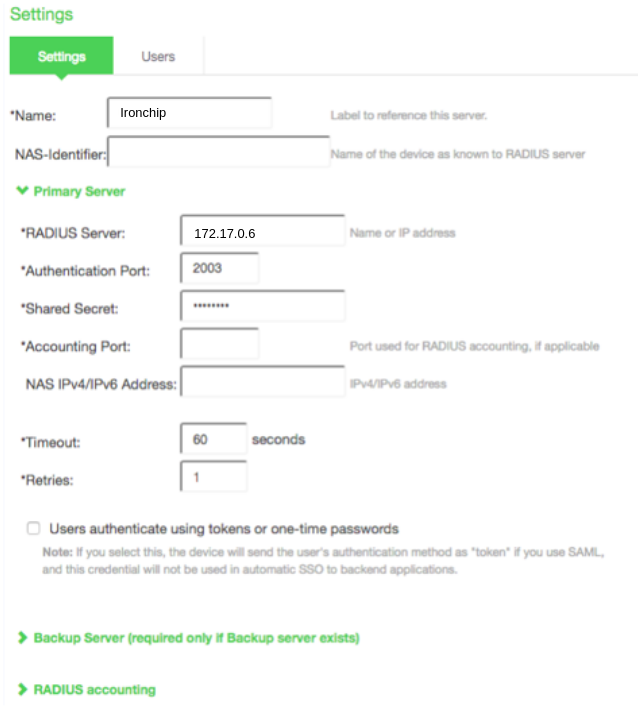
In the Authentication tab > Authentication Servers > New. Create a new server to perform authentication and enter the values, as in the following image.
-
The backup server can be created if if required and ignore RADIUS accounting section.
-
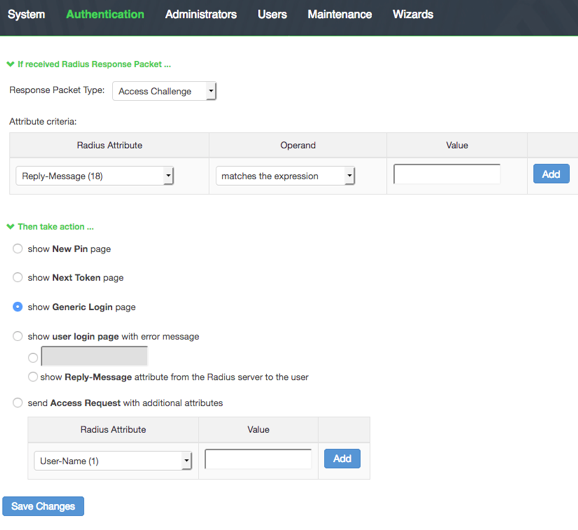
A new RADIUS rule will now be created in the Custom RADIUS Rules section by clicking on New RADIUS Rule. A new window will appear, in which you have to enter the following data as in the following image.
-
Save Changes and ignore any warnings that appear.
-
Save Changes again for the authentication server.
Create User Realm
-
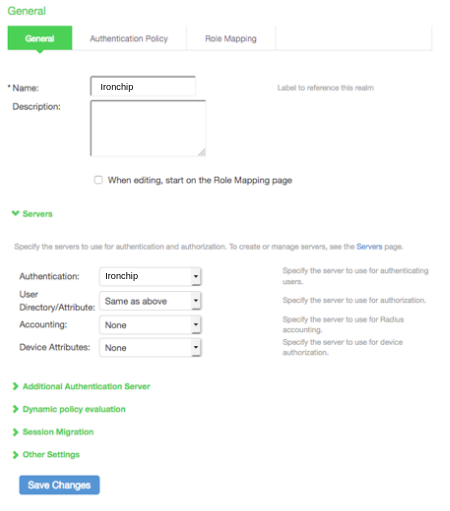
In the Users tab > User Realms > New. Define a new authentication realm and enter the values, as in the following image.
-
Save Changes.
Optionally, the Role Mapping can be configured. The following screen appears:
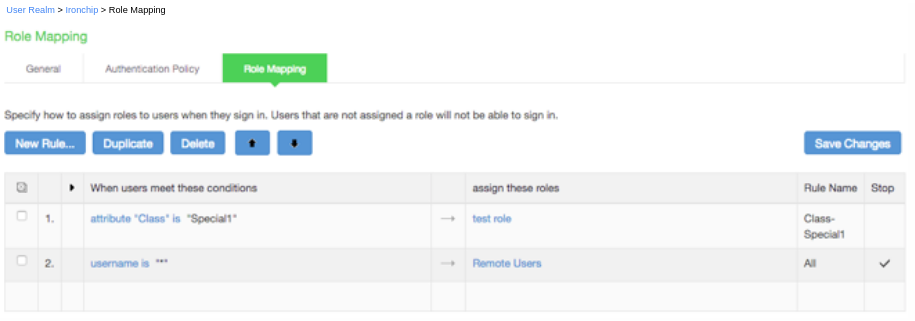
Using this configure role assignments based on user attributes. In addition, you can rely on the advanced RADIUS configuration for dynamic roles for roles.
Sign-in Policies
-
In the Authentication tab > Signing In > Sign-in Policies.
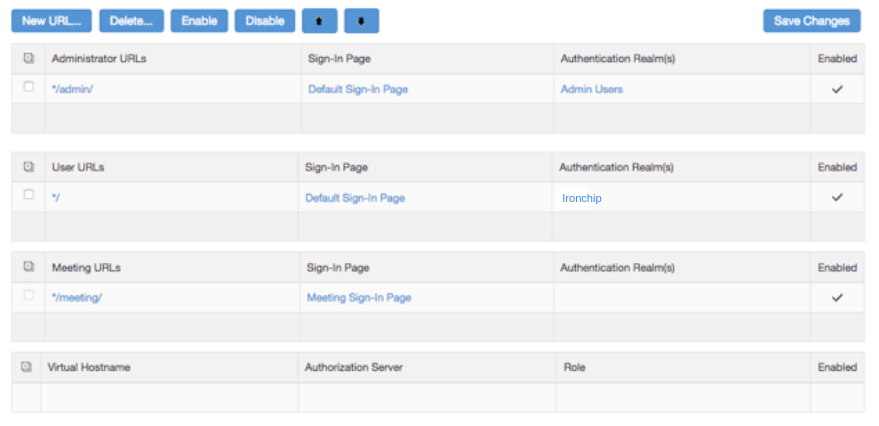
-
Identify the Policy and click on the URL to confirm/edit your selected domains.
-
Open policy detail page’s Authentication realm section .
