Configuration
API KEY integration configuration
Add application to the company of type API KEY
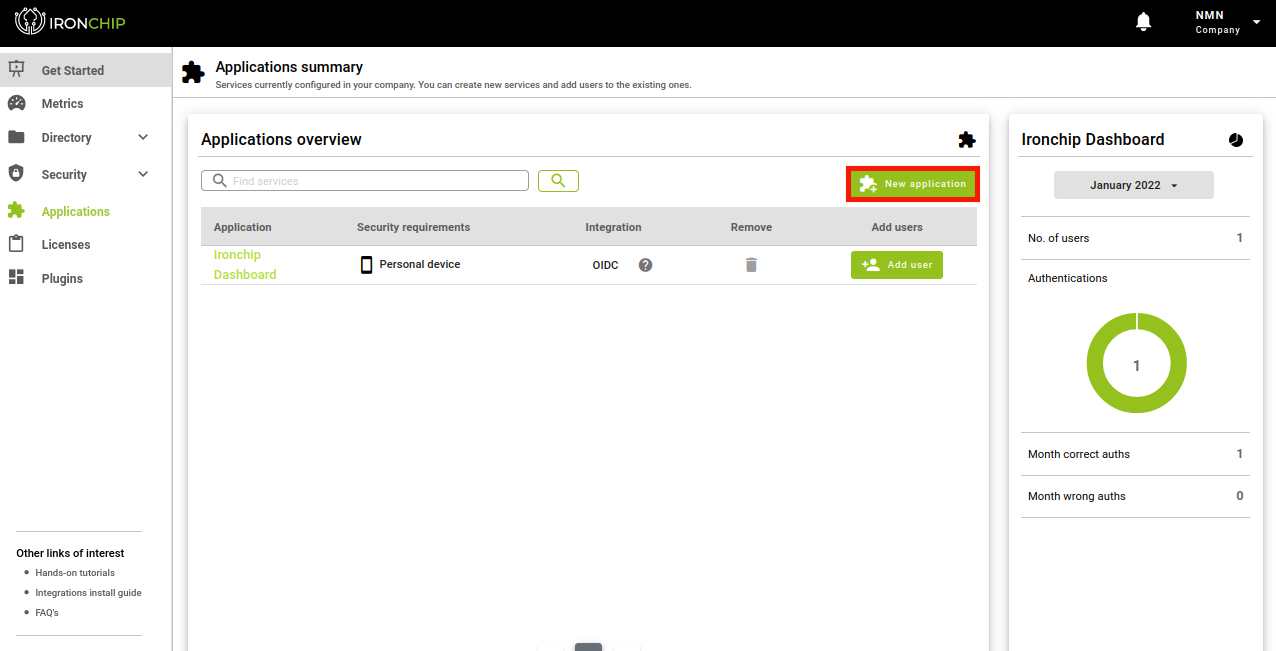
In the Applications section you can see all the protected applications that have been added to Ironchip and their features. To add an application, click on New Application, which will open a new window.
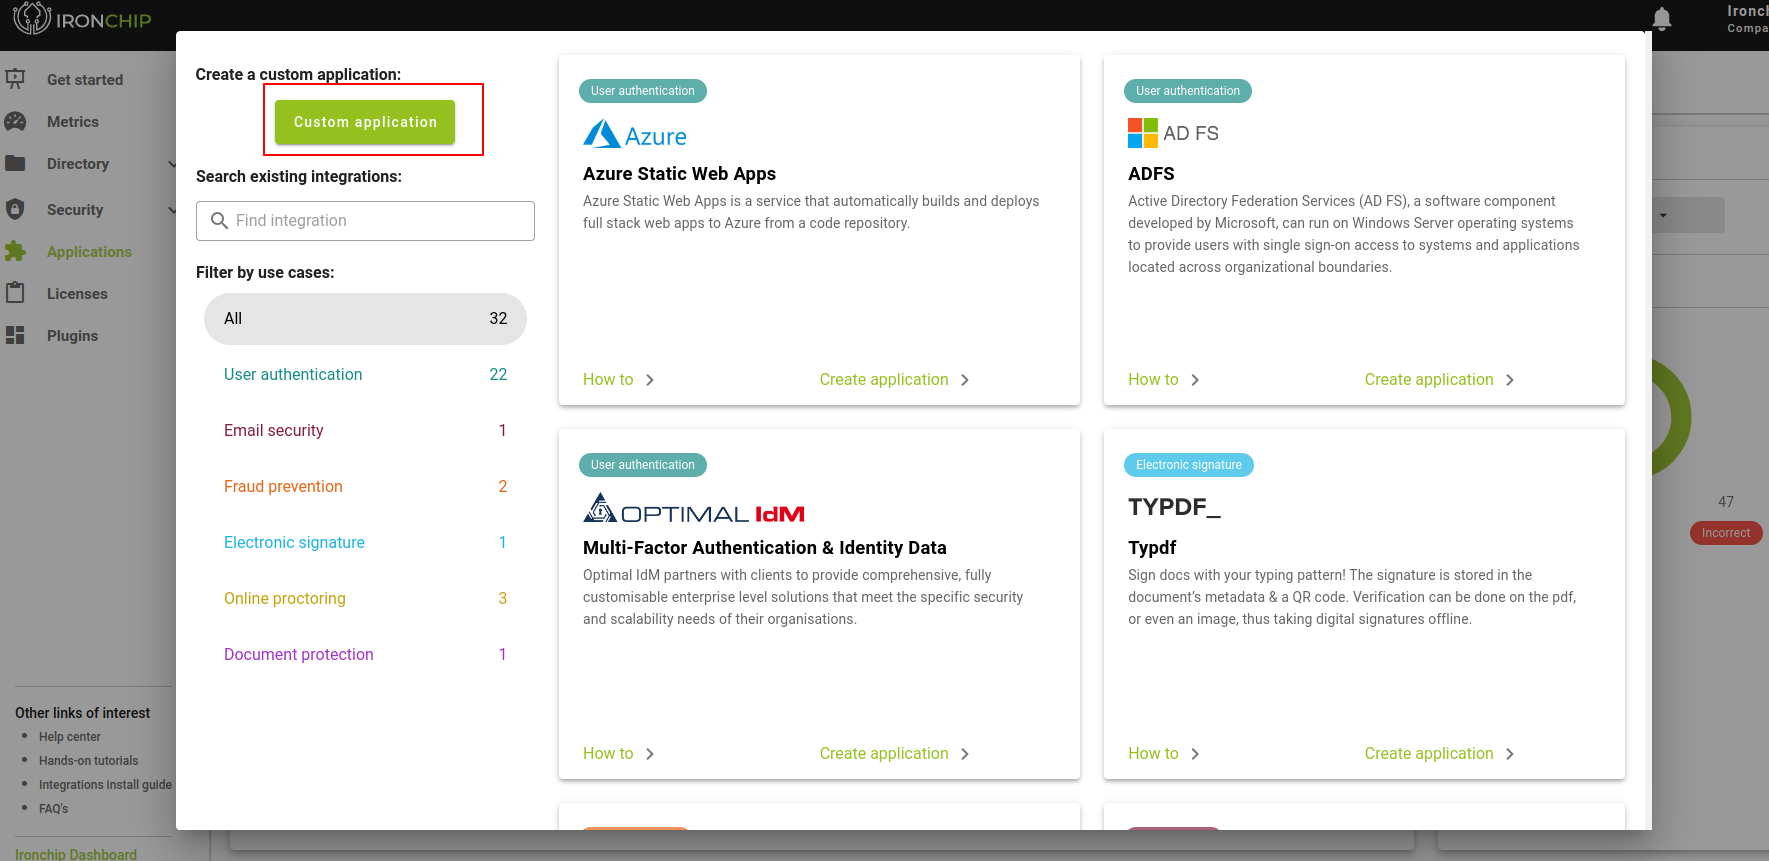
In the new window you will have to choose the new application, it can be one of those listed or a custom application, for which you will click on Custom Application. A new window will open.
In this window you will have to enter the data of the new application, if you have chosen one from the list the name will be predefined, otherwise you will have to enter it. Also, the integration type is API KEY.
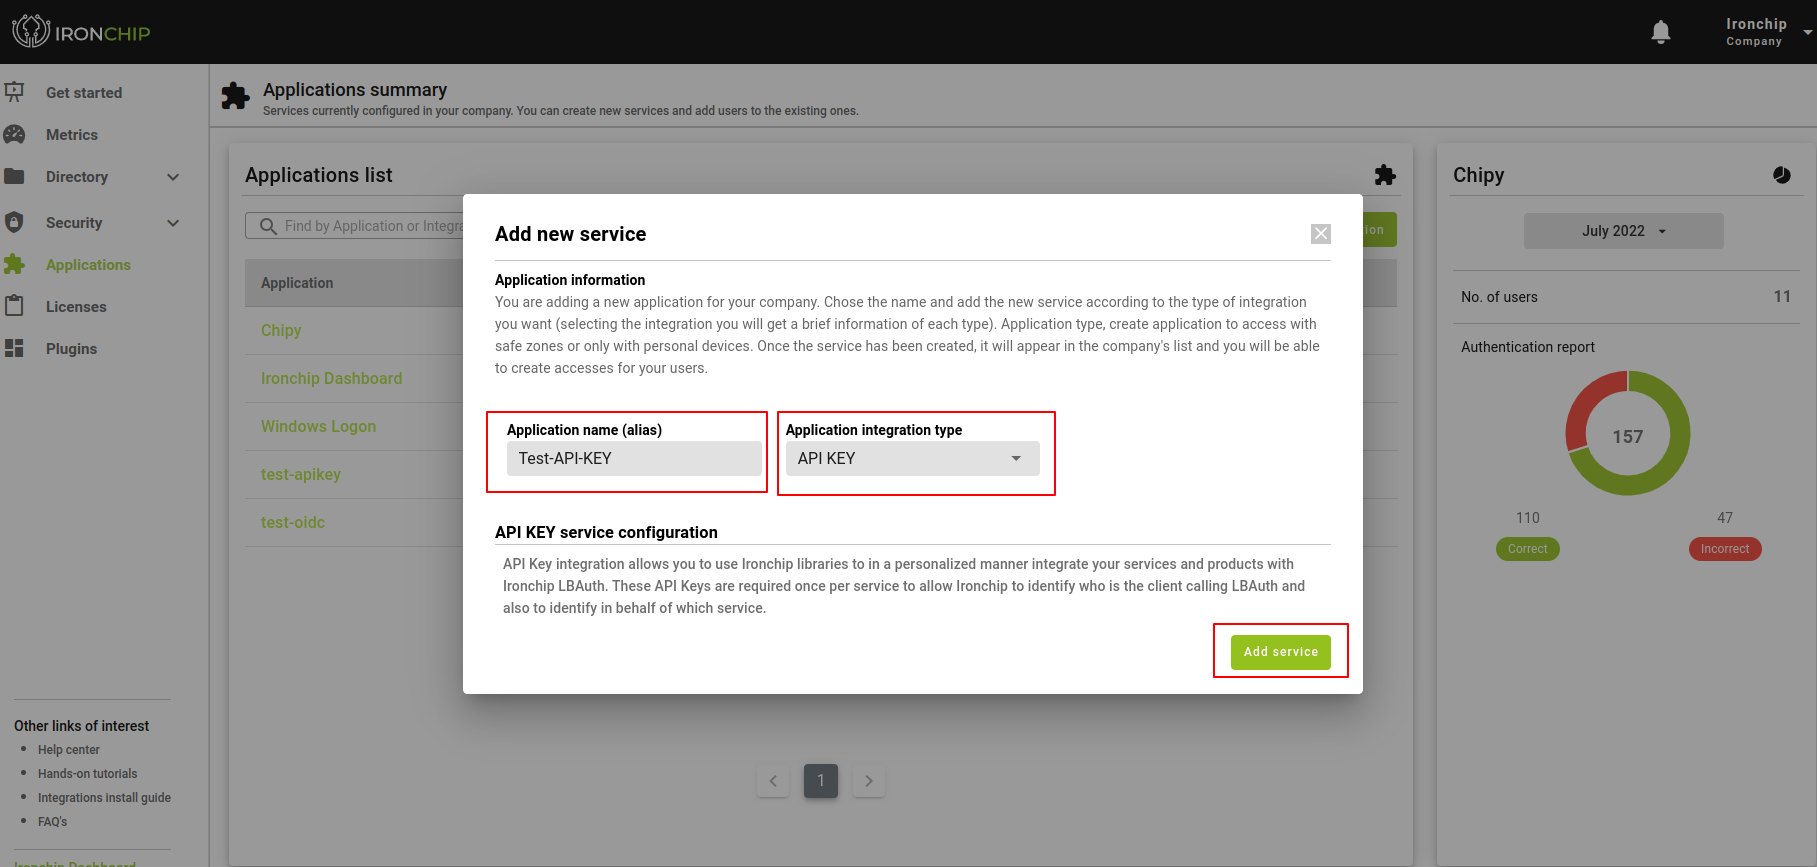
When all fields are completed, click Add service and the application will be displayed in the corresponding section.
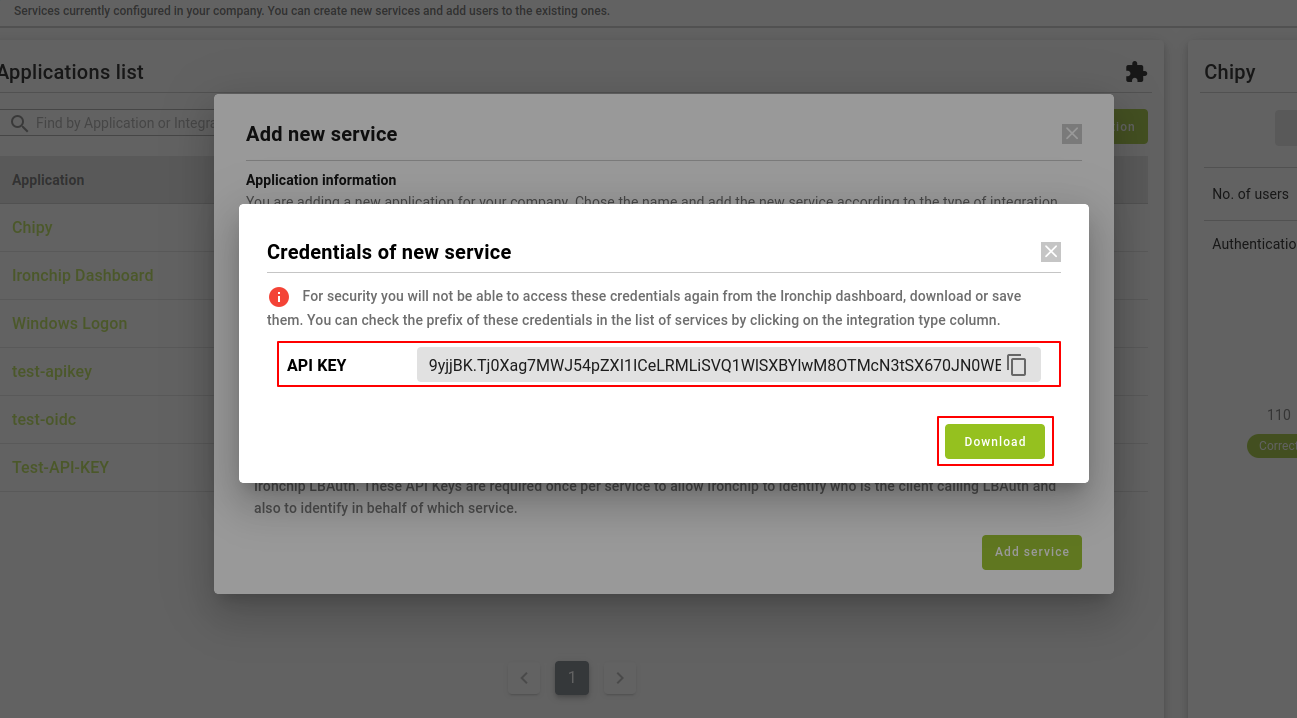
Important: Save the API KEY that is returned when creating the application. This information will only appear this time, so you will need to download it and enter it later when testing the integration.
Adding users to the application using an EXTERNAL_USER_NAME
To add users to an application, the following steps, detailed in the following link, must be followed:
Agregar usuarios a una aplicación
Checking integration
Once the user has been added, we must proceed to check the integration, having already:
- API KEY generated in the first step of this process.
- EXTERNAL_USER_NAME of the client assigned in the second step of this process.
Request Authorization to the API KEY:
curl -H 'Authorization: APIKEY' 'https://api.ironchip.com/authorization?state=RANDOM_VALUE&username=EXTERNAL_USER_NAME'
Response:
{"subject":"UNIQUE_USER_SERVICE_VALUE","name":"USER_NAME","email":"USER_EMAIL","timestamp":TS_MS,"external_username":"EXTERNAL_USER_NAME","external_service_id":"SERVICE_ALIAS","customer_name":"COMPANY_NAME","group_name":"ACCESS_GROUP"}