Fortinet Configuration
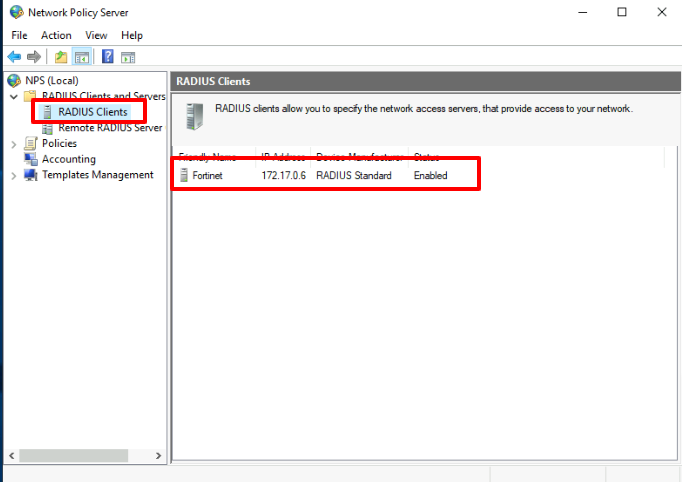
RADIUS client configuration.
We create a RADIUS Client pointing to the Fortinet IP address.
Then in the Ironchip dashboard, we create a HTTP_MFA integration and an associated service and add the users to be protected.
Fortigate configuration:
From the User&Authentication option, we choose the connection with RADIUS-Servers.
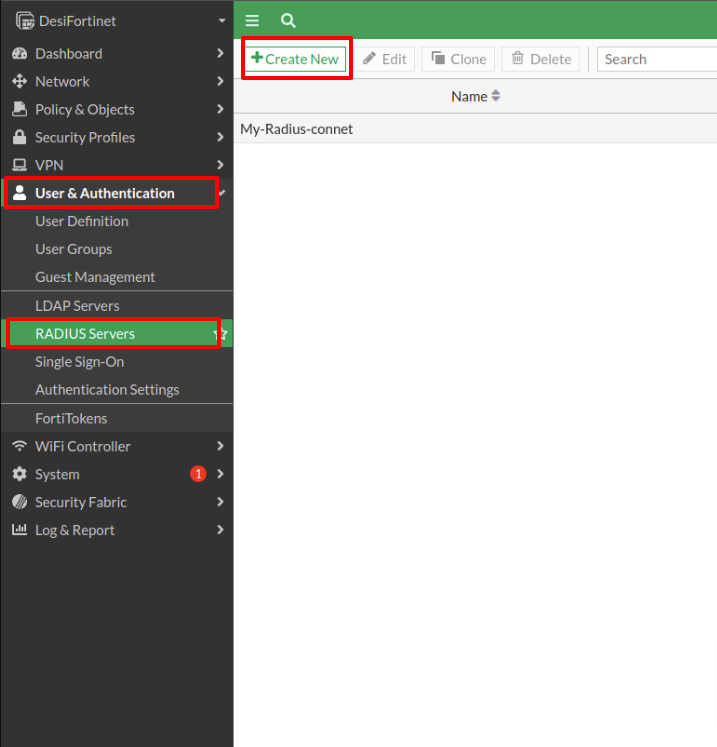
We select Create New and there we name and enter the NPS server data where the RADIUS client has been configured, we also create a secret.
Then click on OK.

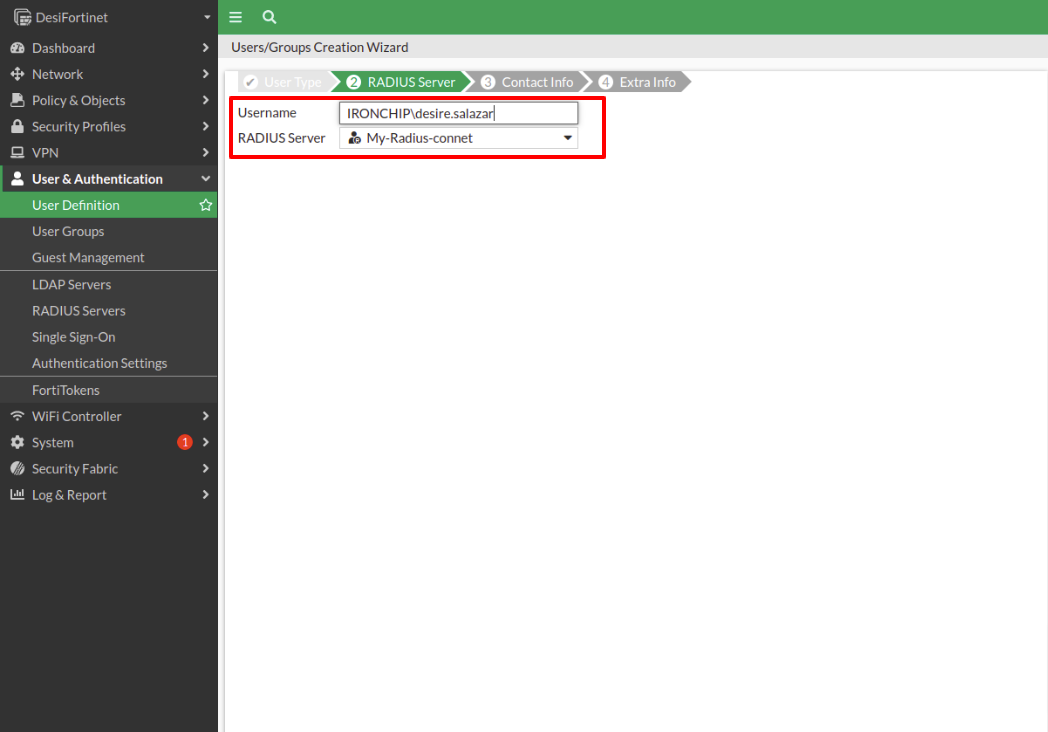
Next, we select the User Definition tab, if we wish to add a single user. The first step is to select the type of user, in this case, Remote RADIUS Users.
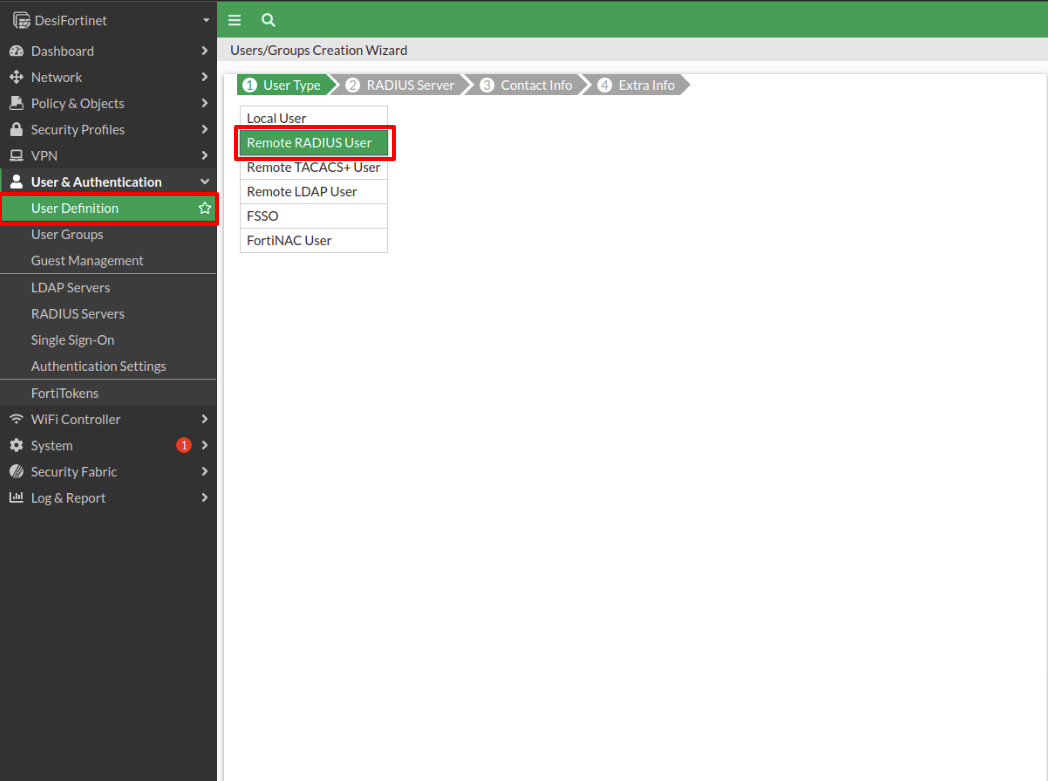
The next step is to enter the user name and select the RADIUS Server we created at the beginning.
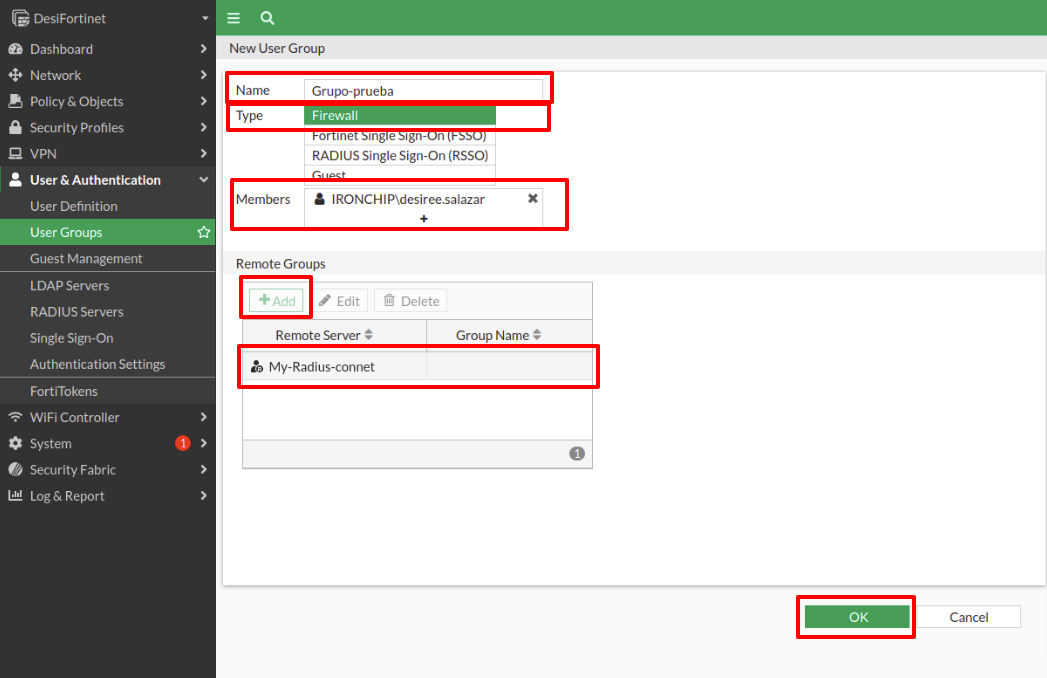
Select User Group to create a group to protect. Choose to Create new, name the group, choose Firewall type, add the members to the group, and in the Remote Groups option add the Radius server created in one of the previous steps.
Click OK twice to continue with the configuration.
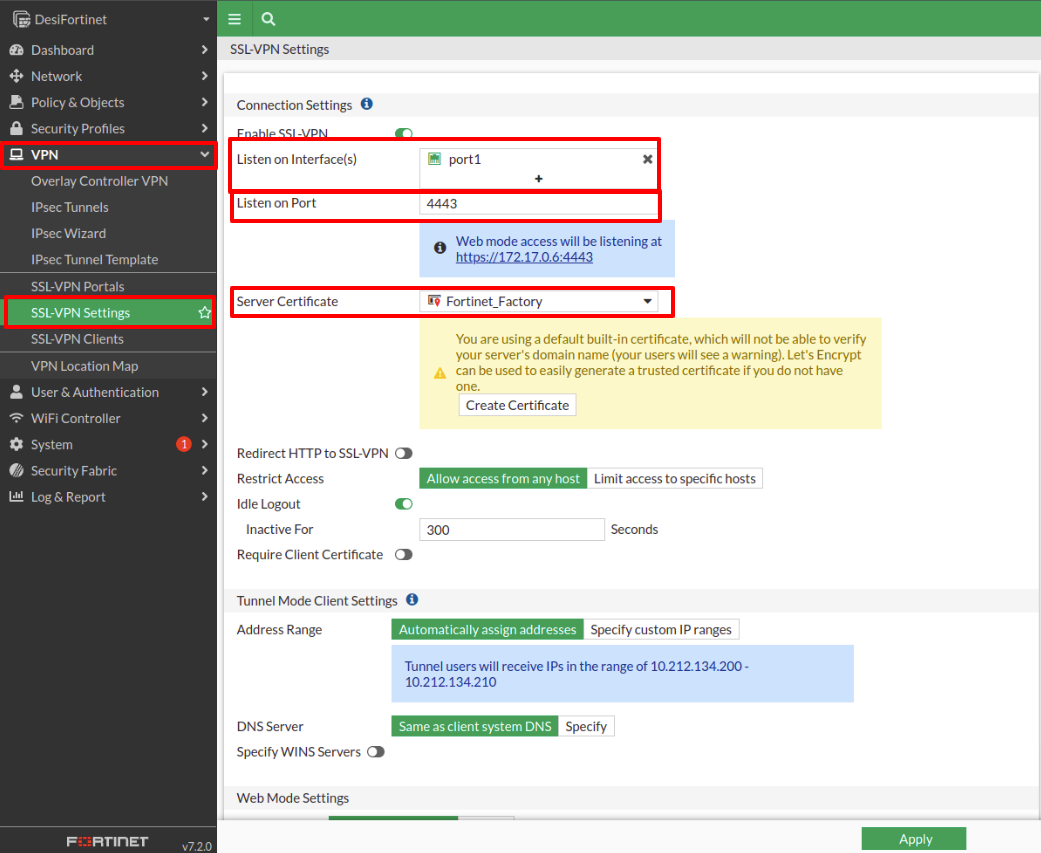
Now we have to go to the VPN tab and select SSL-VPN-Settings.
In the first box, we select the physical port, in this case, port1. Then we choose the port that will listen (in our case has been the 4443).
To generate the server certificate we can choose some of the options offered (in this case Fortinet_Factory was used).
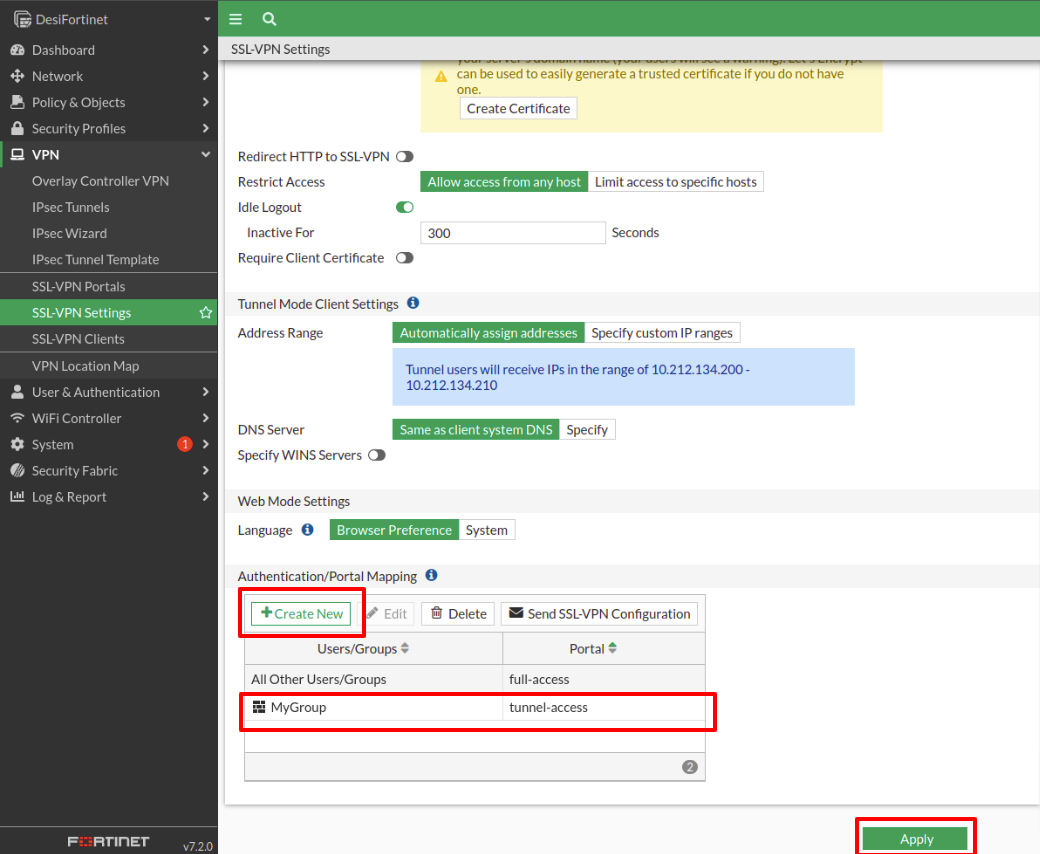
When we go down the page to continue with the configuration we find the Authentication section of PortalMapping. There we select Create New and in the window that pops up we choose the group that has been configured before.
Once the VPN has been configured, a message will pop up telling us to create a
Firewall Policy.
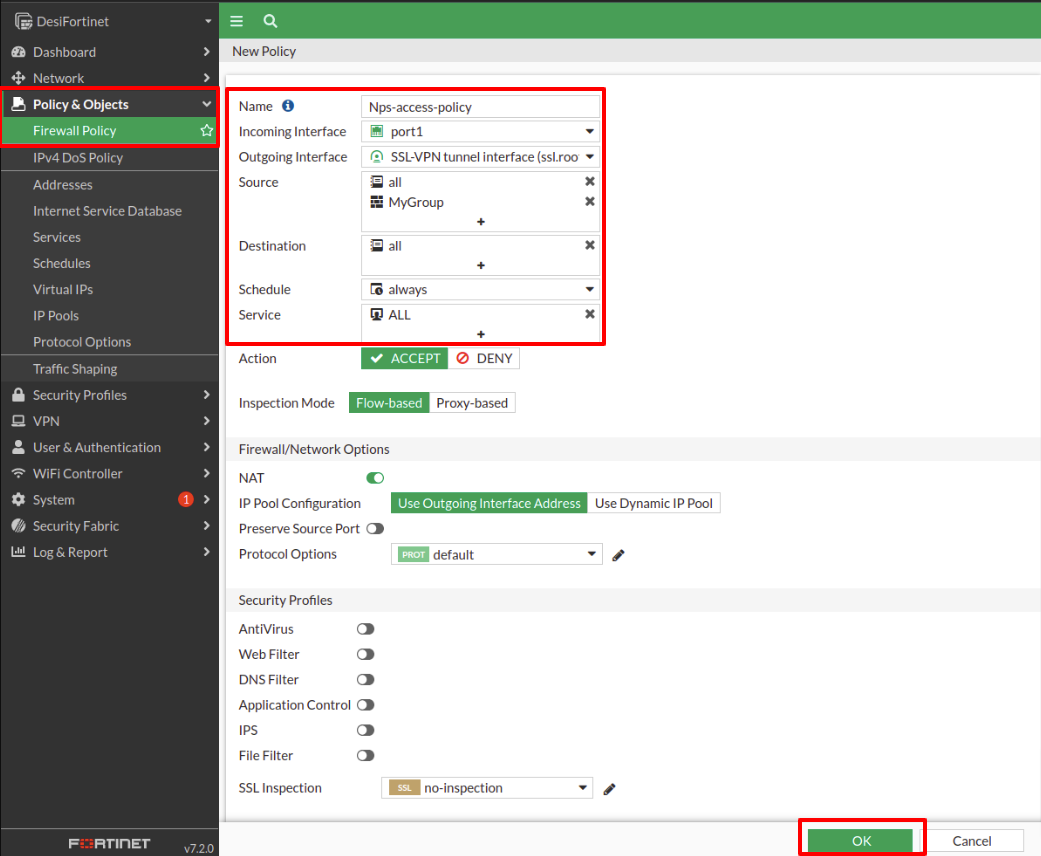
We go to the Policy & Objects tab, then Firewall Policy and make the following configuration:
Assign a name.
In Incoming Interface select the physical interface.
In Outgoing Interface select the SSL-VPN-tunnel-interface option.
In Source select the all option and it is also very important to select the group.
In Destination select the all option.
In Service we select the ALL. option.
Once all these parameters have been configured, to continue click on OK.
The last step must be to set the timeout for both the fortinet and radius connections to 60 seconds so they can wait for the user to complete an authentication. In order to do so open a Fortinet terminal by clicking on the upper right associated icon and then write:
    FG100D3G16xxxxxx # config user group

    FG100D3G16xxxxxx (group) # edit <<YOUR PROTECTED GROUP NAME>>

    FG100D3G16xxxxxx (Guest-group) # set authtimeout 60

    FG100D3G16xxxxxx (Guest-group) # end
this will allow the protected group to have a timeout for their authentication of 60 seconds.
And we should do the same for the RADIUS:
    FG100D3G16xxxxxx # config user radius

    FG100D3G16xxxxxx (radius) # edit <<YOUR RADIUS CONNECTION NAME>>

    FG100D3G16xxxxxx (radius) # set authtimeout 60

    FG100D3G16xxxxxx (radius) # end
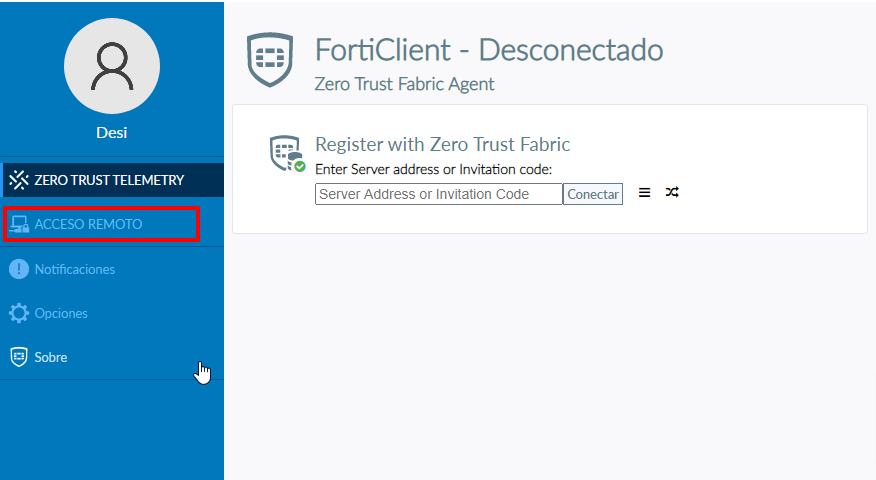
Using Forticlient to test connectivity
Note: It is important that both the NPS and Fortinet servers are started at the time of testing.
First, select the REMOTE ACCESS option.
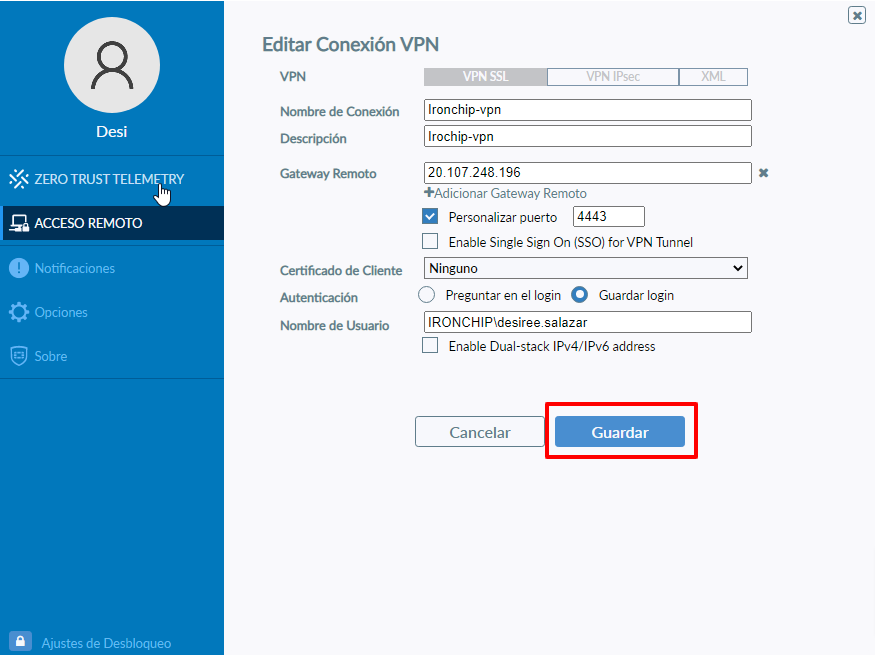
In the next window, we choose the option Configure VPN.

This will display a screen where we will place all the data of the VPN, if we have customized the port we place the port that has been configured for access, it is also important to respect the same pattern of user identification that has been established.
After entering all the necessary data to make the connection, we must click Save.
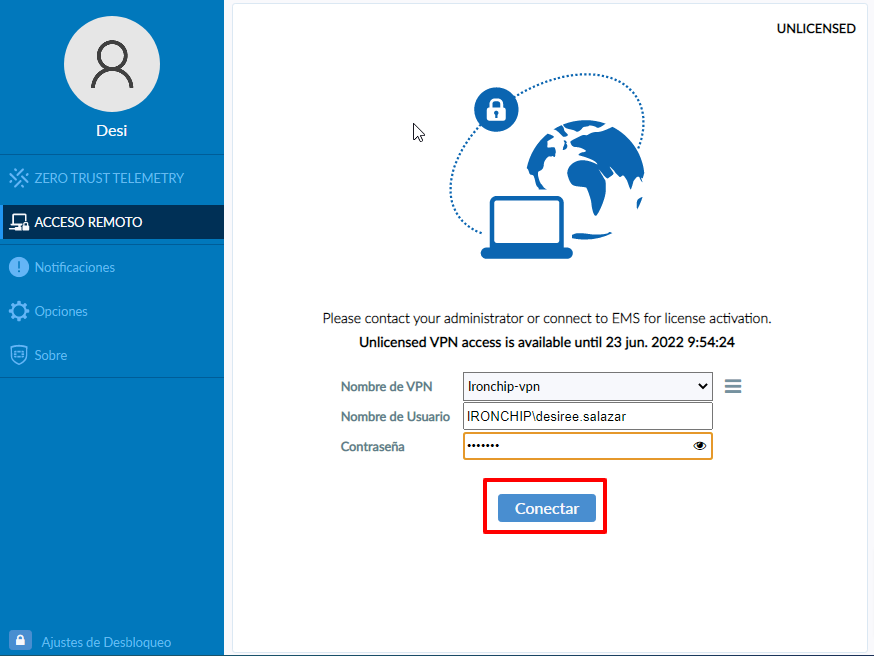
On the next screen, we will have the name of the connection that we gave before, and the name of the user and the only thing left to do is to enter the user’s password.
Then click on Connect.
Note: at this point, it is important to disable the Firewall.
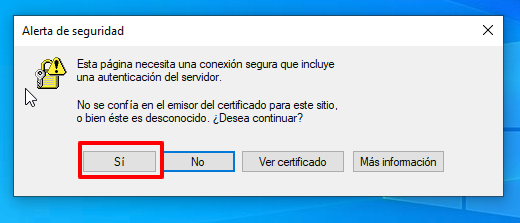
A Security Alert window will appear, read what it shows us, and click on the Yes option.
Once accepted, you must continue with the connection process, at this point you will receive a message to authorize access through the Ironchip application, accepting it will complete the connection process.
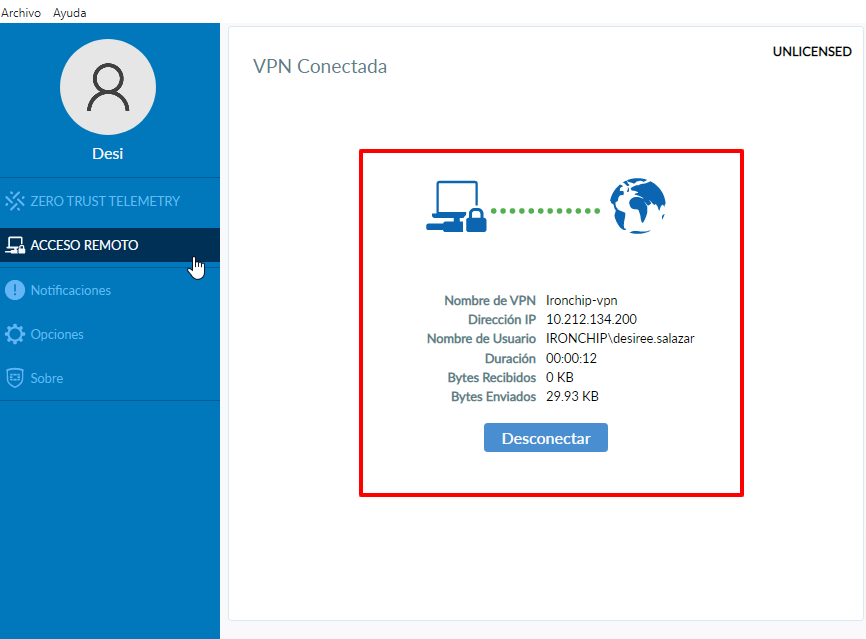
After the connection has been established, a window like this will appear with a brief description of the connection: