Google Workspace
Integration process
Google Workspaces is integrated with Ironchip via SAML protocol. In order to do this integration, both parties, i.e. Google and Ironchip must have their SAML parameters configured, in this case Ironchip will work as a Identity Provider and Google Workspace will be constituted as a service provider.
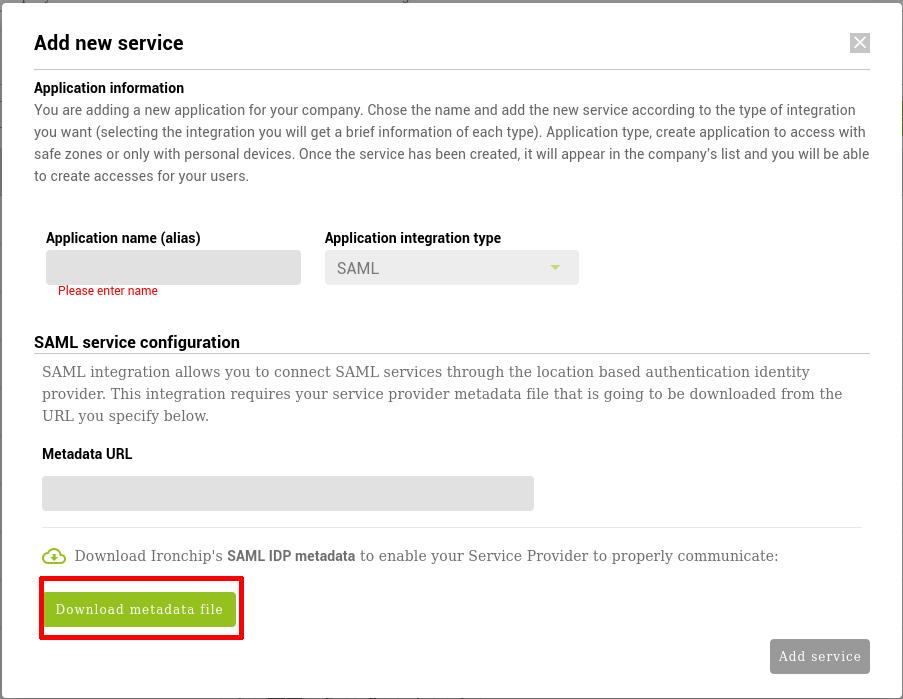
To begin with the integration, proceed to create a new SAML service in the Ironchip Dashboard, look for the application section in the left menu and create a new custom application of type SAML giving it a descriptive name.

Once in the new service creation dialog, download the metadata file by clicking on the lower left button of the dialog.
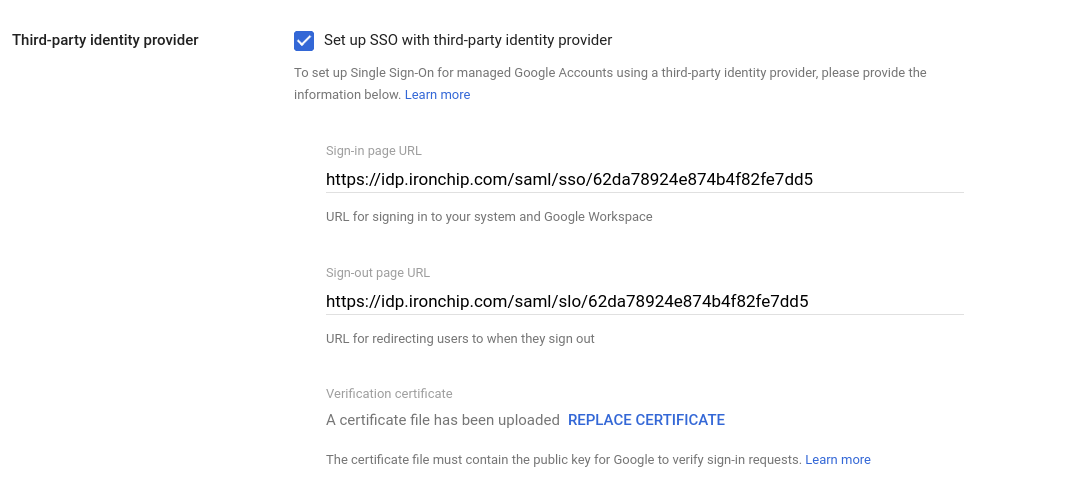
When you have downloaded the Ironchip IdP metadata file, proceed to your Google Admin and navigate to Security > Authentication > SSO with third-party IdP. In there, proceed to configure your “Third-party SSO profile for your organisation”.
To fill the required inputs, please open your metadata file.
For the Sign-in page URL, look in the metadata file for the property “Location” in the “SingleSignOnService” XML tag inside. The URL should look like this:
https://idp.ironchip.com/saml/sso/607ea9b6ad6047207b21e7c9
For the Sign-out page URL, look again for the property “Location” in the “SingleLogoutService” XML tag inside. The URL should look like this:
https://idp.ironchip.com/saml/slo/607ea9b6ad6047207b21e7c9
For the certificate upload, generate a new local file with a “.crt” extension and save in the file the result of pasting the X5909Data from the “X509Certificate” tag inside the first field of this tool:
https://www.samltool.com/format_x509cert.php
this will add the headers and footers needed for Google to recognize the certificate as valid.
Once the file has been saved, upload it to google.
The rest of the fields can remain the same, click save and your service should be now configured.
Once the service is configured in Google, return to the Ironchip SAML service creation screen. Ironchip expects a Metadata URL to read the information of the google integration from. In order to provide this metadata, first you must generate it by copying this file:
<?xml version="1.0" encoding="UTF-8"?>
<md:EntityDescriptor xmlns:md="urn:oasis:names:tc:SAML:2.0:metadata" validUntil="2122-09-16T10:40:54Z" cacheDuration="PT604800S" entityID="google.com">
   <md:SPSSODescriptor AuthnRequestsSigned="false" WantAssertionsSigned="false" protocolSupportEnumeration="urn:oasis:names:tc:SAML:2.0:protocol">
      <md:NameIDFormat>urn:oasis:names:tc:SAML:1.1:nameid-format:emailAddress</md:NameIDFormat>
      <md:AssertionConsumerService Binding="urn:oasis:names:tc:SAML:2.0:bindings:HTTP-POST" Location="https://www.google.com/a/<<YOUR DOMAIN HERE>>/acs" index="1" />
   </md:SPSSODescriptor>
</md:EntityDescriptor>
substituting the “«YOUR DOMAIN HERE»” with the domain your accounts in Google Workspaces will use.
Once this file has been created, upload it to a public Internet direction and provide the URL by adding it to the Metadata URL field in the Add new service dialog.
SSO Activation in Google Workspaces
In order to assign the just created SAML integration, navigate again to the Security > Authentication > SSO with third party IdP section in your Google Admin interface.
Click on Manage SSO profile assignments manage button. On the left side, you can configure the Groups or Individual users you will authenticate by using the second factor authentication provided by Ironchip.
Remember to configure these users into the just created Ironchip SAML Service.