Authentication
Authentication Process
Once the secure zones are created and linked to the corresponding services, the authentication process can be carried out in two different ways.
-
The first and most common way is as follows:
-
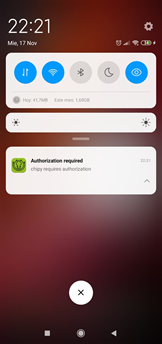
To start the process, you will have to enter your credentials in the service you want to authenticate. When you do so, a push notification will be sent to your mobile phone via the Ironchip app.
-
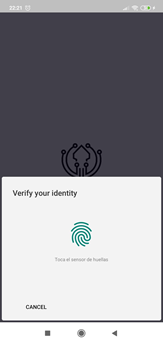
Clicking on the push notification will open the Ironchip application, in which we will need to enter the selected biometrics if it has been set as a requirement first.
-
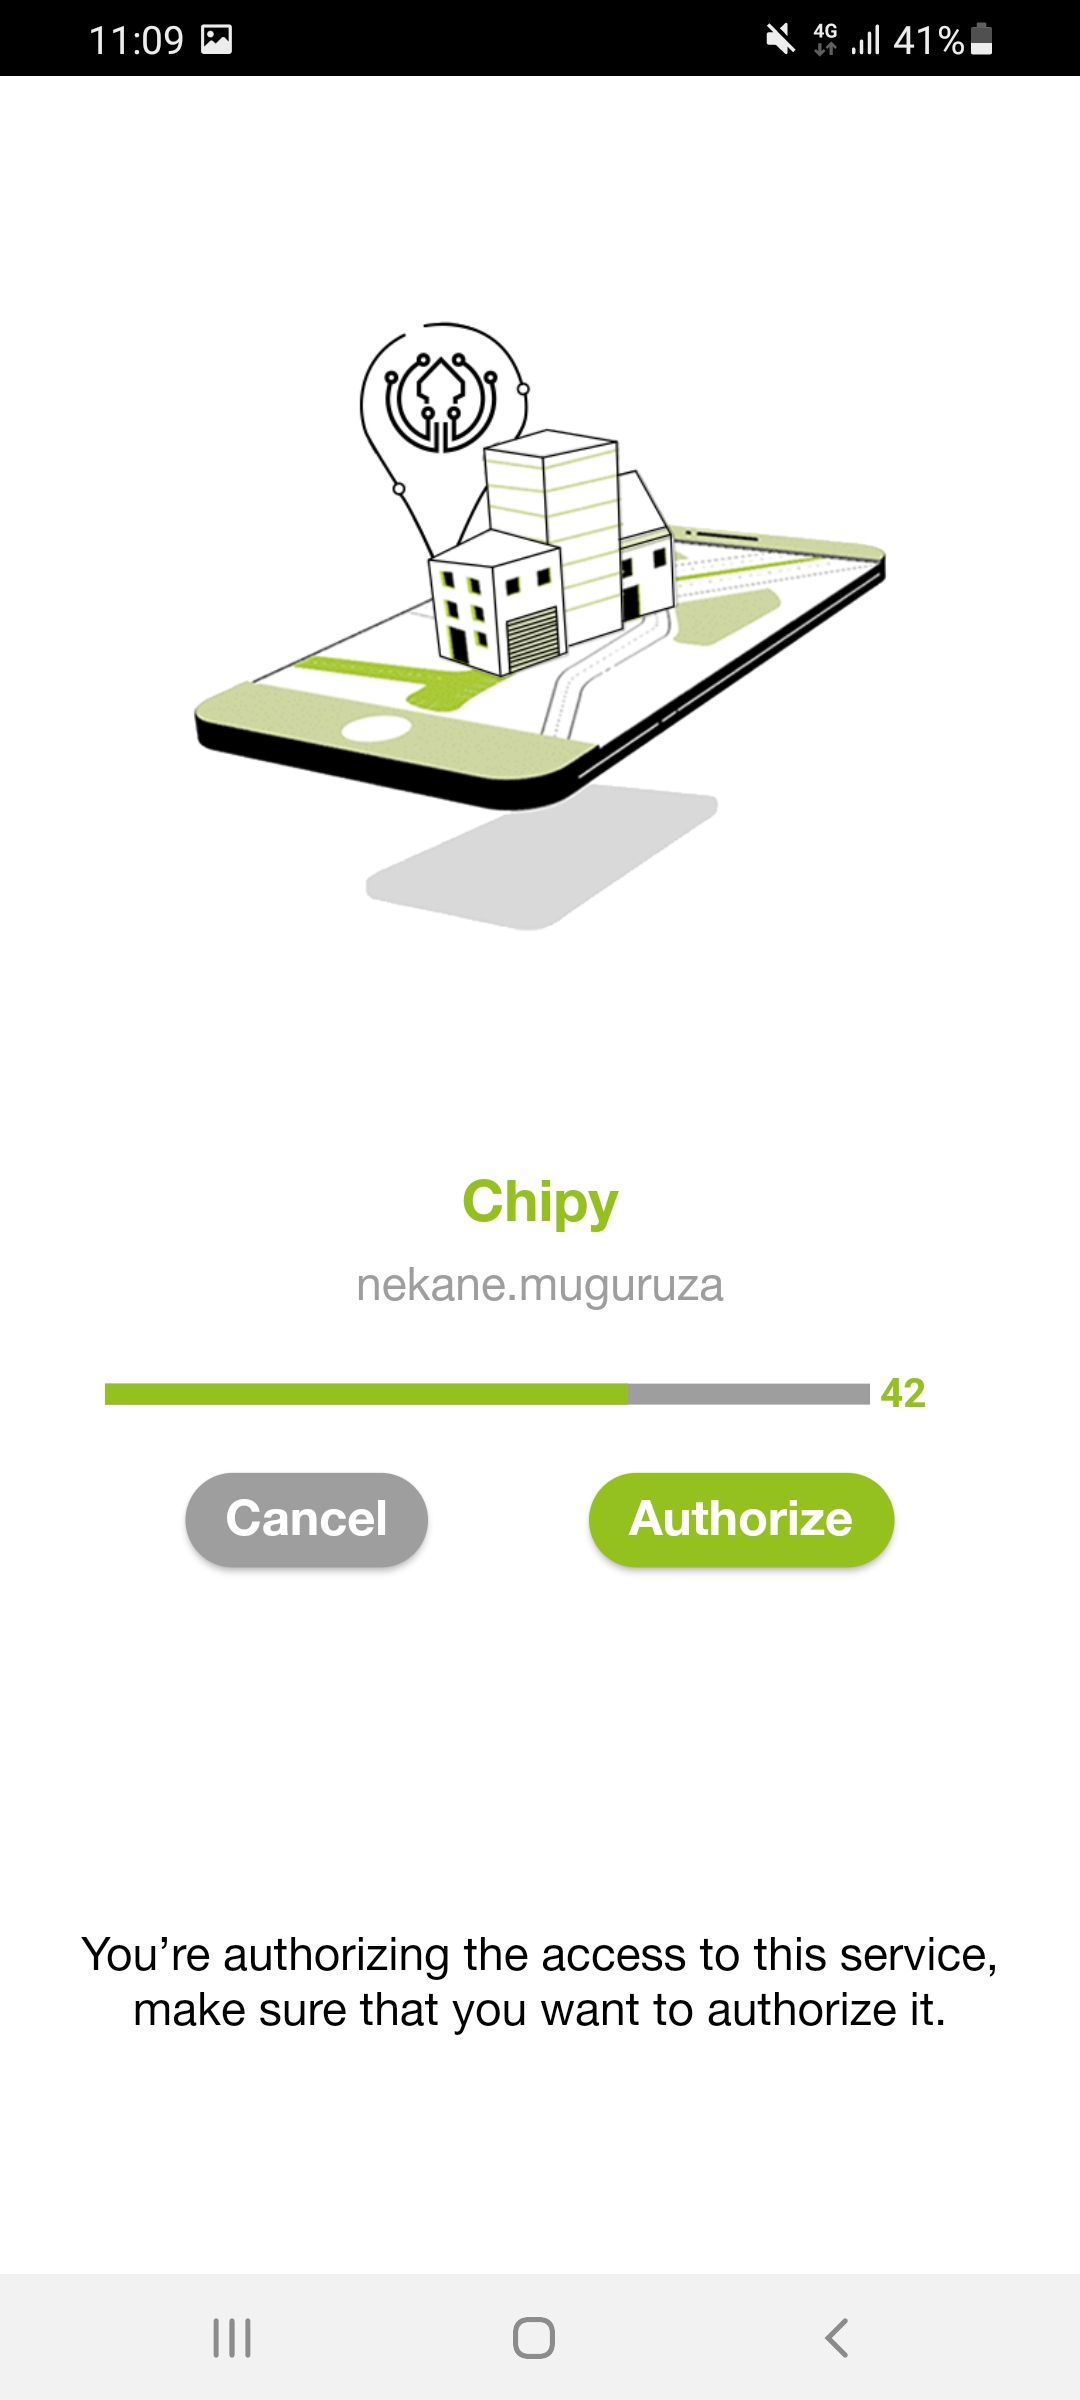
Once inside, clicking on Authorize will open the signal scanning screen that will verify if you are in the authorised place for access to the service or not. If you are in the correct location, you will have accessed your service.
-
-
The second way in which this process can be carried out is as simple as the previous one:
-
To start the process, you will have to enter your credentials in the service you want to authenticate. When you do so, a push notification will be sent to your mobile phone via the Ironchip app.
-
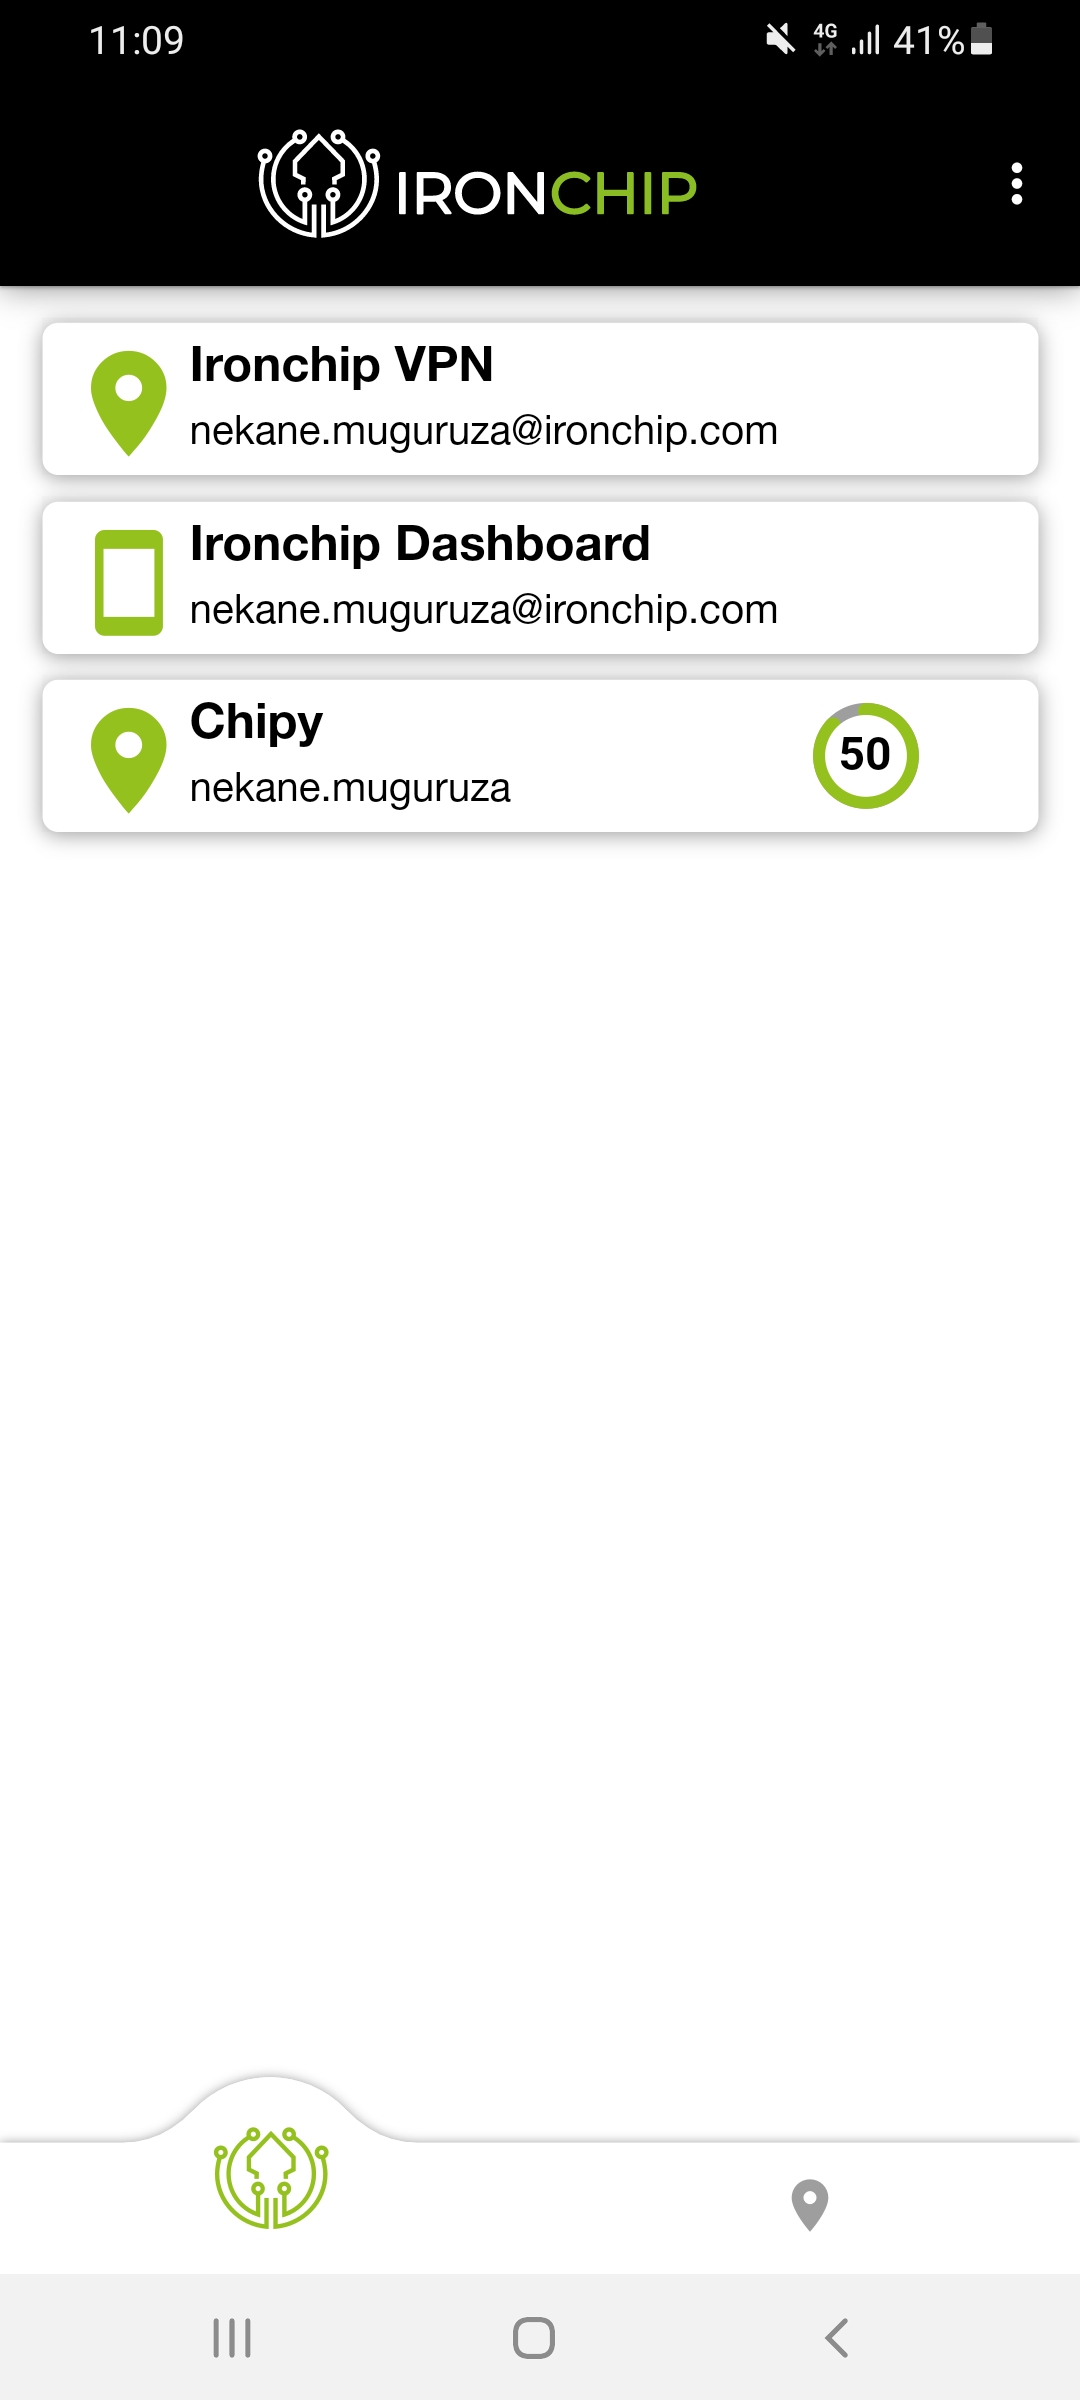
Now, instead of clicking on the push notification, you will go directly to the Services section of the application. In this section, you will see a countdown timer on the service for which you have entered your credentials. This countdown timer shows how many seconds are left to perform the signal scan in order to verify your identity. You have to click on the card.
-
Once inside, clicking on Authorize will open the signal scanning screen that will verify if you are in the authorised place for access to the service or not. If you are in the correct location, you will have accessed your service.
-