Check Point configuration
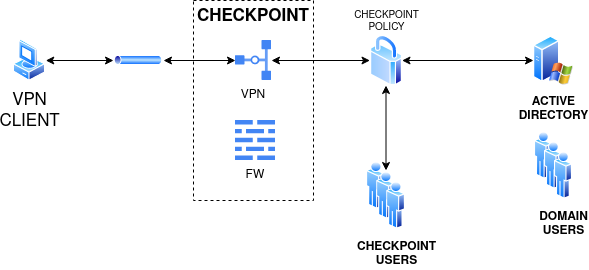
Check Point base architecture
Ironchip Integration proposal
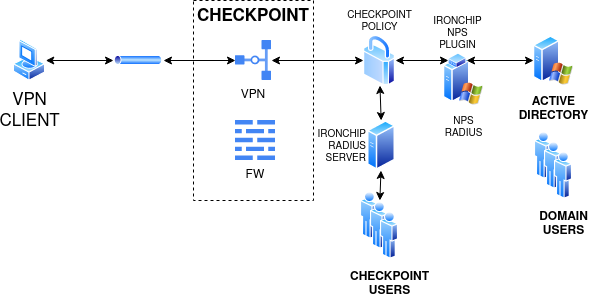
For domain users (Active Directory)
For this configuration it is needed to have a NPS server configured with Ironchip NPS Plugin
For Check Point users
For this configuration it is needed to have the Ironchip RADIUS server configured into a server, request more information through the contact form.
Integration mechanisms
For domain users (Active Directory)
Once the previous configurations are ready, (i.e.: NPS server installed and an HTTP MFA integration properly configured.), go to Check Point’s Smart-Console as shown:ón.
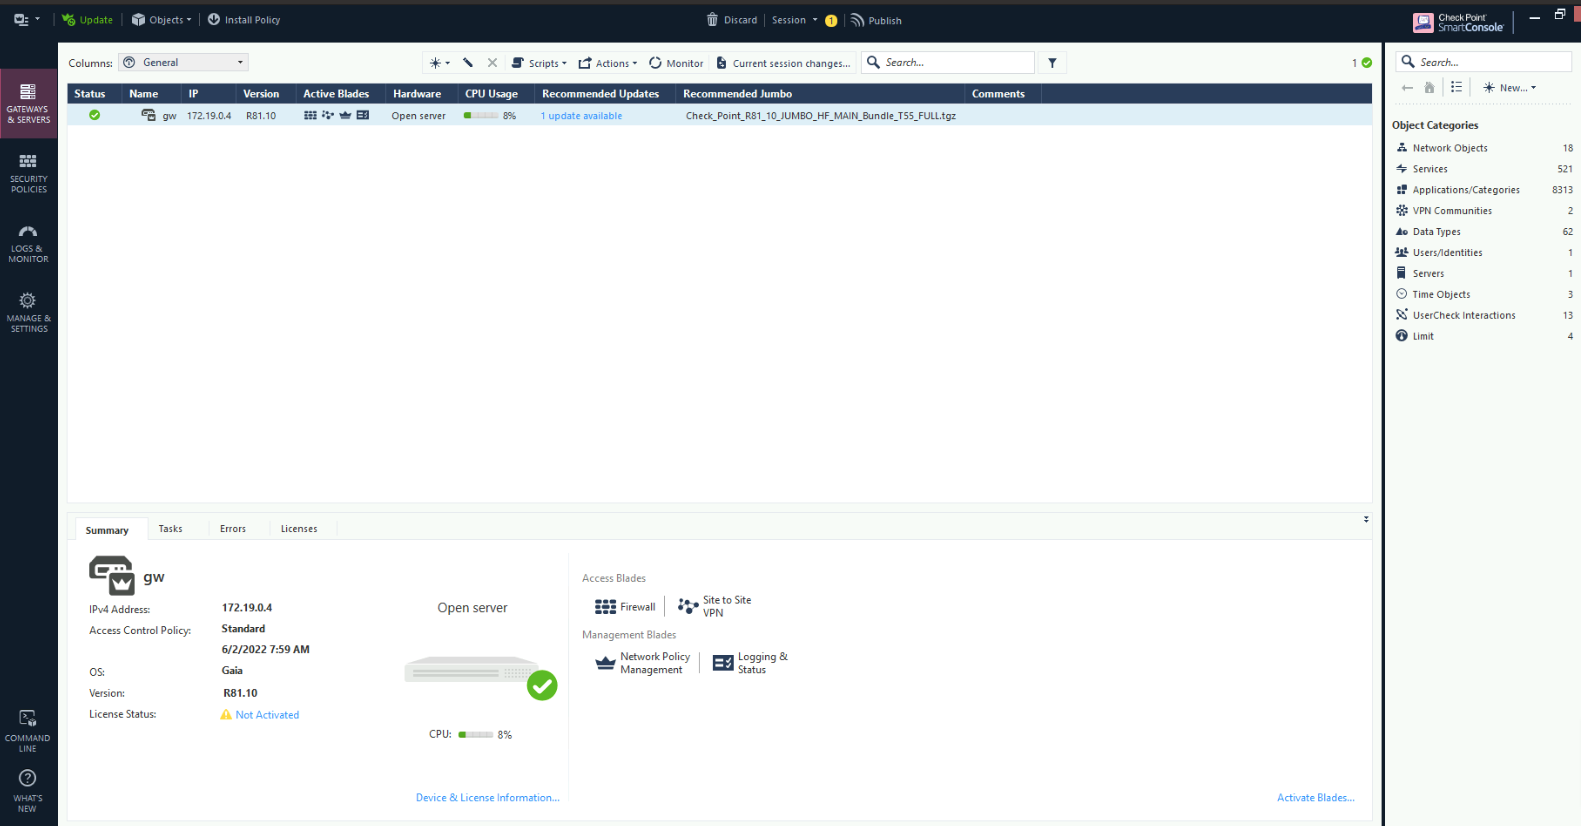
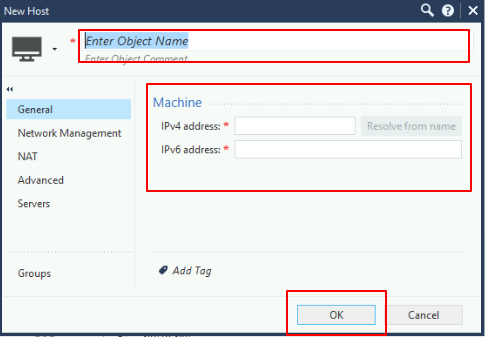
The first step is to create a Host, in order to do so, on the upper right part of the Smart-Console click on New and select Host

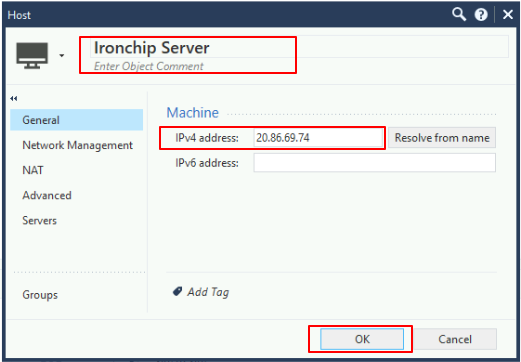
Once clicked, in the shown screen, configure the Name and IP parameters of the Host in which the NPS server is running. Press Ok when configured.
Once the configuration has been properly done, we should have a Host created, as shown:
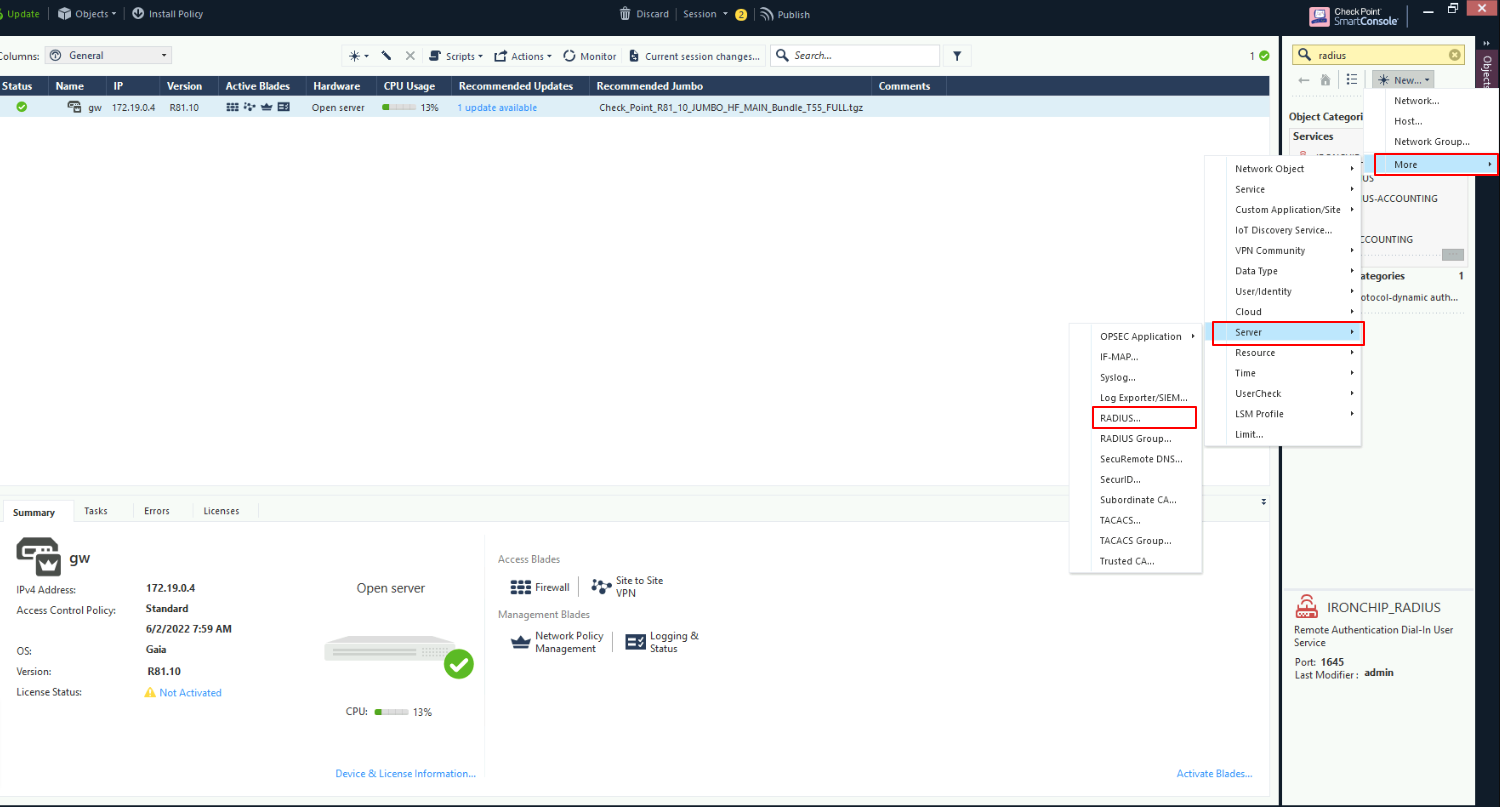
The next step is to configure the RADIUS connection properties. In order to do so, in the search bar at the upper right corner, search for RADIUS. Clone the protocol under the Services section, more precisely in the UDP service section. Once cloned, configure the just cloned UDP service in the following manner:
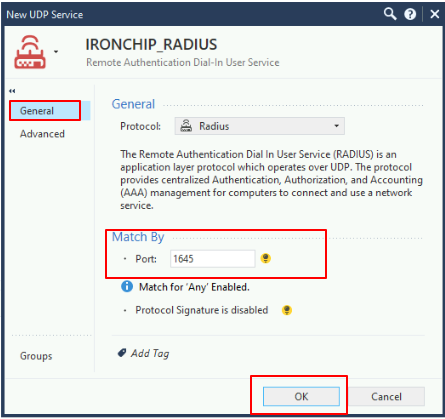
Under general tab, we should give it a proper name, (i.e.: Ironchip_Protected_NPS_Protocol), then check that the port and protocol matches our NPS configuration:
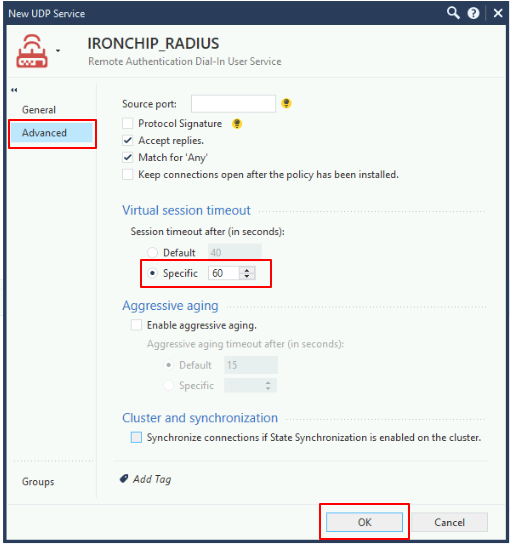
In the advanced configuration, configure the Virtual session timeout to be 60 seconds and disable the Aggressive aging.
Once both the Host and the Protocol properties are correctly set, create new RADIUS server, to do so:
The configuration itself is made into the following configuration modal:
In this case, give it a descriptive name (i.e.: “NPS_IRONCHIP_RADIUS”), you should also configure:
- Host: the host in which the NPS server resides.
- Servicio: the service created in the second step.
- Secreto compartido: a secure string matching the one configured in the NPS
- Protocolo: the most secure protocol supported by your NPS server once finished we press OK.
The third step is to create an external user needed for the authentication of users not registered internally in Check Point.
To complete this step, in the Smart-Console, at the left menu, select Security Policies, then Mobile Access and click on it.
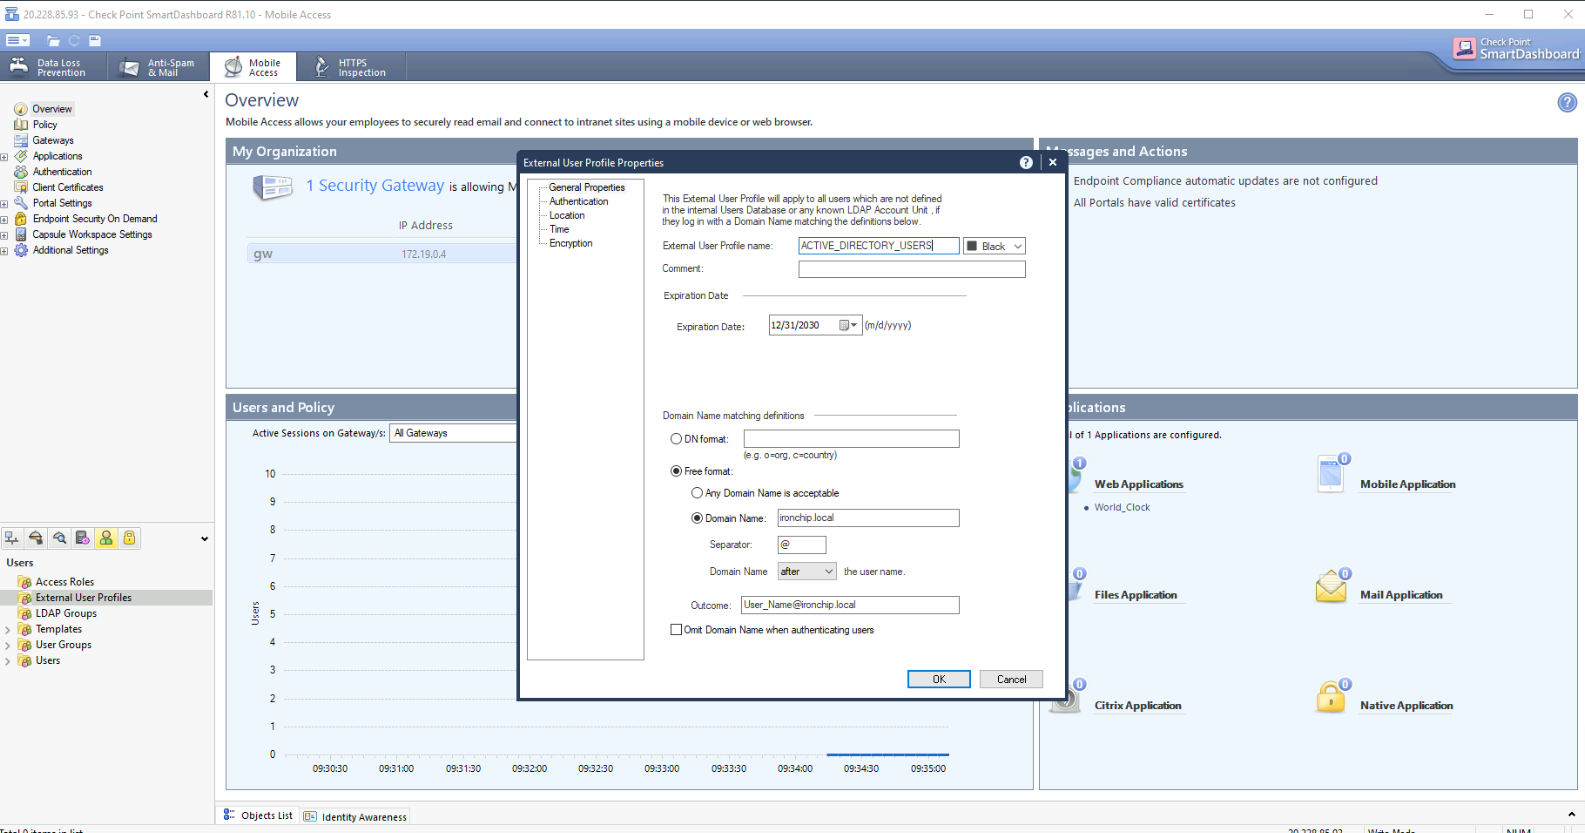
In the lower left menu, click on the user icon on top, create a new External User Profile configuring the needed parameters according to your Domain configuration. Click OK once finished.
Once the External User Profile is done, the fourth step is to generate a new Authentication Policy, to do so, on the main Smart-Console screen, click on the gateway that has the VPN configured and navigate VPN Clients > Authentication on the left menu. In the appearing modal, we click on Add and then New:
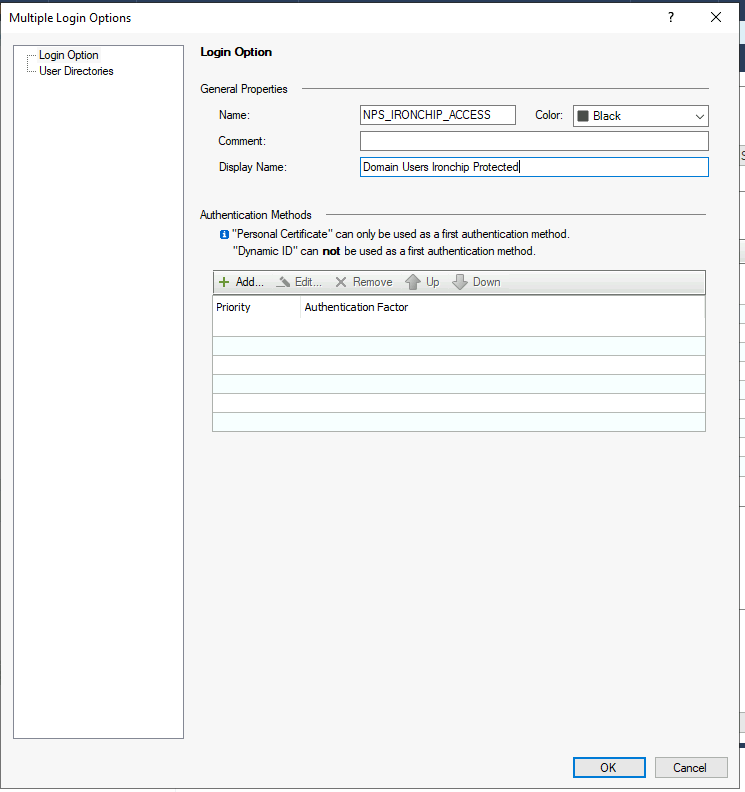
In the next modal, set the a new name, (i.e.: NPS_IRONCHIP_ACCESS), configure the Comment and Display Name as desired.
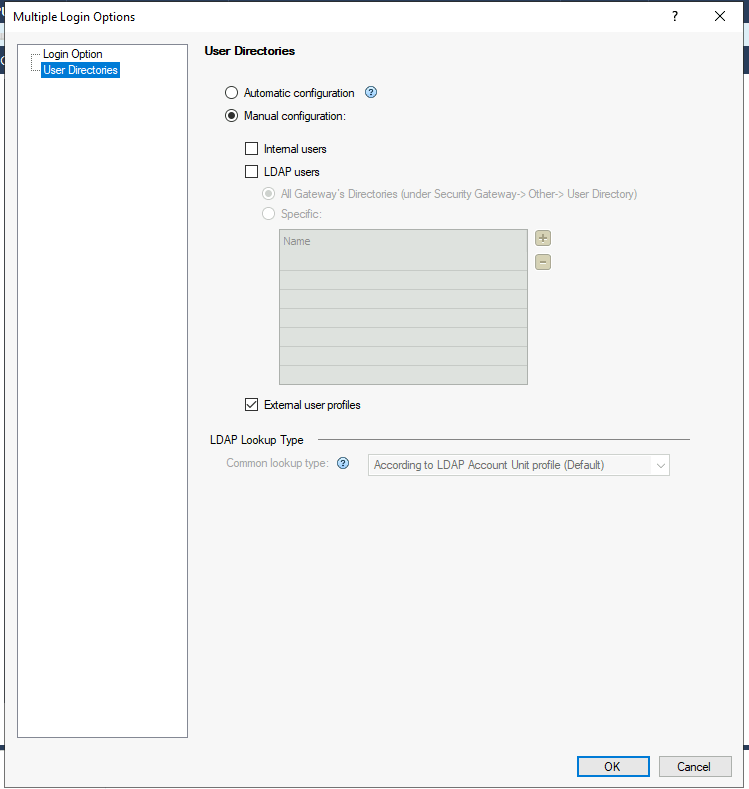
In the User Directories tab, select the Manual configuration option and activate the authentication only for External user profiles:
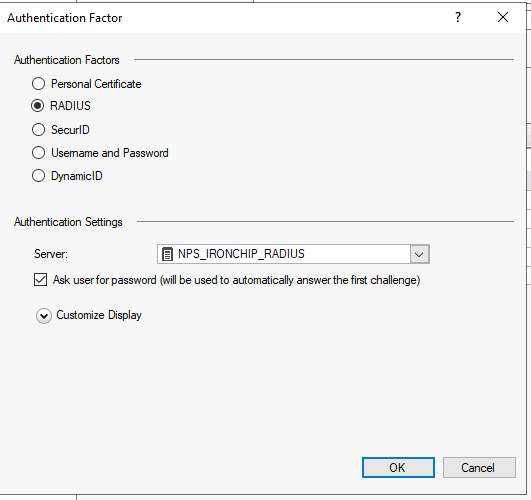
Add a new Authentication factor, selecting RADIUS as the factor and setting the server to the one created before, click OK when ready:
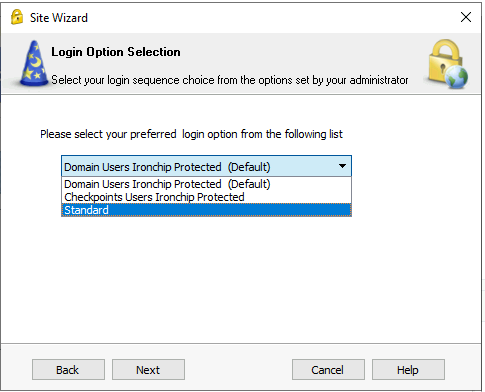
Once this last step is completed, then the VPN client can use the recently added authentication method:
For Check Point users
Once the previous configurations are ready, (i.e.: Ironchip RADIUS server installed and an API KEY integration properly configured.), go to Check Point’s Smart-Console as shown:ón.
The first step is to create a Host, in order to do so, on the upper right part of the Smart-Console click on New and select Host
Once clicked, in the shown screen, configure the Name and IP parameters of the Host in which the Ironchip RADIUS server is running. Press OK when configured.
Once the configuration has been properly done, we should have a Host created, as shown:
The next step is to configure the RADIUS connection properties. In order to do so, in the search bar at the upper right corner, search for RADIUS. Clone the protocol under the Services section, more precisely in the UDP service section. Once cloned, configure the just cloned UDP service in the following manner:
Under general tab, we should give it a proper name, (i.e.: Ironchip_Protected_Protocol), then check that the port and protocol matches your Ironchip RADIUS server configuration:
In the advanced configuration, configure the Virtual session timeout to be 60 seconds and disable the Aggressive aging.
Once both the Host and the Protocol properties are correctly set, create new RADIUS server, to do so:
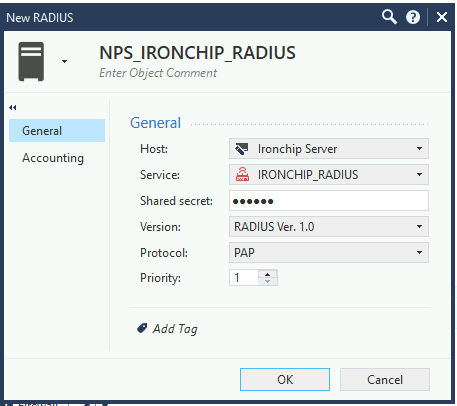
The configuration itself is made into the following configuration modal:
In this case, give it a descriptive name (i.e.: “IRONCHIP_RADIUS”), you should also configure:
- Host: the host in which the Ironchip RADIUS server resides.
- Servicio: the service created in the second step.
- Secreto compartido: a secure string matching the one configured in the Ironchip RADIUS server
- Protocolo: select PAP once finished we press OK.
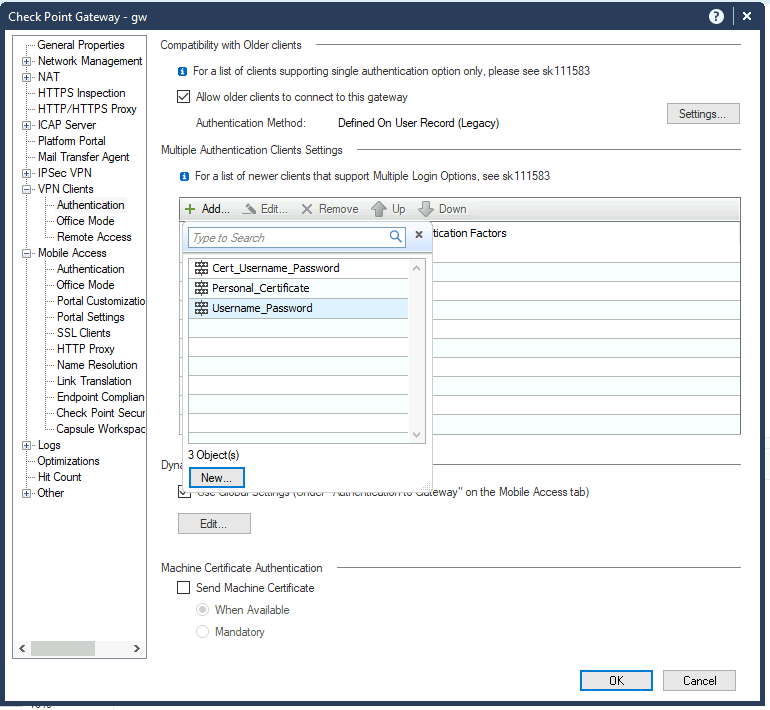
The third step is to generate a new Authentication Policy, to do so, on the main Smart-Console screen, click on the gateway that has the VPN configured and navigate VPN Clients > Authentication on the left menu. In the appearing modal, we click on Add and then New:
In the next modal, set the a new name, (i.e.: RADIUS_IRONCHIP_ACCESS), configure the Comment and Display Name as desired.
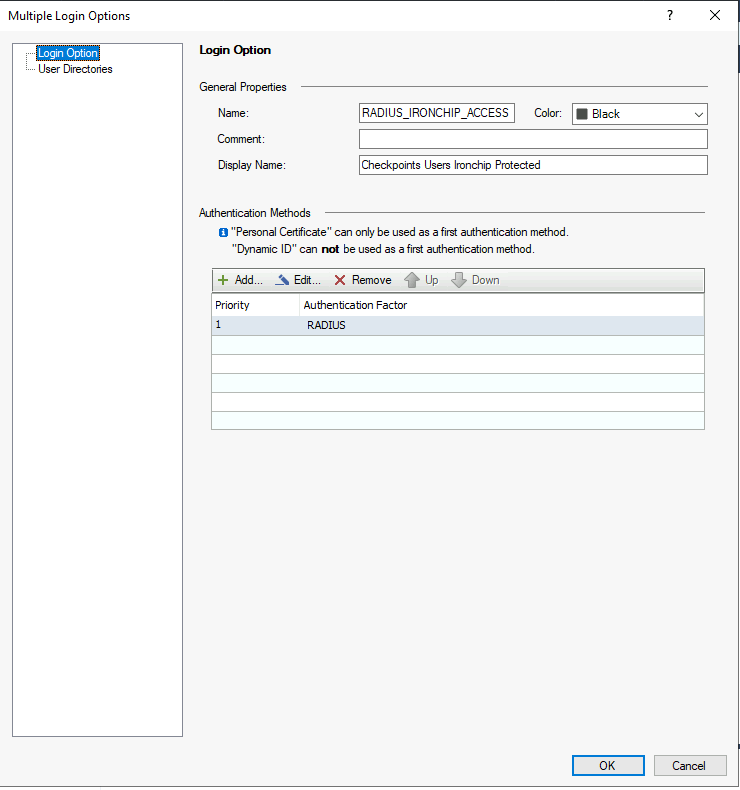
In the User Directories tab, select the Manual configuration option and activate the authentication only for External user profiles:

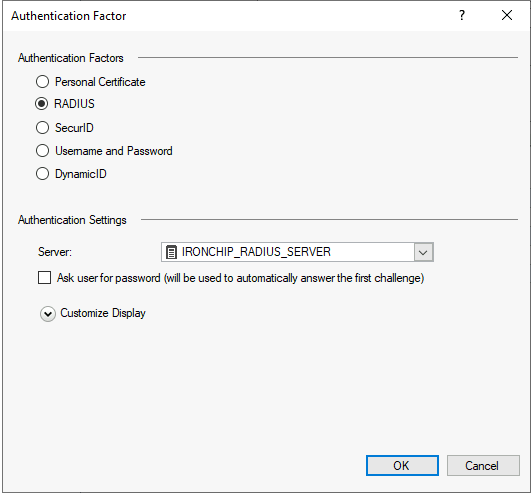
Add a new Authentication factor, selecting RADIUS as the factor and setting the server to the one created before, click OK when ready:
Once this last step is completed, then the VPN client can use the recently added authentication method: