RD Gateway
RD Gateway Activation and Configuration
The first step is to enter the Remote Desktop Gateway Manager program from the administrative tools.
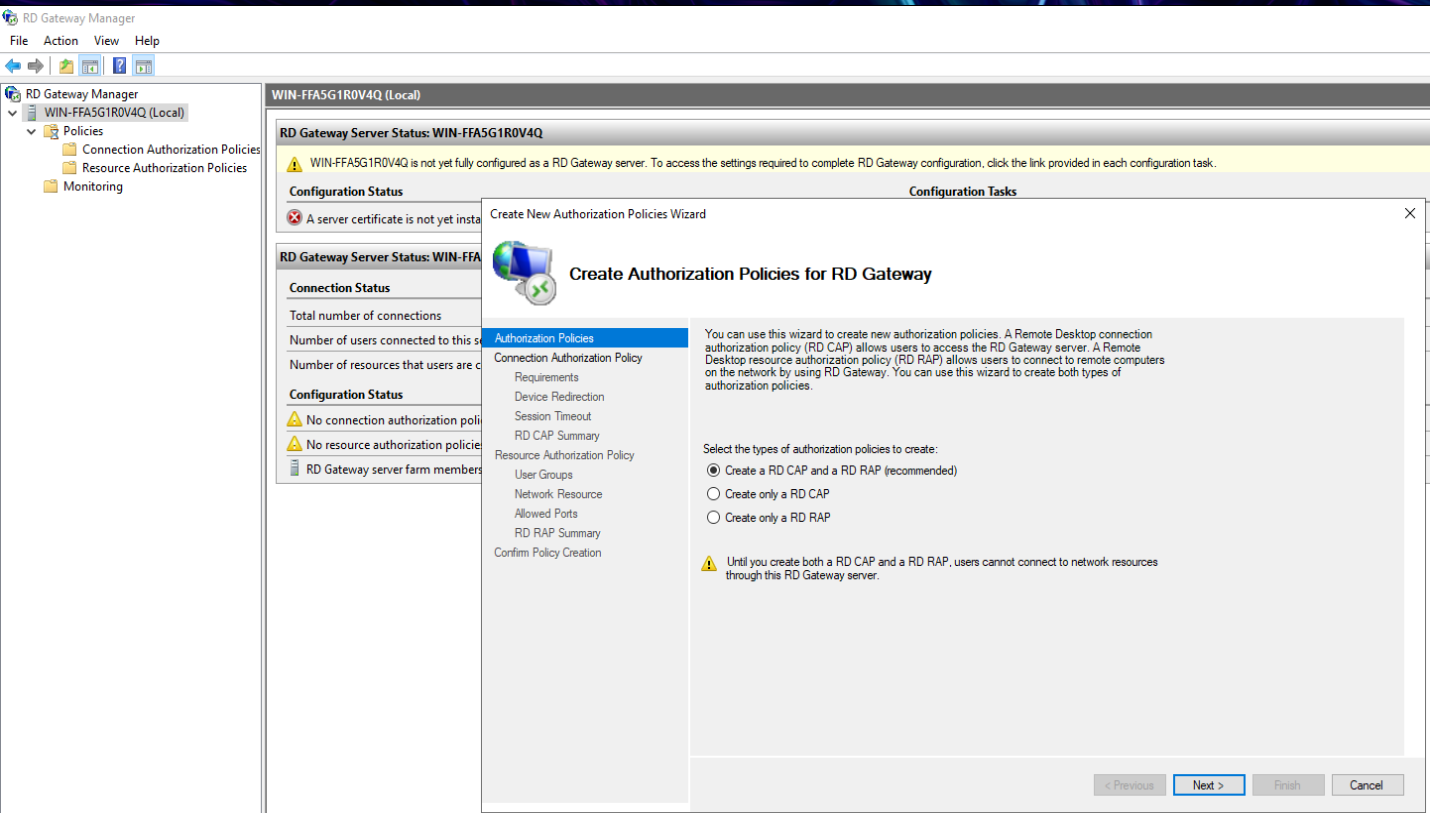
Right click on the Policies folder and select Create New Authorization Policies. When the new window opens, click on Create a RD CAP and a RD RAP and click on Next.
In the next window you will enter the name for RD CAP, e.g. Ironchip RDCAP. It is important that the name we assign to the RD CAP policy in this case (Ironchip RDCAP) is the same that will appear in the “External ID” of the service created in the Ironchip dashboard.
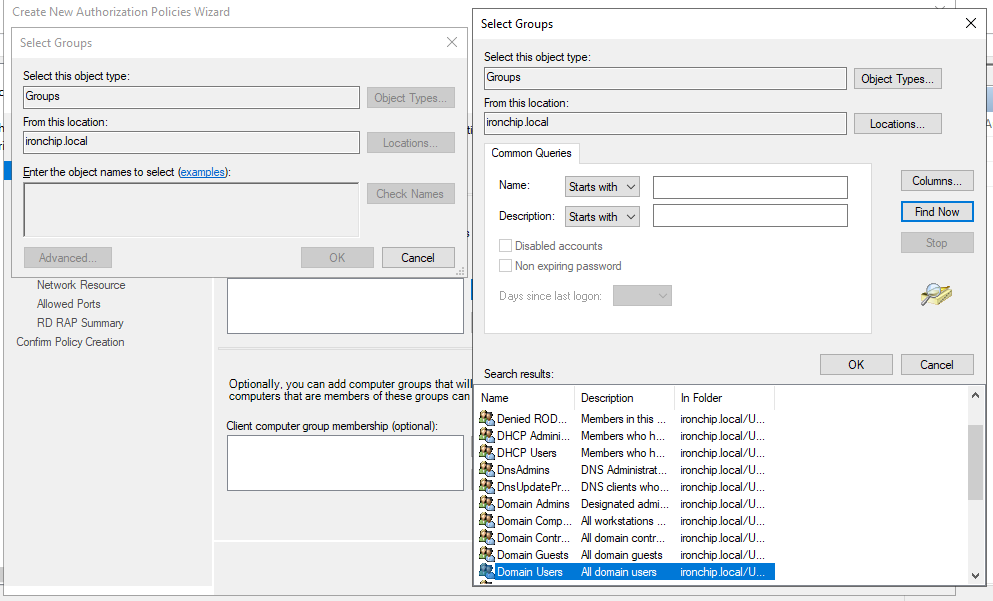
Click on Next. Then you need to add the requirement for domain users to be associated with RD CAP by clicking on Add Group…, then Advanced… and finally Find Now to see all those that can be selected. Click on Next.
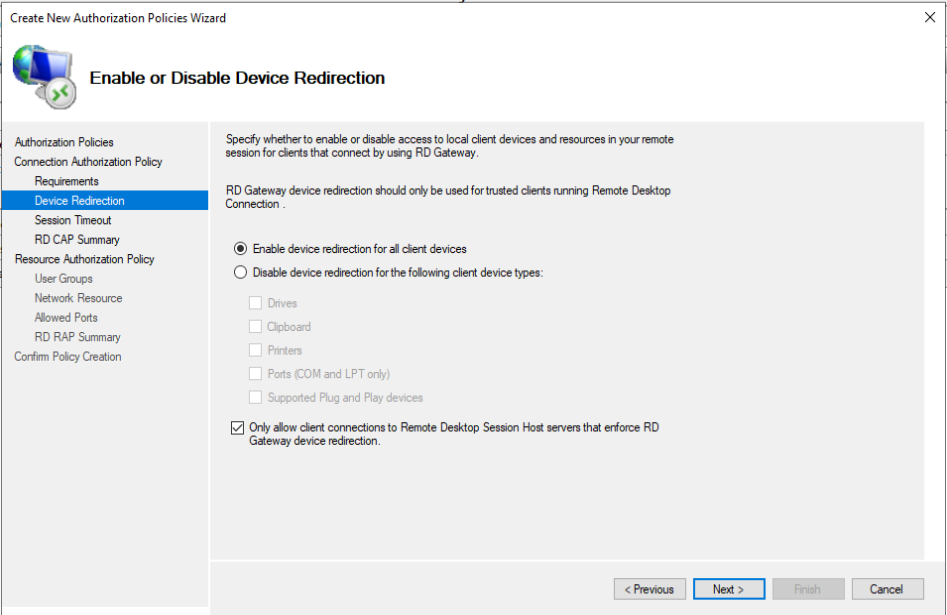
In the next window will select Only allow client connections to Remote Desktop Session Host servers that enforce RD Gateway device redirection. Click on Next 3 times to start the same process with RD RAP.
In the next window you will enter the name for RD RAP, e.g. Ironchip RDRAP. Click on Next. And then you have to add the requirement for domain users to be associated to RD RAP by clicking Add Group…, then Advanced… and with Find Now you can see all the selectable ones. Click on Next.
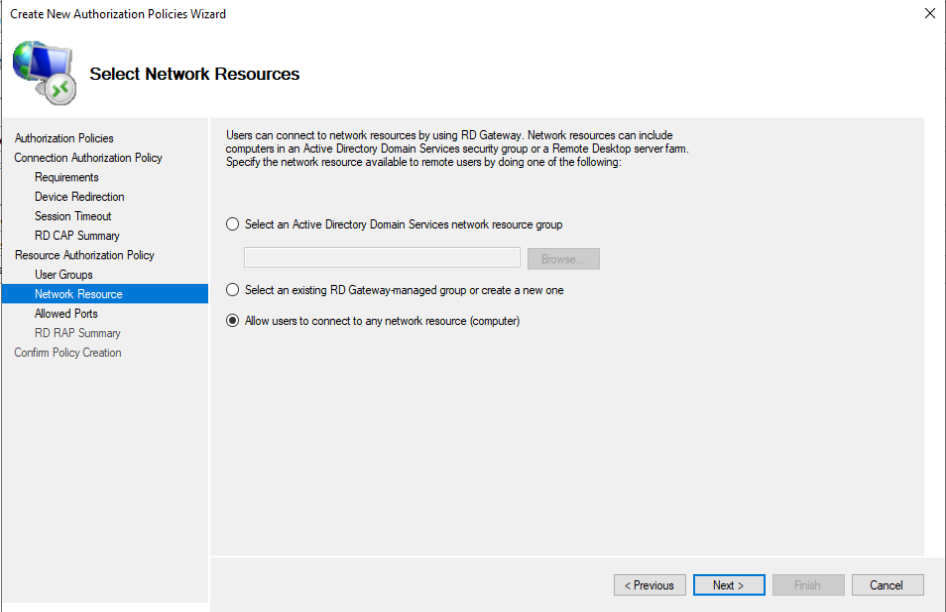
Finally, Allow users to connect to any network resource will be selected. Click on Next 2 times and Finish. When it is seen that RD CAP and RD RAP have been successfully created click on Close.
In the internal folders of Policies you will see them already created.
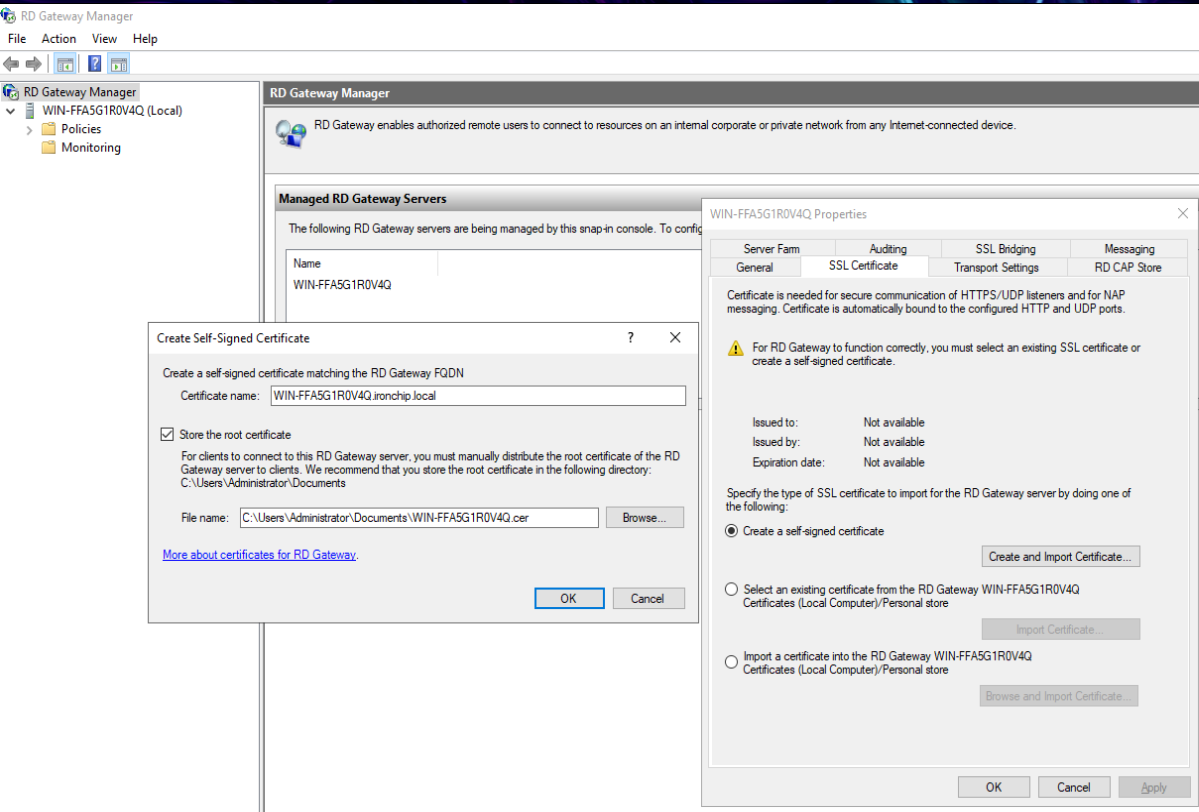
To continue with the configuration right click and select Properties. In the section SSL Certificate select Create a self-signed certificate; this will enable Create and Import Certificate…, click on it and press OK. This will save the certificate in the Documents folder of the computer.
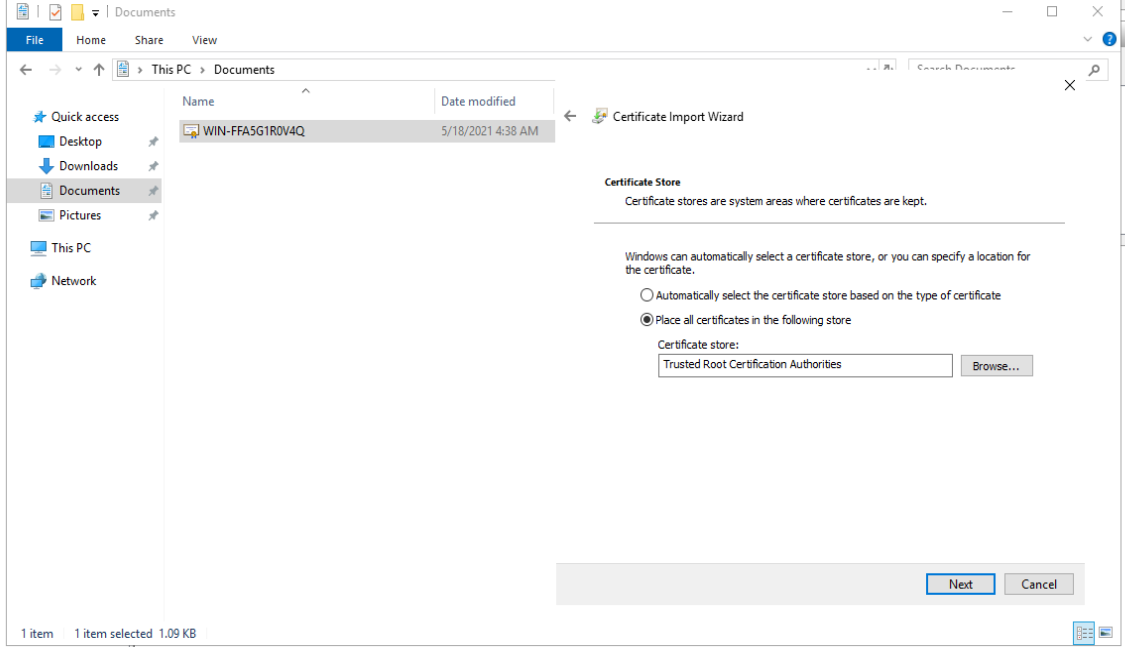
The certificate must now be installed on the machine. To do this, follow the steps below:
- Right click on the certificate.
- Select Install Certificate.
- Select Local Machine and then Next.
- Select Place all certificates in the following store and Browse….
- In the window that opens next, select the folder Trusted Root Certification Authorities and OK.
- Finally click on Next and Finish.
The certificate shall be affixed to all machines and the same process shall be carried out on all machines.
After this, the group policies will be generated using the Group Policy Management program from the administrative tools. The steps to follow are:
- Open Forest and Domains.
- Right click on ironchip.local and select Create a GPO in this existing domain, and link it here….
- Insert a name; for example, Ironchip.
- Right-click on the created GPO and select Edit.
- The Group Policy Management Editor program will have opened. In this program, select User Configuration, Policies, Administrative Templates, Windows Components, Remote Desktop Service, RD Gateway.
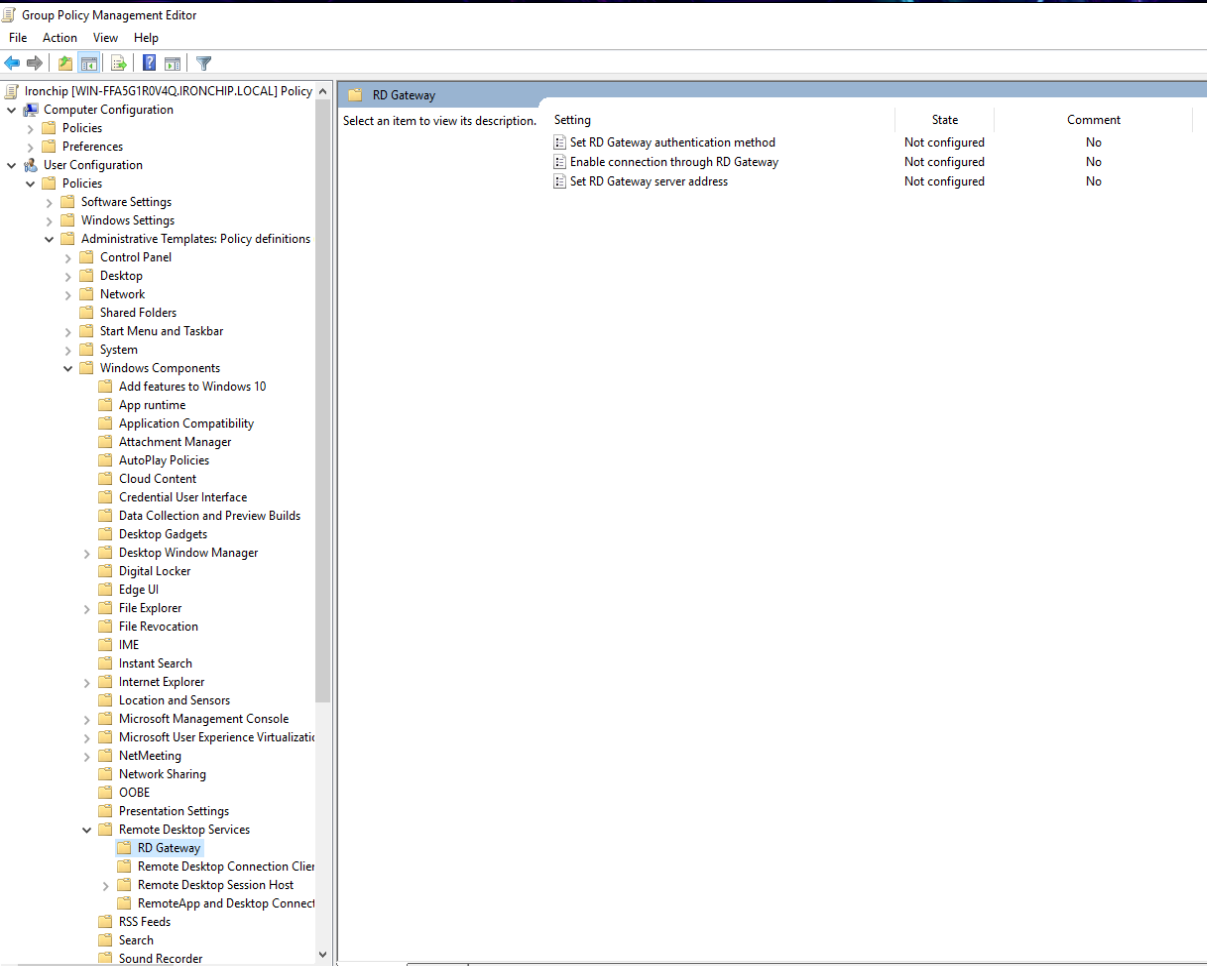
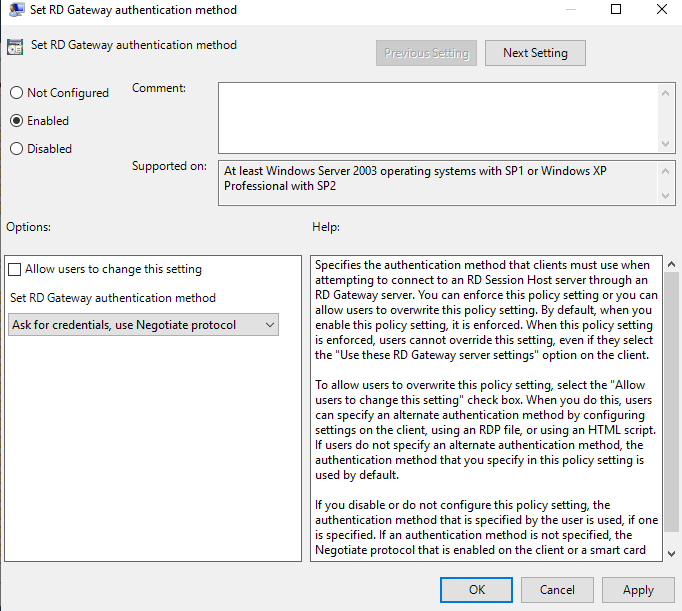
- In this section select RD Gateway authentication method and enable it by clicking Enabled and select Ask for credentials, use Negotiate protocol.
- In the RD Gateway section, select Enable connection through RD Gateway and enable it by clicking on Enabled.
- In the RD Gateway section, select Set RD Gateway server address and enable it by pressing Enabled and enter an address, for example, 10.0.0.2.
- Finally run the command gpupdate in the PowerShell on all related machines.