Massive Distribution
Massive installation of Windows Logon through GPOs.
With the tool called Orca, we have to generate a .mst file from the .msi installer.
Download the tool for editing .MSI files (Orca).
Download the installer or file with an .MSI extension that you want to transform.
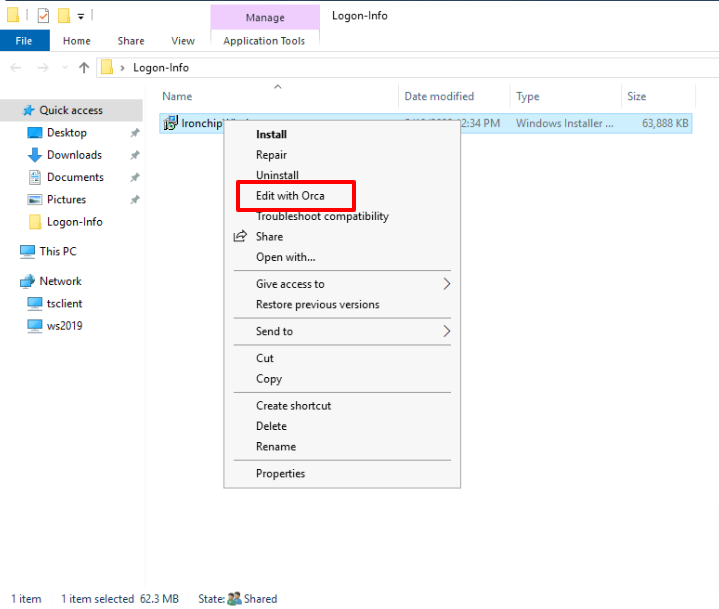
Open the downloaded file by right-clicking and choosing the option Edit with Orca.
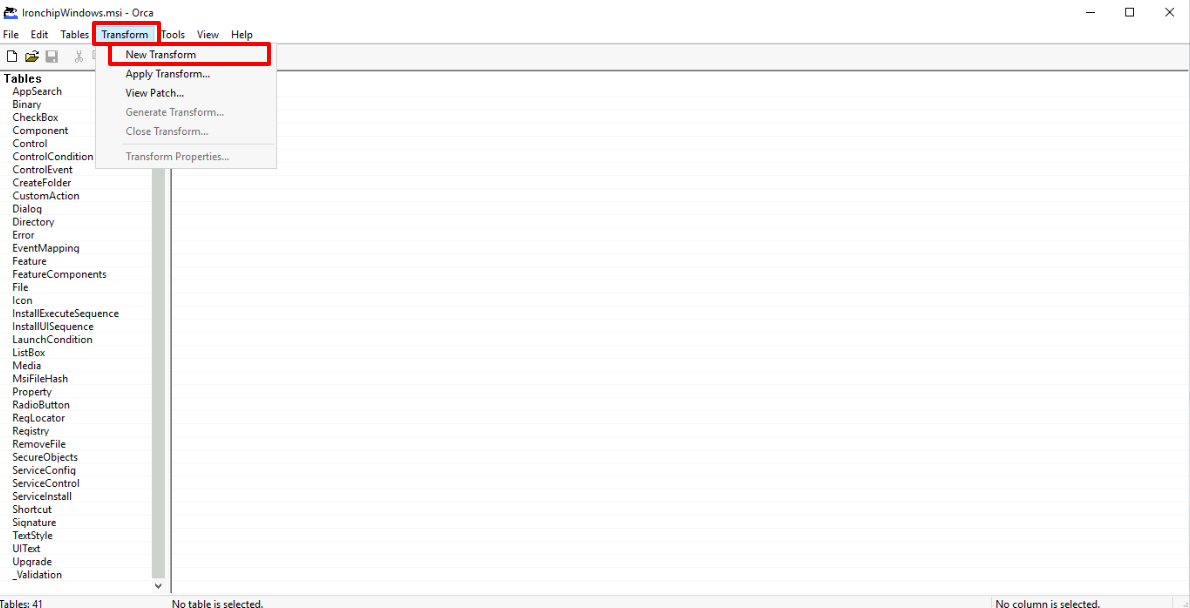
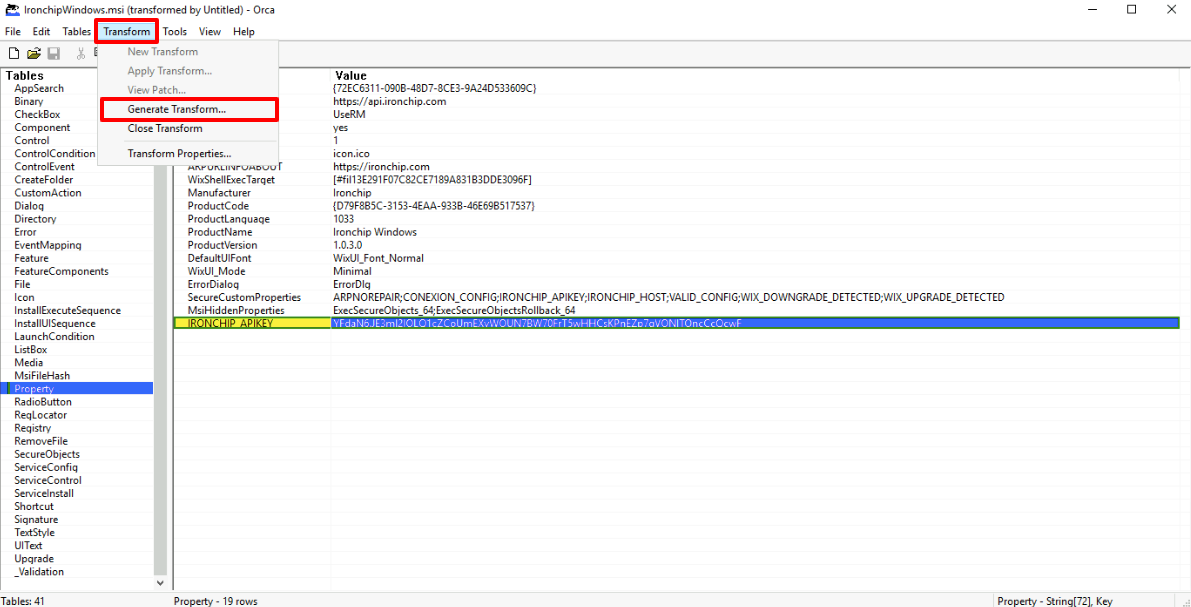
Once inside the tool, from the Transform tab, choose New transformation.
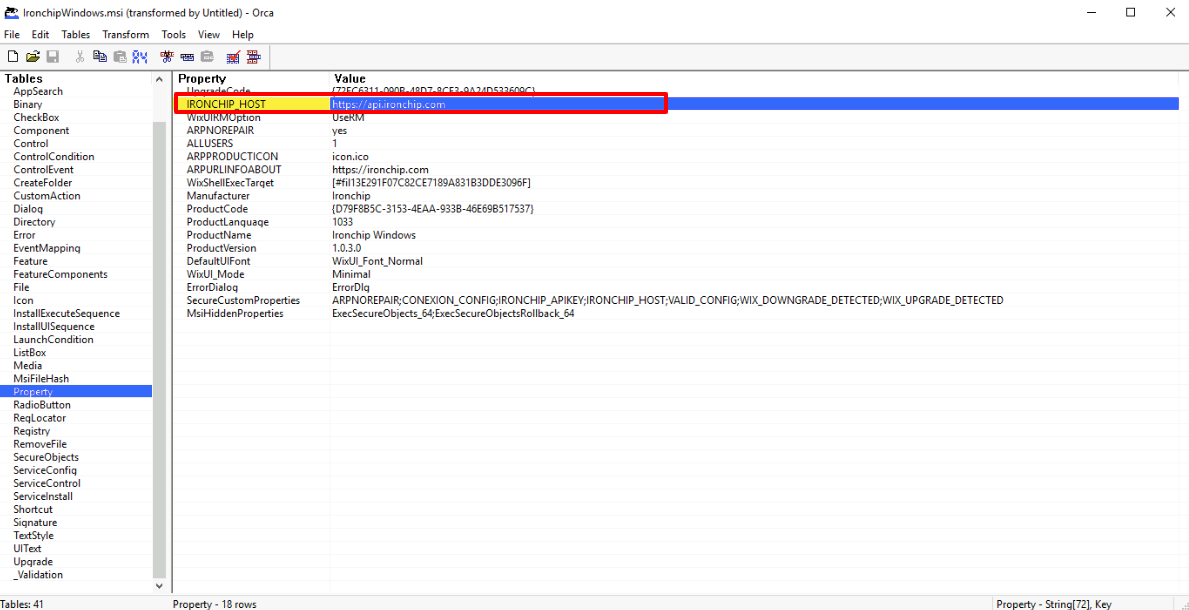
Once inside, navigate to the Properties option.
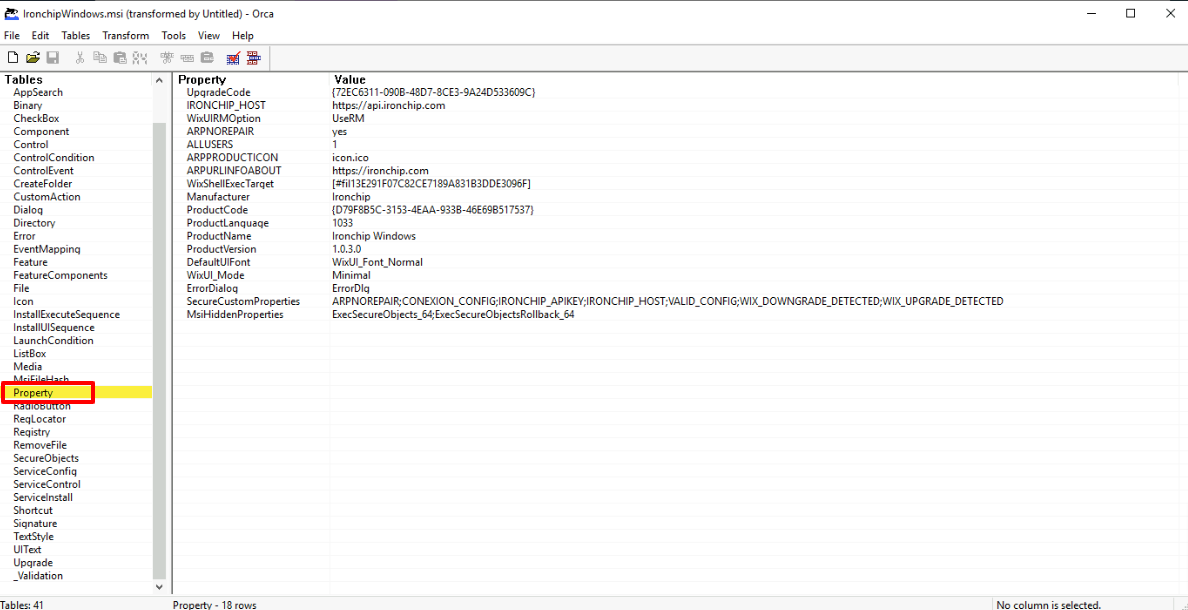
There we can edit all the options we consider necessary: for example, if we are working in a different environment than the production environment, we modify the IRONCHIP_HOST section and set the correct environment.
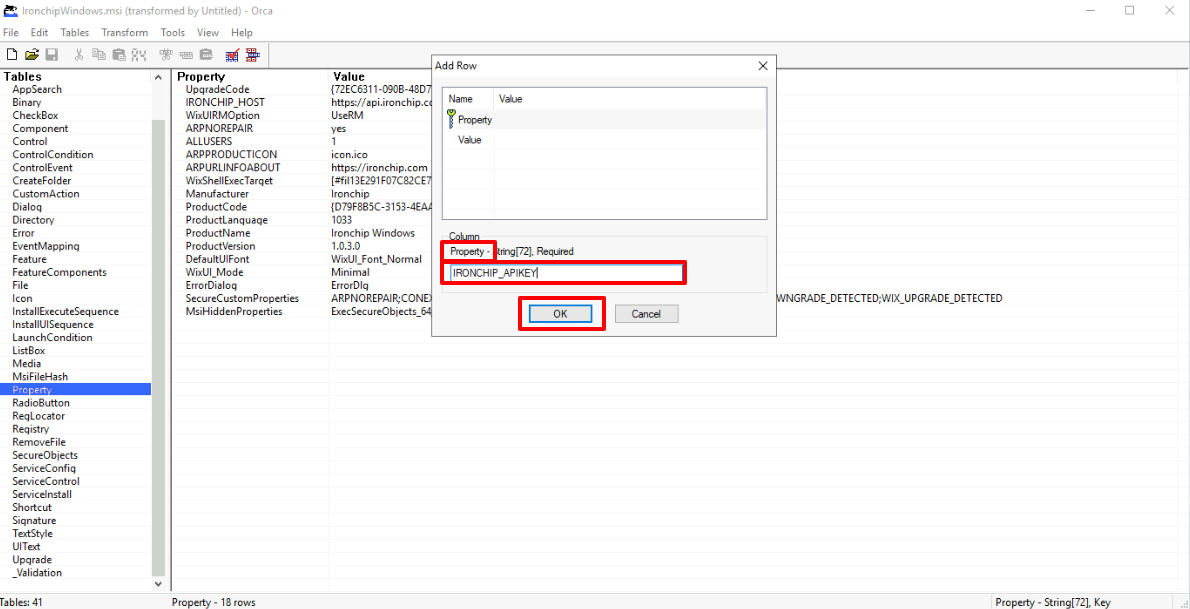
It will also be necessary to add a new row where we will place the corresponding API KEY. For this, we double-click on one of the blank zones, first we place the Property: IRONCHIP_APIKEY, and click OK.
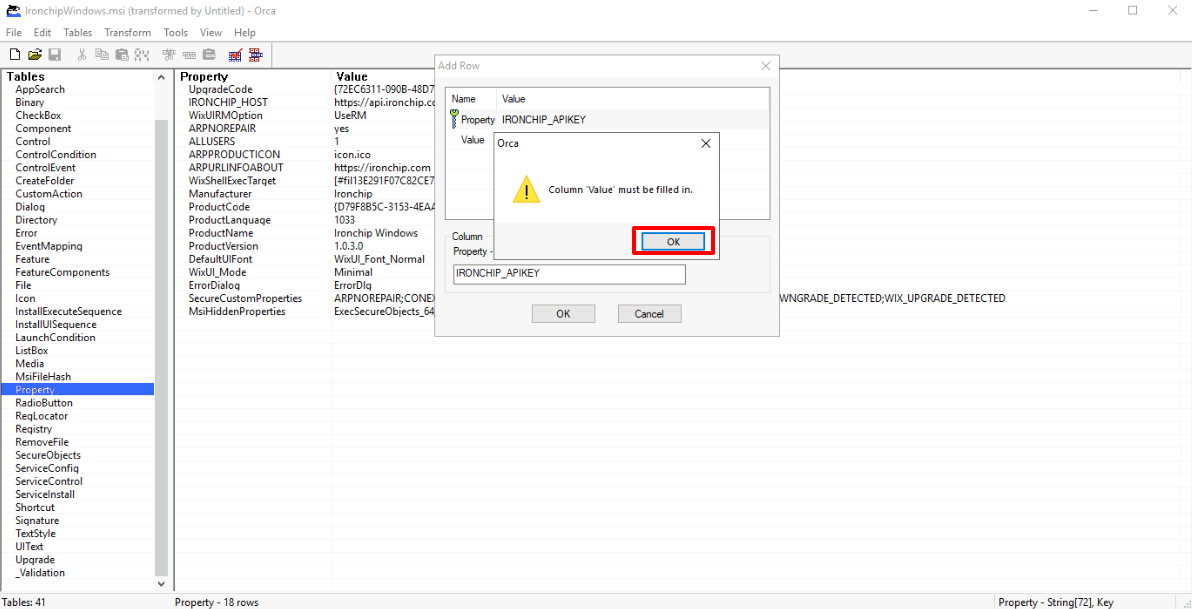
A message will appear indicating that the column has been modified successfully, click OK to continue.
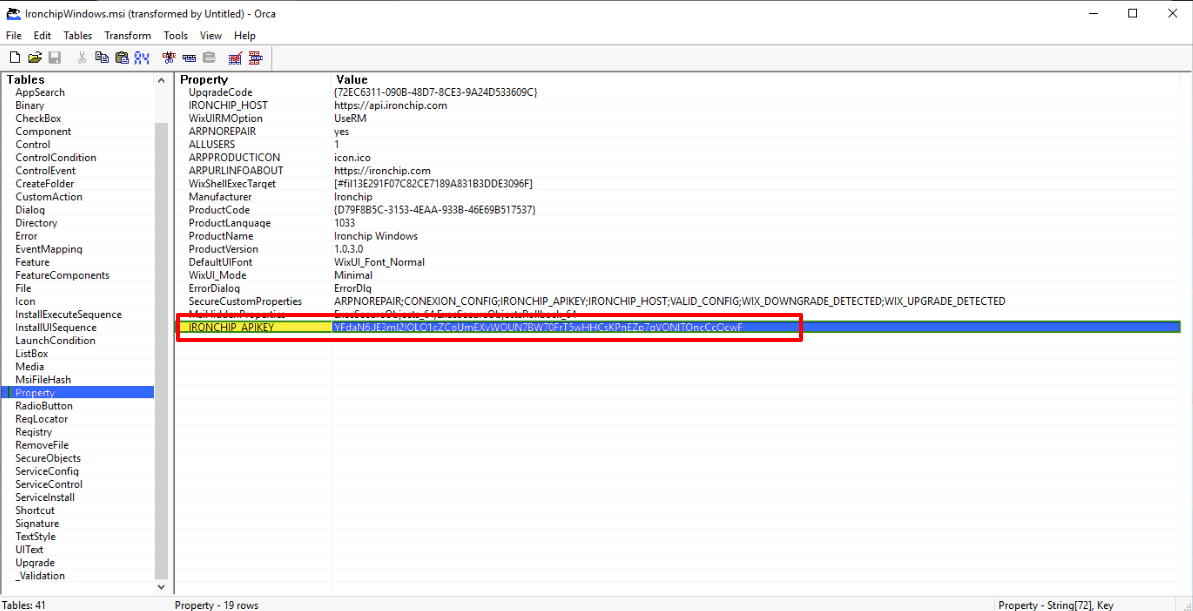
Then we will place the value for this property, there in Value, and we place the API KEY generated in our application in the Ironchip management panel.
Click on OK.

Once you have done the above steps, you will have the new property value you have created on the screen.
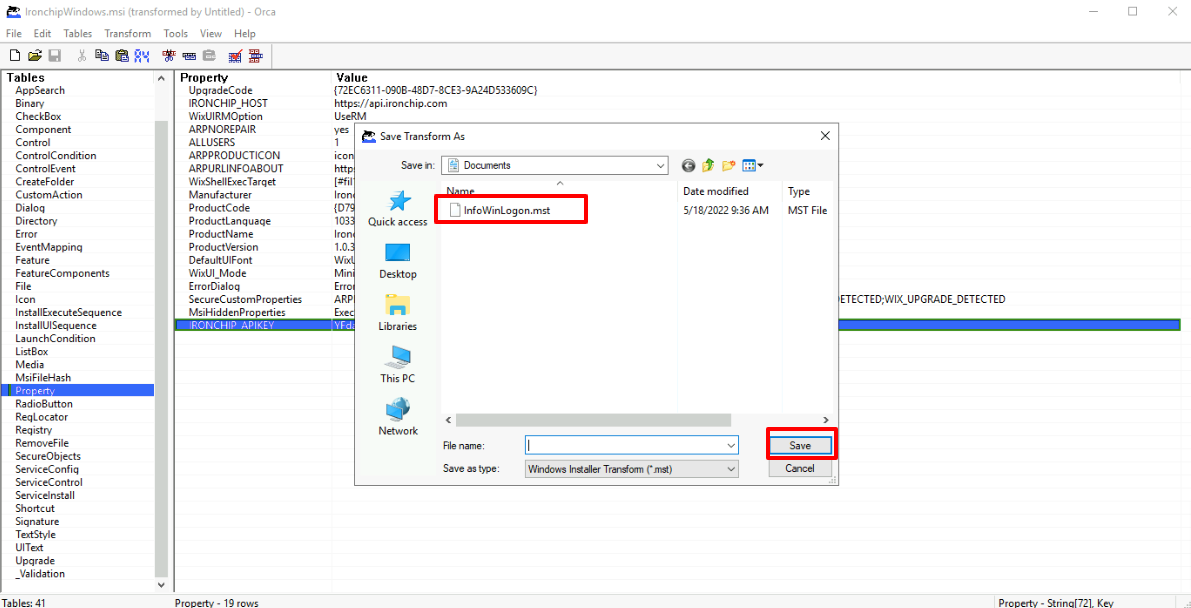
To continue we must go again to the Transform tab and choose the option Generate Transformation.
We must name the file and Save the changes.
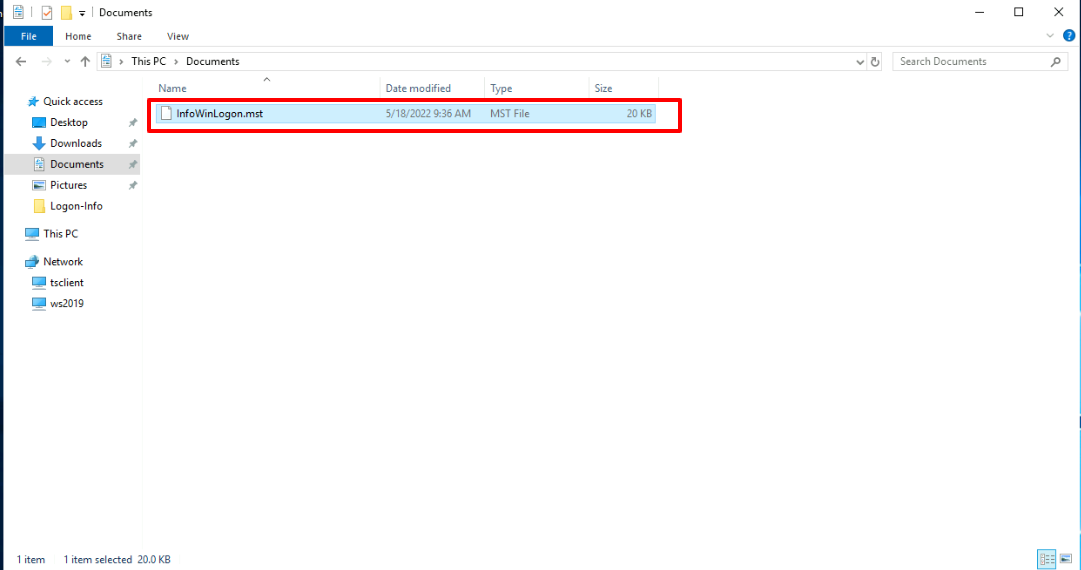
We can then verify that the file with the .mst extension has been created in the chosen location.
Generate Group Policy (GPO).
Note: It is necessary to create a shared folder with the users/computers that are going to be involved in the group policy, inside it we must put the .msi installer as well as the .mst file that we just generated in the previous steps with orca.
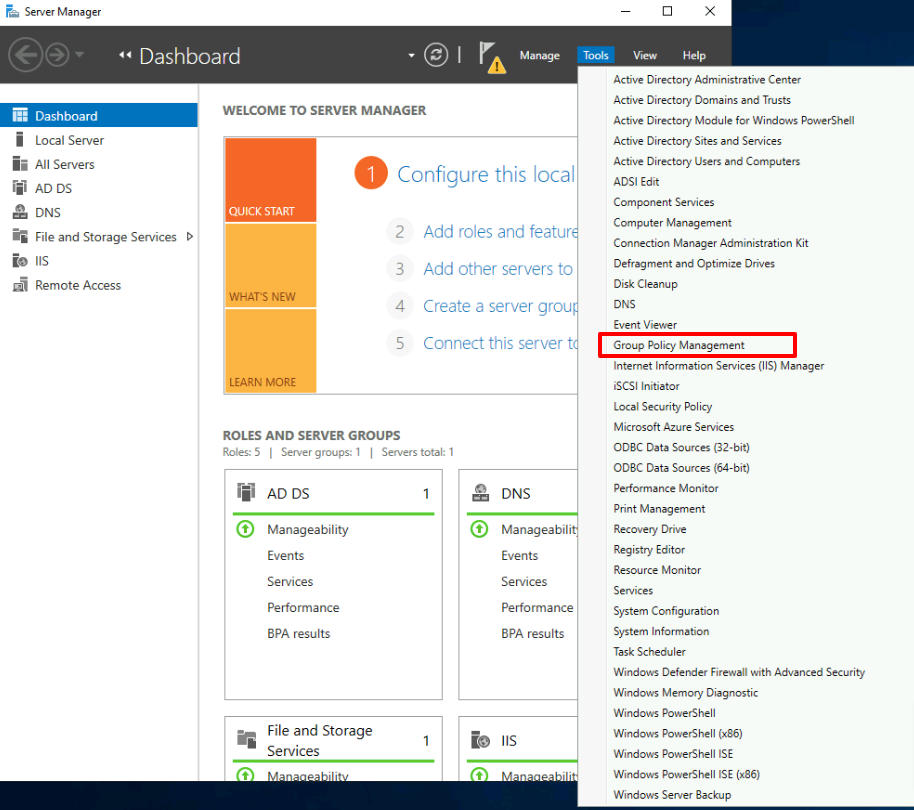
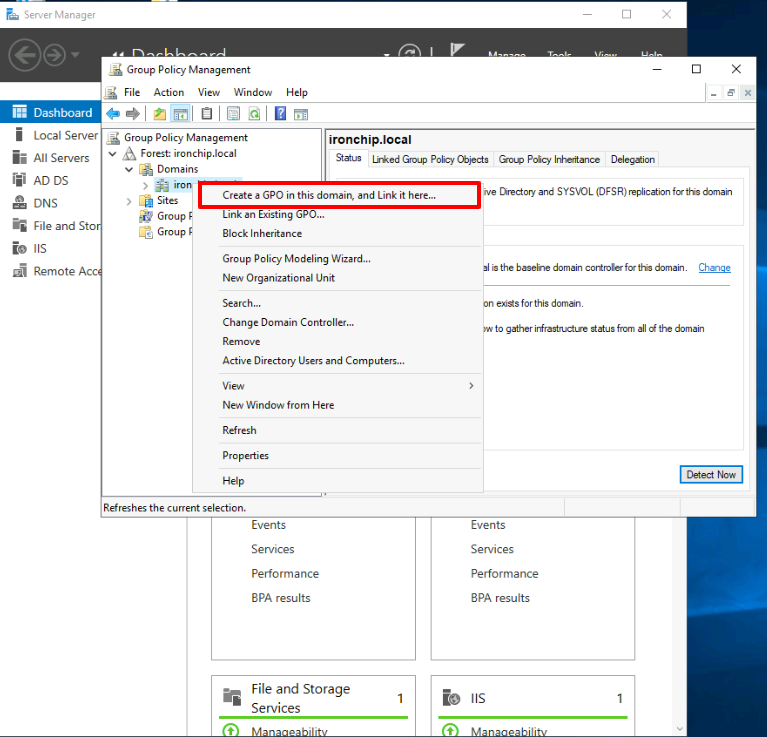
On our server, in the tools tab select Group Policy Management.
In the screen that opens we must expand our domain node and in the Domains folder choose the option to Create a GPO on this domain and anchor it here.
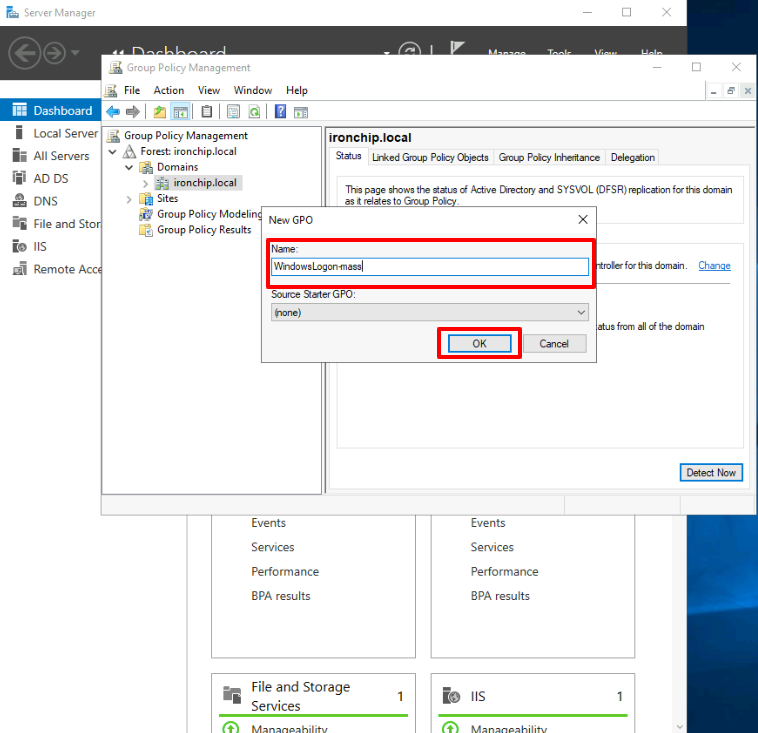
In the next window we will give a name to the group policy that is being created, it is advisable to give a name to the group policy according to the action to be performed.
Then click OK to continue.
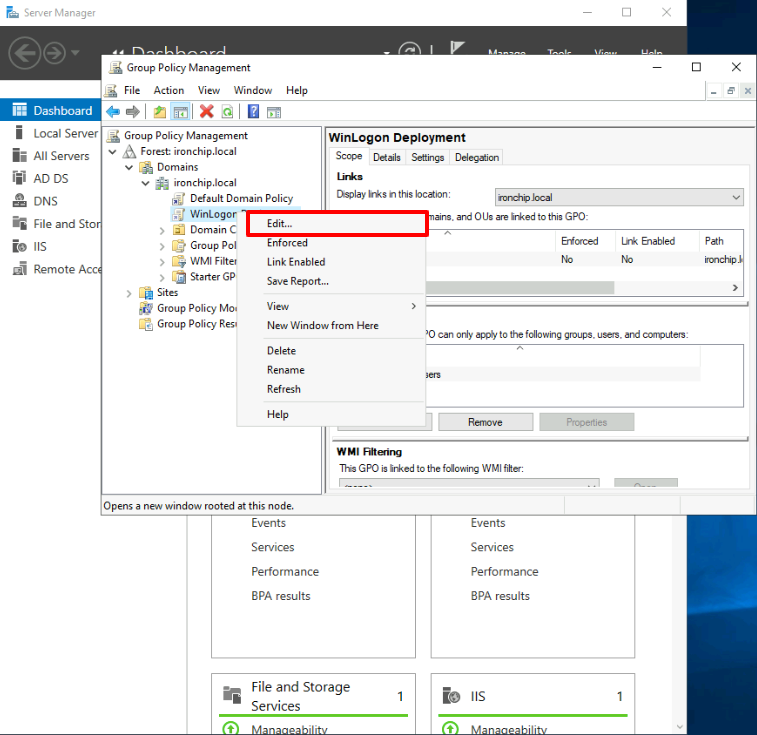
Once the policy has been generated, click on the name of the policy and right-click on it to display a list of actions where you can choose Edit.
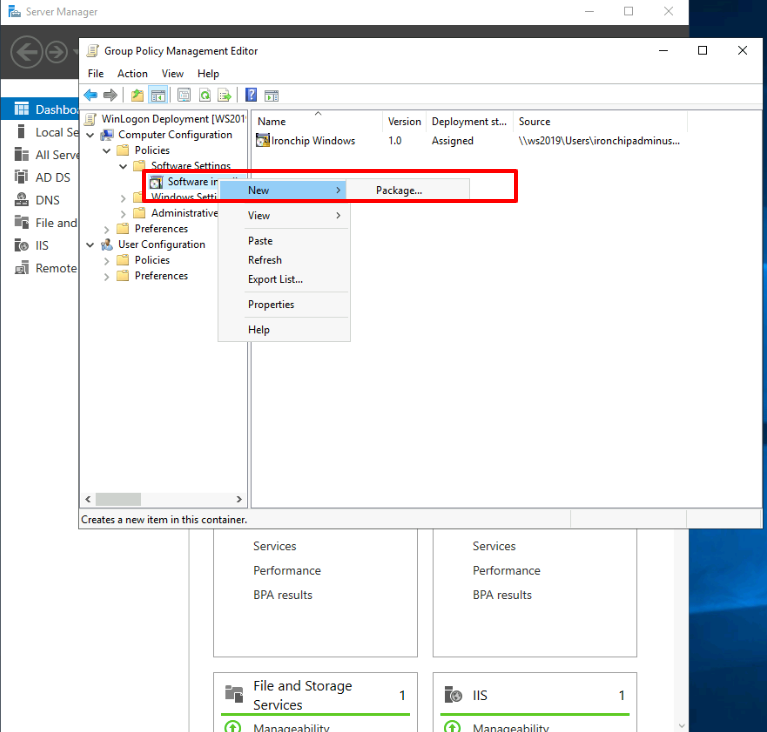
Within the Policy Editor go to Computer Configuration > Policies > Software Setting > Software installation. Right-click on Software installation, and select New > Package.
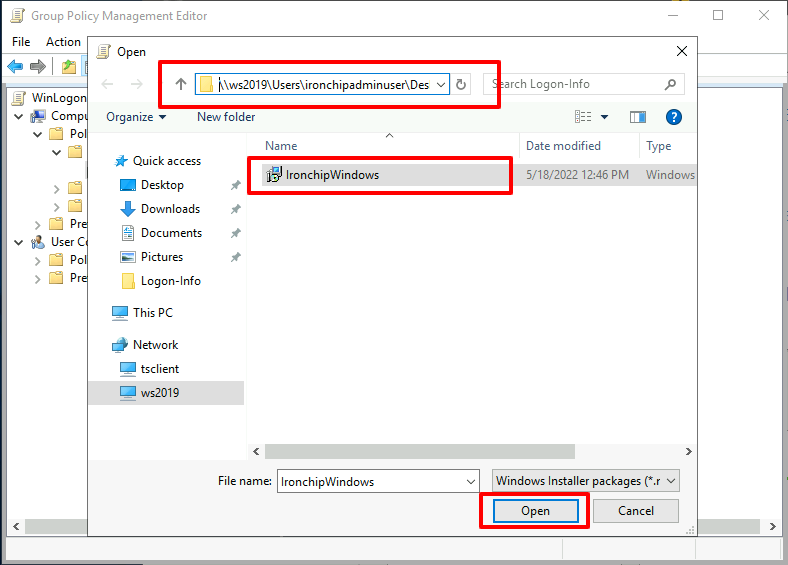
In the next window it is important that we select the .msi file from the shared folder we generated at the beginning of the configuration.
Then click Open.
In the next window, select the Advanced option and click OK.

A new window of the policy properties will open where we select the option Assigned (we must select it even if it is already checked), this will enable the option Install this application at login which we must also check.

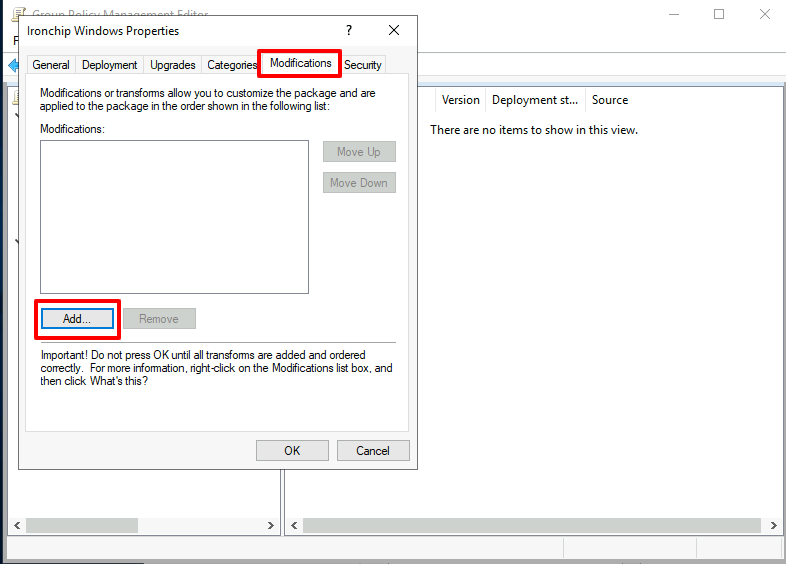
We go to the Modifications tab, where we click on the Add button.
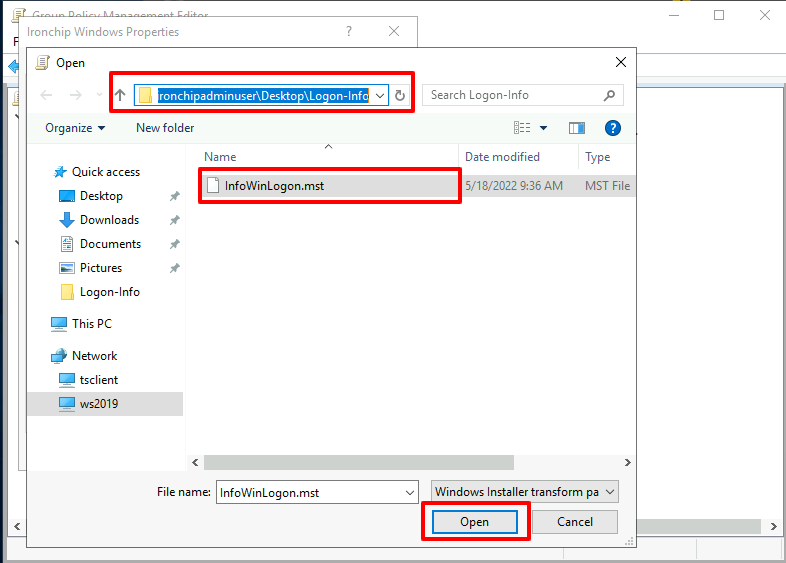
In this screen we must choose the .mst file generated before, remember to choose it from the shared folder, the same one used when choosing the .msi file before.
Then click Open.
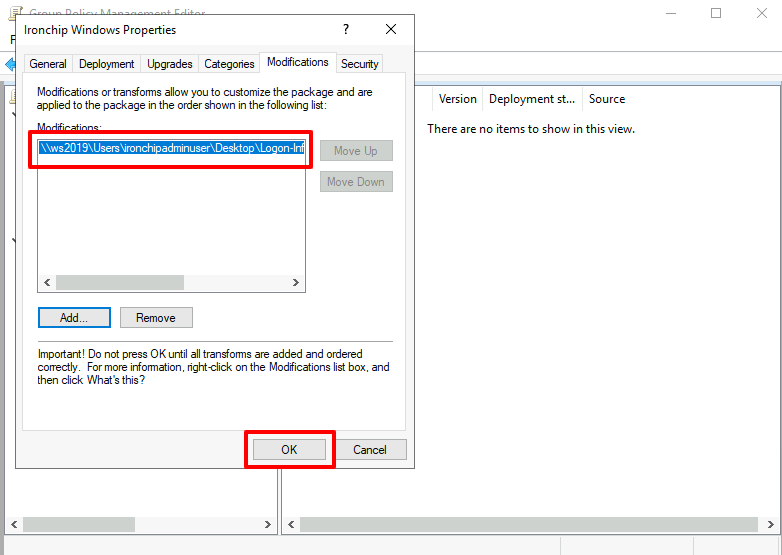
Now we will see the path from where the file has been selected, the next thing to do is to press OK.
Close the Group Policy Management window and open a Windows command console.
In the console we must enter the command gpupdate /force. The server will inform that it will not be able to apply the installation policy without rebooting and will offer to reboot. Type in the command line Y, and press the Enter key. The system will reboot 1 minute after entering the command. Or simply reboot the server via the Start menu.
After this, we will see the application installed on all the machines that were included in the GPO.
Note: This step must be done on all devices participating in the policy, clients, and server.
White List Users by GPO
If we wish to add a Whitelist of Users when we make a distribution by means of a Group Policy (GPO), it is possible, to do so follow the steps below:
- On our server, in the tools tab select Group Policy Management.
- In the screen that opens we must expand our domain node and in the Domains folder choose the option Create a GPO on this domain and anchor it here.
- Once the group policy is created, either a new one or the same one that will be used to distribute the application to a specific group of users that we have previously added to a group, as described here:
Windows Logon by GPO distribution section.
- To continue adding the Whitelist we must from the Edit tab of the GPO we have created, in the Computer Settings area choose the Windows Settings folder, and right click on the Registry option, choose the New option.
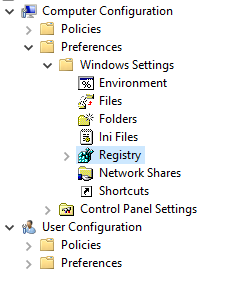
-
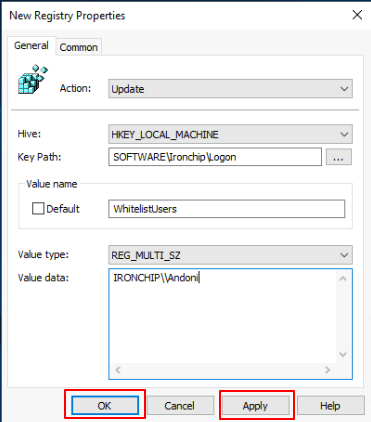
In the window that pops up, we must enter the data as shown in the image: In the General tab:
- Action: Update.
- Hive: HKEY_LOCAL_MACHINE.
- Key Path: SOFTWARE\Ironchip\Logon
- Value name: WhitelistUsers.
- Value type: REG_MULTI_SZ
- Value data: DOMAIN\Username, Important, as written by the user in the Ironchip Logon prompt. In each line must be a user, in case you want to add multiple users, one for each line.
Regular expressions (RegEx) must be used in this field, allowing us to use expressions for:
a) Add user:
IRONCHIP\\username
and more specifically, in case we want to minimize errors due to the use of case sensitive we should add at the beginning:
(?i)IRONCHIP\\username
b) Users without depending on a Domain:
.*\\username
Using the expression to avoid case sensitive errors:
(?i).*\\username
c) Exclude from a domain:
(IRONCHIP\\.*)
Once the values have been entered correctly and as specified, press Apply and then OK.